In a few previous posts, I have written about some of the short duration hip opening yoga sequences. These were provided in the standing, seated and reclining categories. In the present article, I am providing a 30-minute sequence that combines a few asanas each from the standing, seated and reclining positions. You can integrate this sequence into your personal yoga routine and practice it from time to time.
I hope you will enjoy practicing with me using the video sequence.
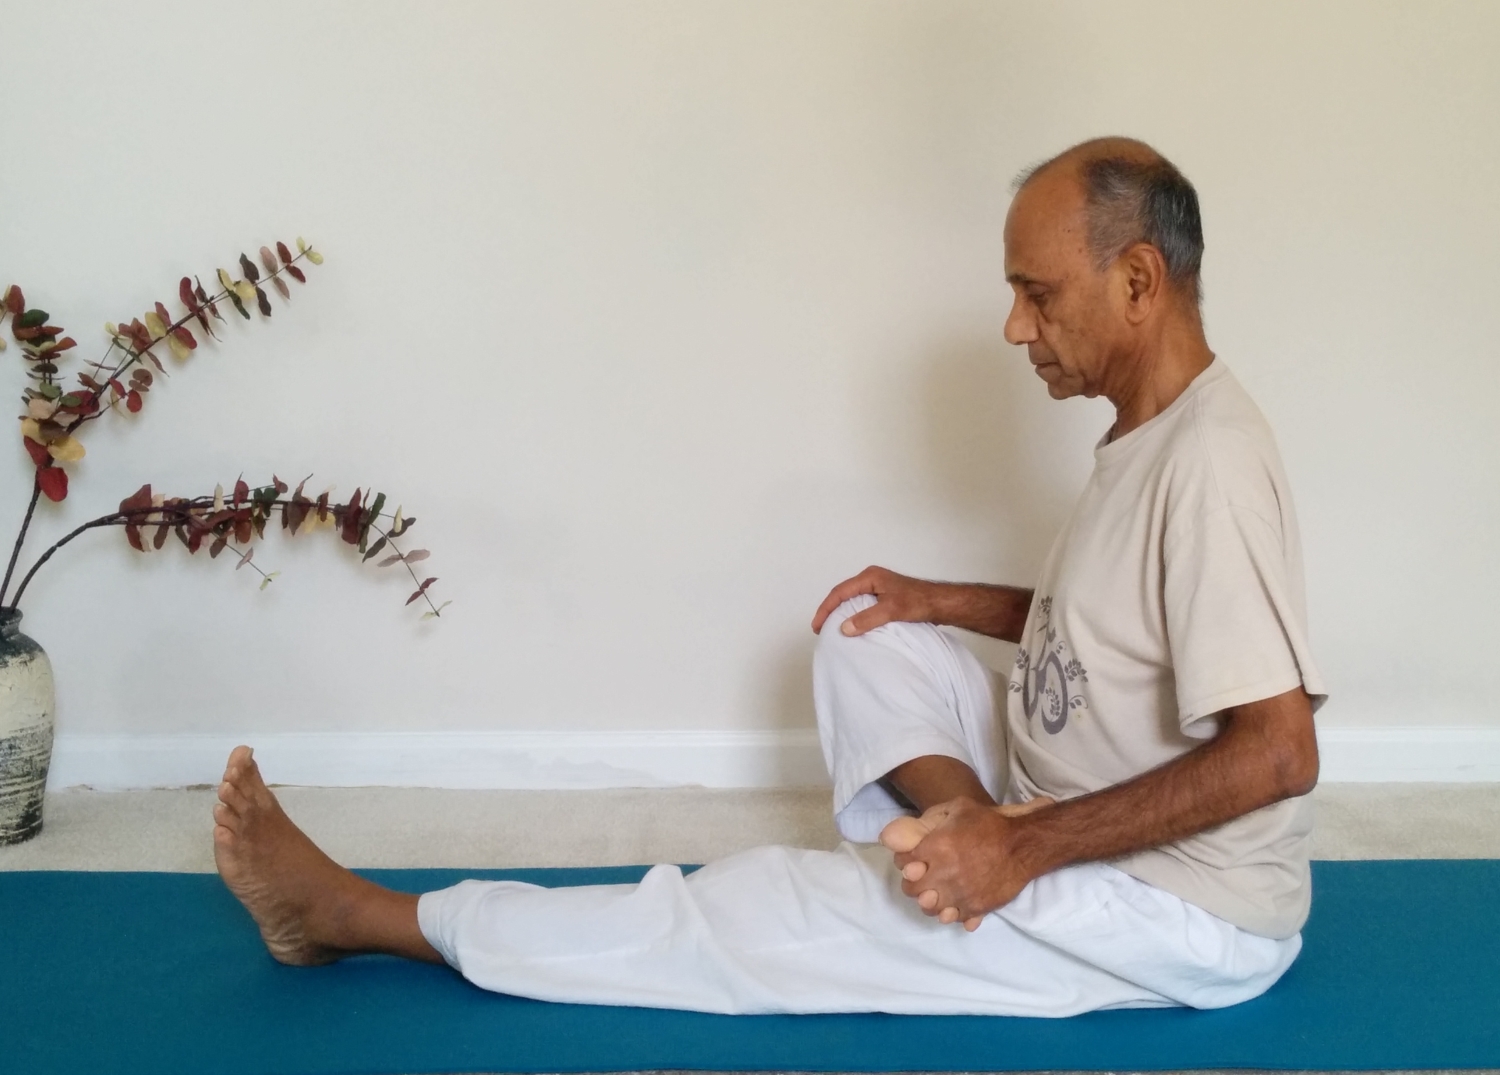
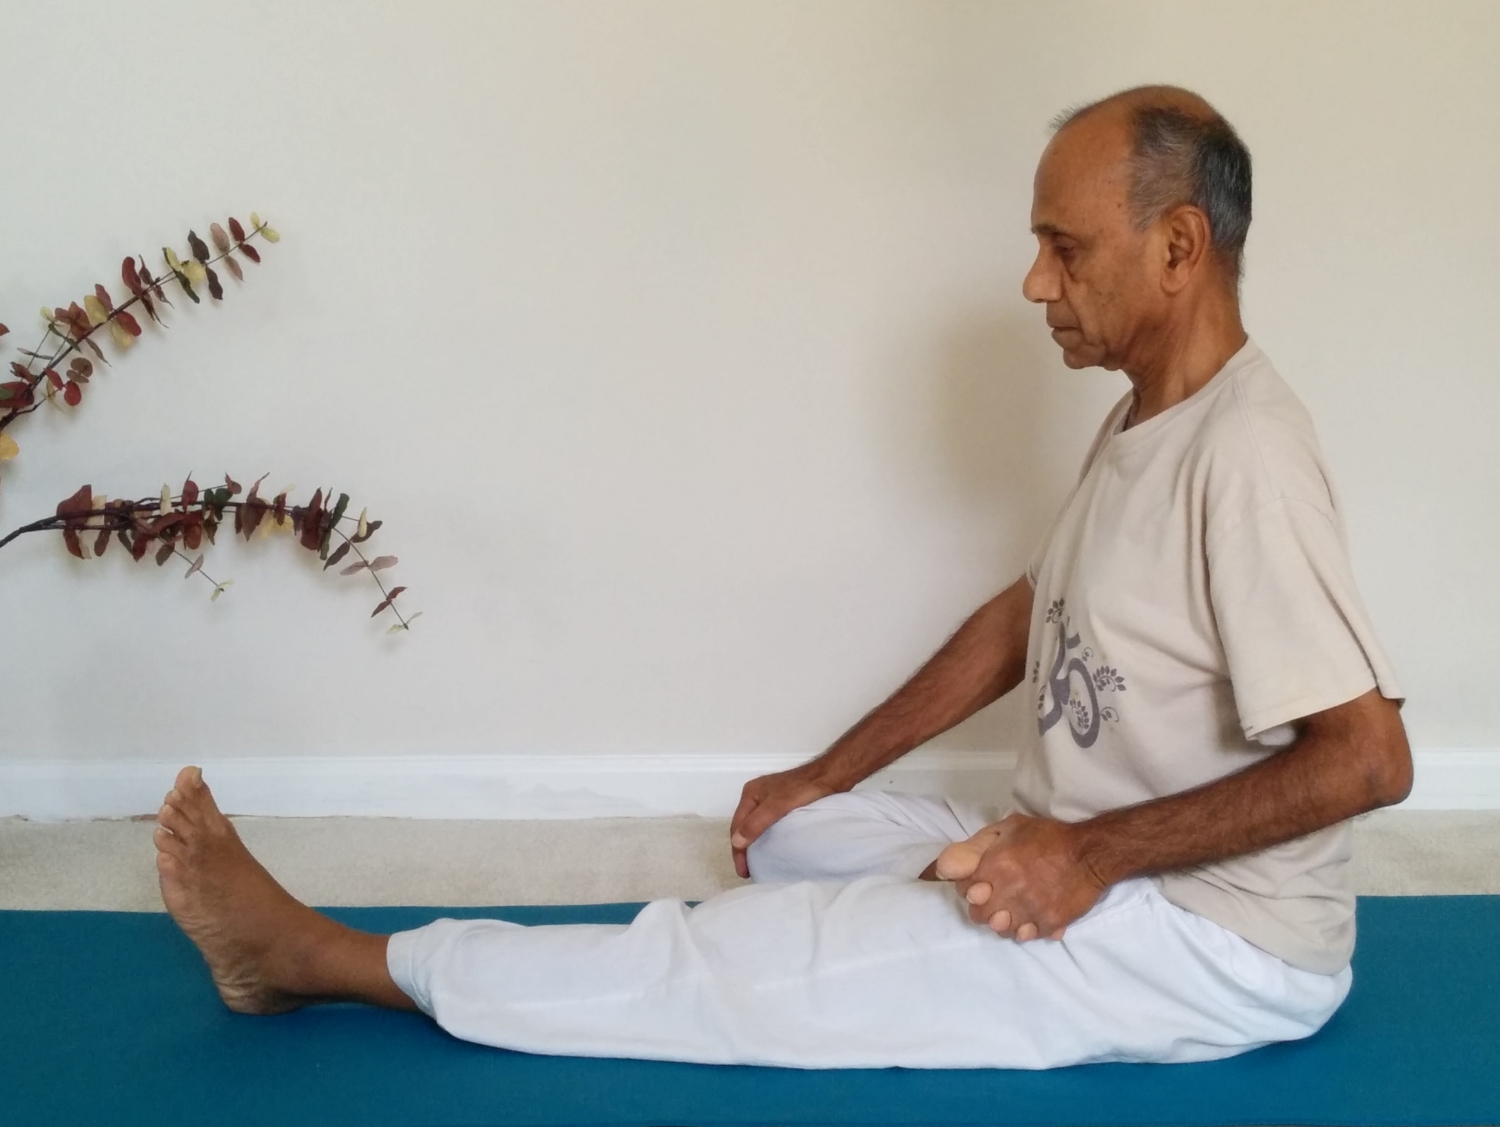
Seated hip rotation and half butterfly
Step-by-step
- Sit down with the legs stretched out in front, keeping the spine tall and straight.
- Bend the right knee and place the top of the right foot on top of the left thigh. Slide the heel as far back as comfortable.
- Thread the fingers of the left hand through the toes to stretch the toes.
- Lightly hold the right knee with the right hand. To create a smooth hip rotation, start by pushing the knee forward, push it down, pull it all the way back and lift it up to bring it up all the way in front again. Repeat this movement 4-5 times.
- Now switch the direction of hip rotation. Lift the knee up, pull it all the way back, push it down and bring it all the way in front. Repeat this rotation 4-5 times.
- Pause briefly and begin the half butterfly move by rhythmically moving the right knee up and down. With every move, make a gentle effort to bring the knee close to the floor. Repeat this move 6-8 times.
- Now switch the position of the feet by stretching the right leg straight out in front and placing the left foot on top of the right thigh.
- Repeat the same rotational movements and the half butterfly, as above, with the left hip.
- Stretch both legs in front and relax for a few moments.
A-karnasana (foot to the ear pose)
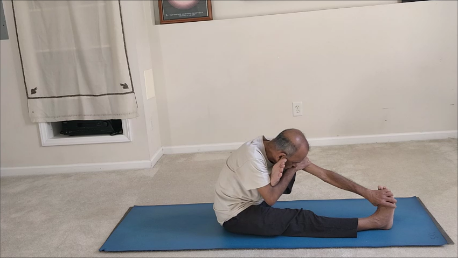
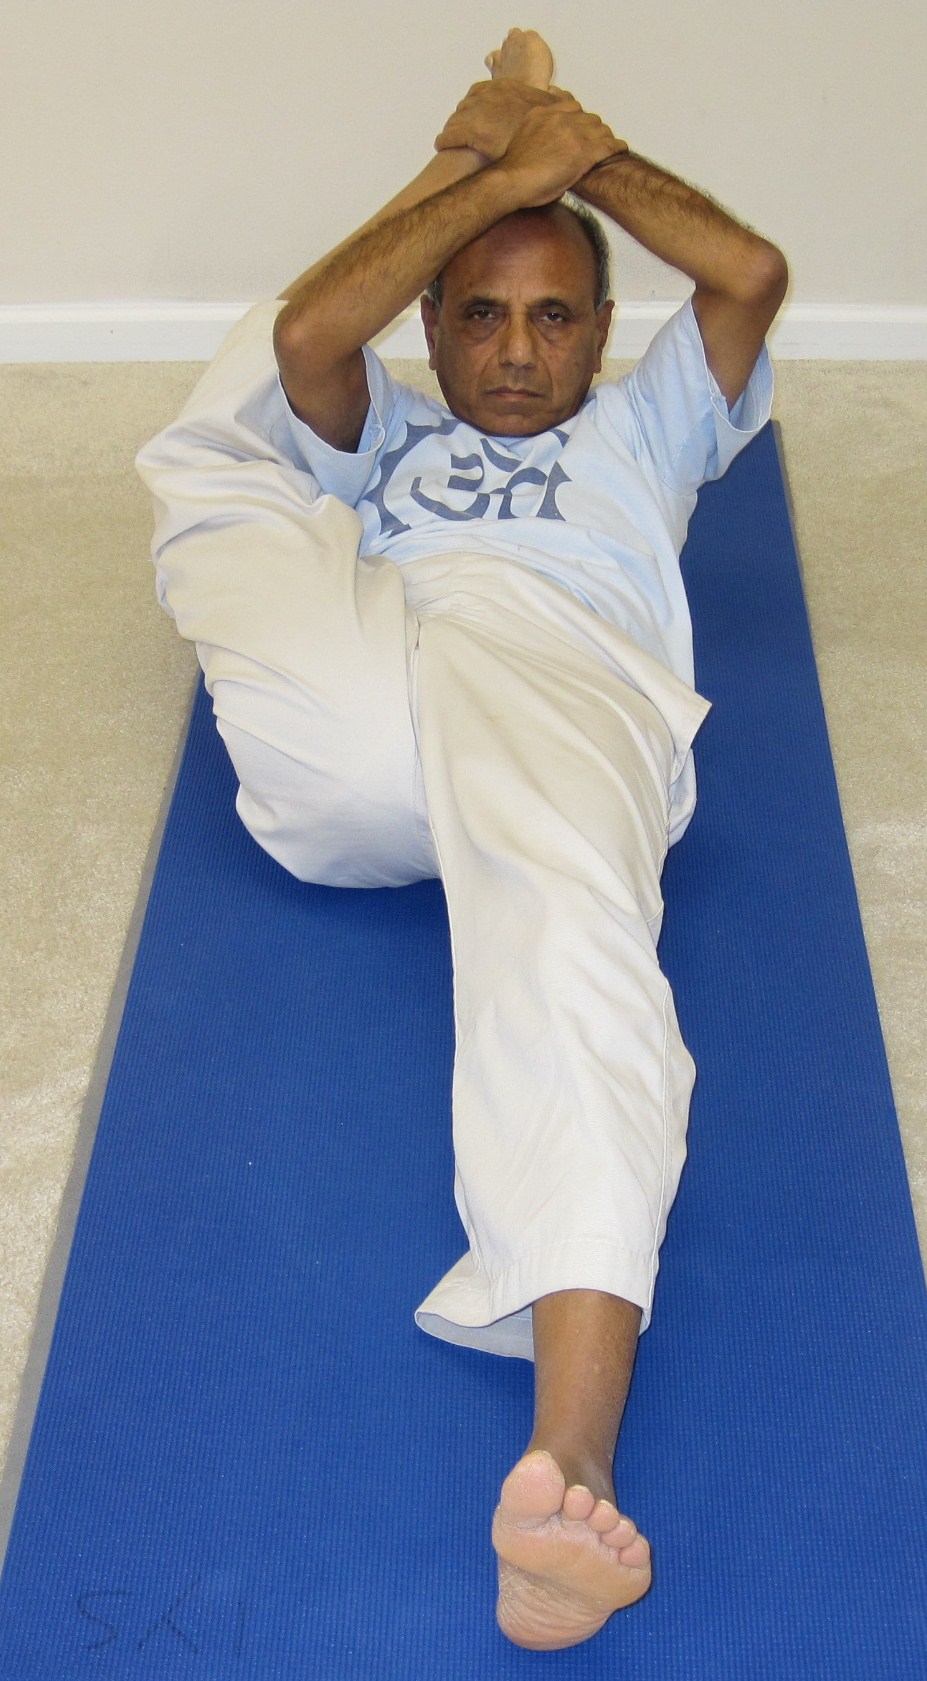
A-karnasana (foot to ear pose)
From here we will transition to what’s called the A-karnasana (foot to the ear pose).
- Position the right foot on the inside of the left elbow and then use that arm to lift the foot up in the direction of the left ear. The intention is to bring the big toe of the right foot in contact with the left ear. Of course, that may not happen when you begin the practice. Try to do the best you can.
- While we’re doing this move, at the same time we would engage the forward bending stretch as well.
- Place your right hand on your left thigh. As you exhale, begin to slide the hand away towards your foot. Keep the left leg as straight as comfortable. Now, while sliding the hand away and getting close to the toes, at the same time lift the right foot up and bring it closer to the ear. We are trying to achieve two results simultaneously – forward bending stretch as well as a deep hip stretch by bringing the foot closer and closer to the ear.
- With the next inhalation, slowly bring the body up. Finally release the legs, pause and relax for a brief moment.
Now, repeat these movements on the other side.
Gomukhasana (cow face pose)
The gomukhasana traditionally has two components – one with the legs and the other with arms and elbows. Since our focus is hips today, we’ll be working with the part involving the position of the legs only
Step-by-step
- Stretch the left leg out, bend the knee and try to position the left foot on the outside of the opposite thigh, sliding it from under the thigh.
- In the same manner, position the right foot on the outside of the left thigh, sliding it out and back from above the thigh. In the final position, try to slide both the feet as far back as comfortable.
- Looking from the back, the two feet look like the ears of a cow – hence the name “cow face pose”.
- To deepen the stretch on the hips, spine and knees, we’ll once again do a forward bending stretch.
- Place the hands on the floor in front and carefully start walking the hands away from the body. Make sure not to strain or overdo this movement. Try to keep the spine elongated during the move.
- Go as far as it feels comfortable. In the final position, if comfortable, resting the elbows and the forearms on the floor, try to lower the chin to the knee. Stay in the final position for about five breaths.
- To come out of the pose, gradually lift the head up and begin to walk your hands back.
- When fully seated, switch the position of the legs and repeat the same moves as above.
- When fully seated, stretch the legs out in front and bounce the knees up and down a few times.
- Finally sit and relax in the sukhasana for a few moments. Alternately, you may relax in the shavasana for some time.
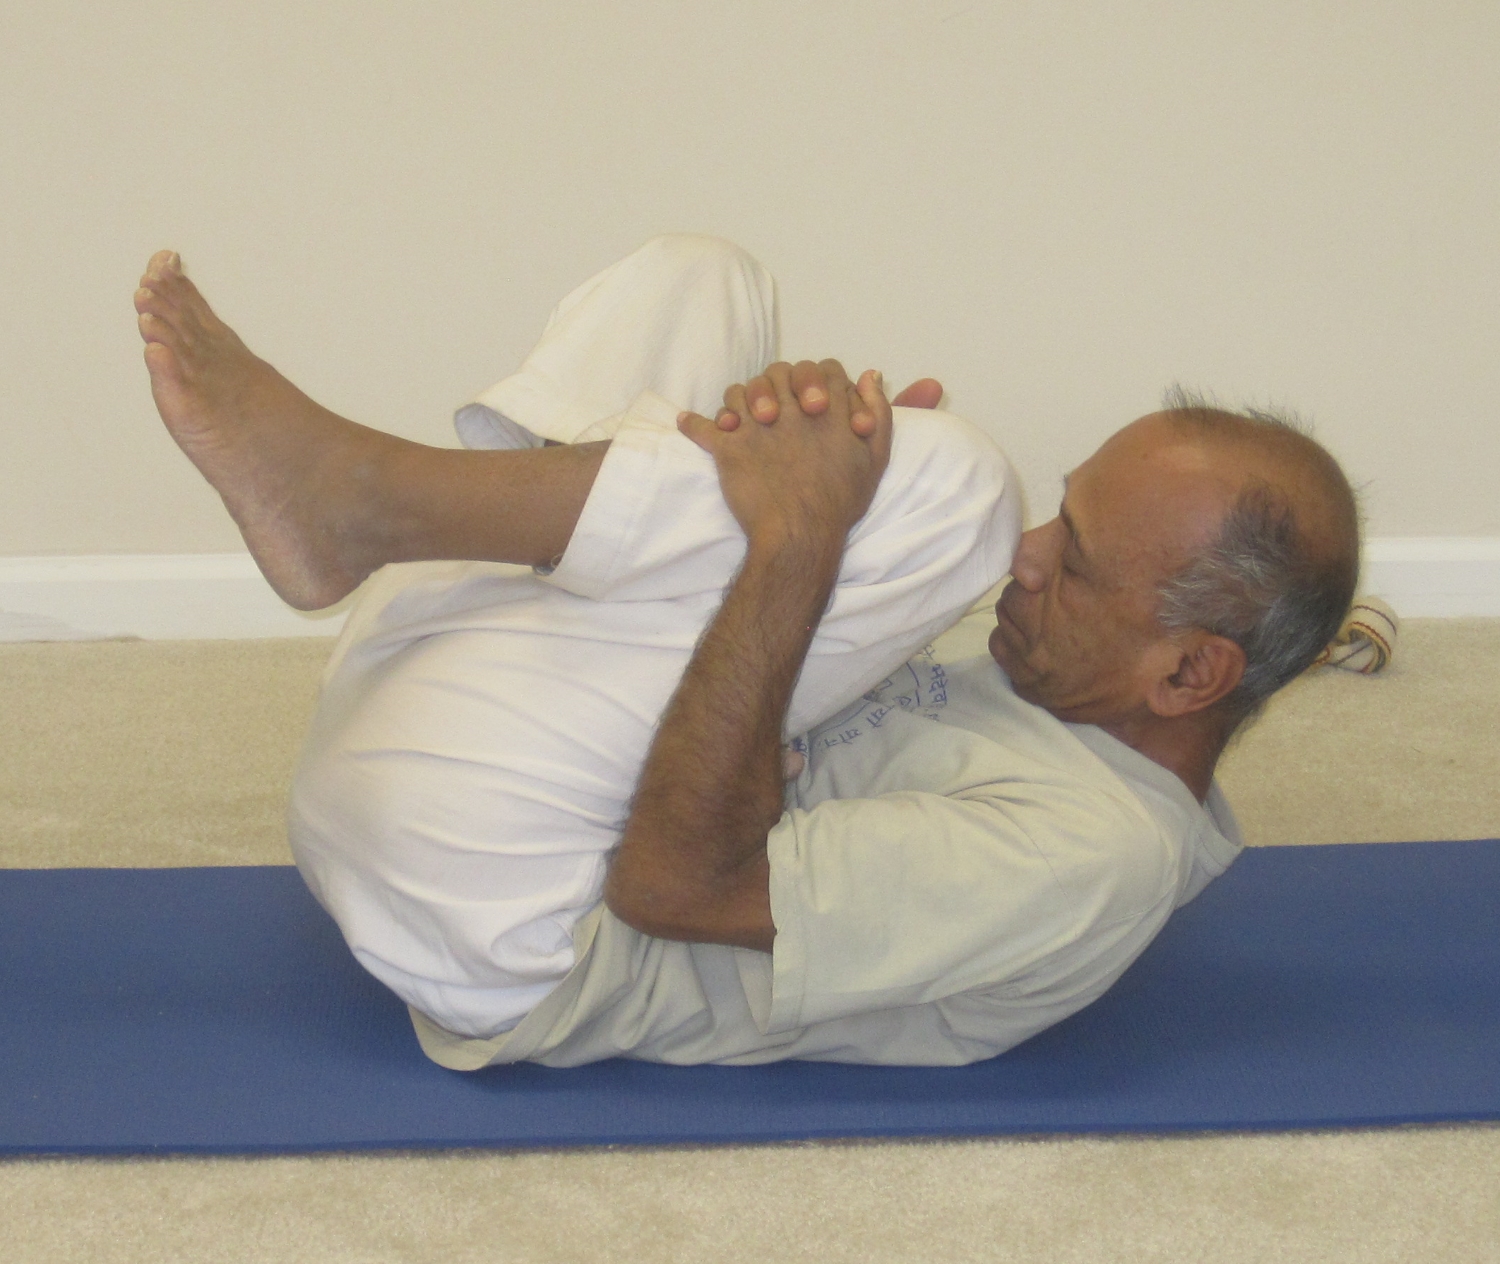
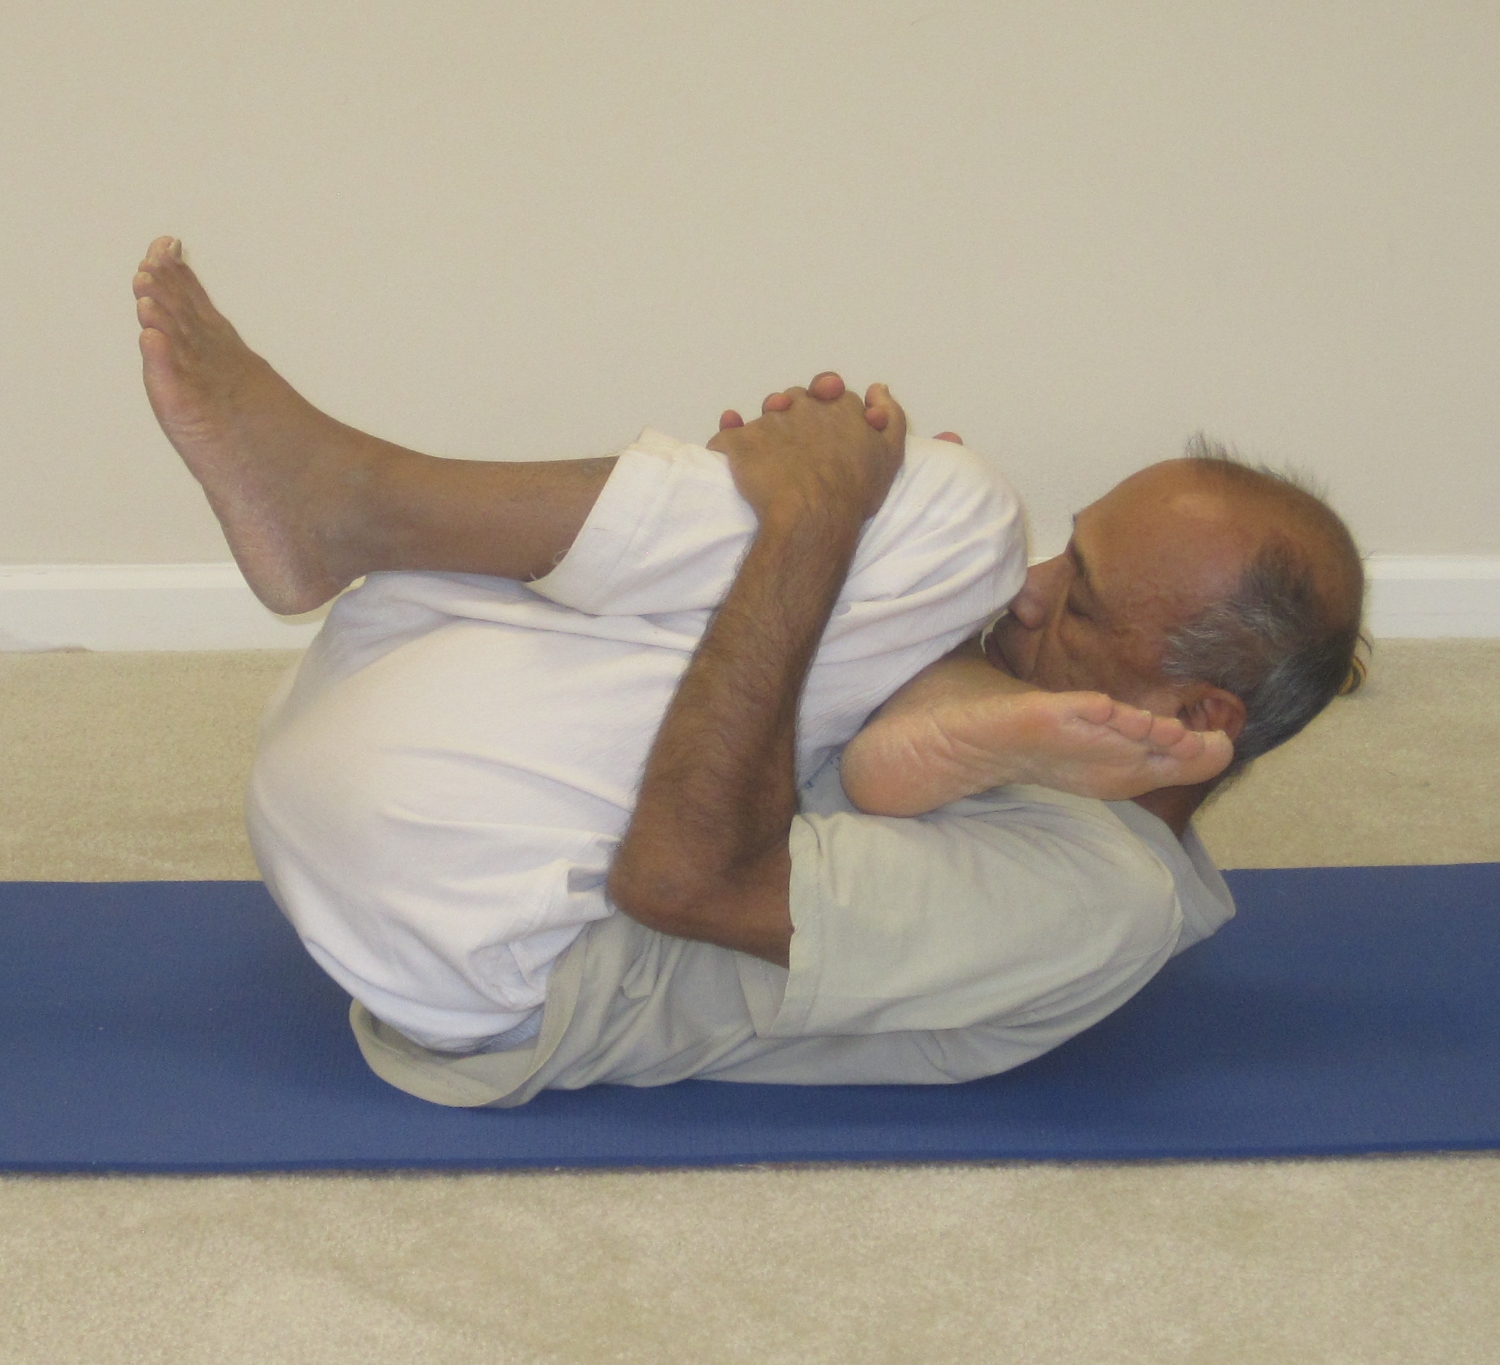
Figure-4 stretch
- Lie down on your back with the knees bent.
- Lift the right foot up and place the top of the foot on top of the left thigh. Try to slide the foot all the way down the thigh so the heel is close to the thigh joint.
- Lift the left foot off the floor and holding the left shin with the two hands try to guide the left knee close to the chest.
- At this point if it doesn’t bother your neck or the spine, lift the head up, lower the chin down to the chest and gently guide the left knee closer to the forehead.
- Maintain the final pose for a couple of breaths.
- Slowly release the head down and slide the right foot up and place it on top of the left knee.
- This time thread the right arm from under the leg and hold the shin with the two hands, as before. Try to guide the left knee close to the chest.
- At this point if it doesn’t bother your neck or the spine, lift the head up, lower the chin down to the chest and gently guide the left knee closer to the forehead.
- Maintain the final pose for a couple of breaths.
- Bring the head and the foot down and relax for a couple of breaths.
- Repeat the above steps on the other side.
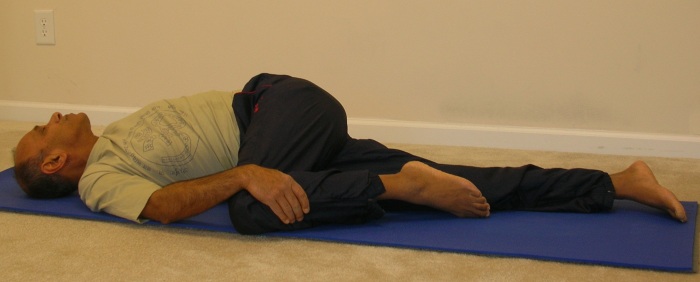
Reclining Twist – Variation
- Lie down on your back. Fold the right knee and place the sole of the right foot on top of the left knee.
- Stretch the arms into a T-shape (in line with the shoulders)
- Use the left hand to hold the raised right knee and start gently pulling the right knee to the floor on the left side. Make sure that the right shoulder stays firmly on the ground and keep looking over the right side. You may roll the right hip over the left while trying the bring the foot closer to the floor on the left side.
- Stay in the final position for five deep breaths
- While inhaling, slowly begin to come up and when the knee is vertical, stretch the leg straight.
- Repeat the above sequence on the other side
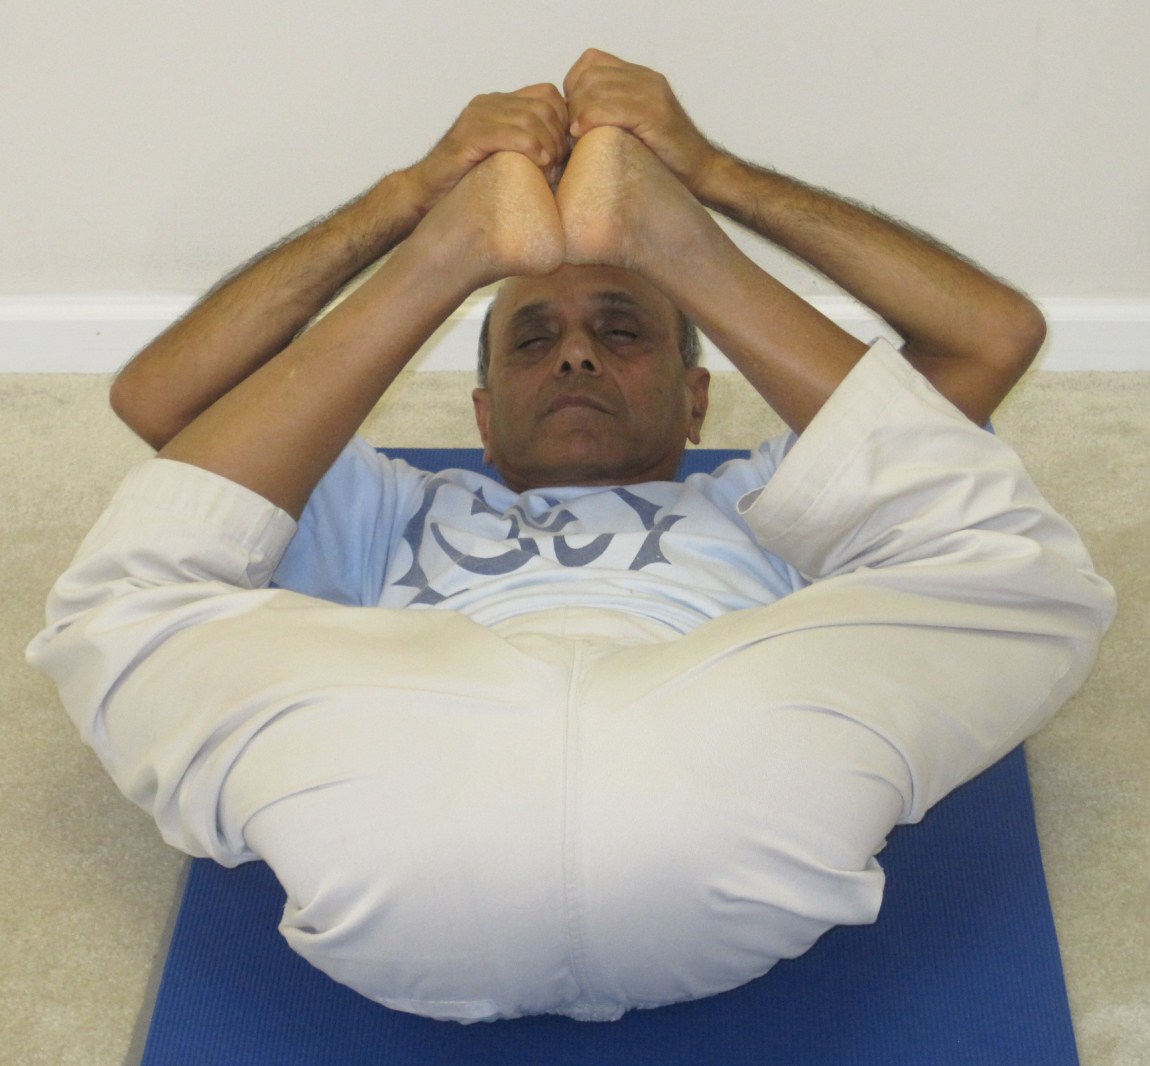
Ananda Balasana (Happy baby pose)
We’ll practice the happy baby pose first with one leg at a time and then with both the legs together.
Step-by-step
- Begin by bending the right knee; hold the right foot with the two hands with the knee pointing outwards.
- Lift the foot upwards and try to bring it in closer to the forehead. At this point, if it doesn’t bother your neck, shoulders or the spine, lift the head up and try to continue the effort to bring the foot closer to the forehead.
- If you are more flexible, you may attempt to wrap the leg behind the neck. Be extremely careful not to overstretch and overdo this pose. It’s a nice pose for the hips, knees, thighs and the spine.
- Stay in the final pose for a few more breaths.
- Slowly bring the leg down, the head down and rest in Shavasana for a few breaths.
- We’ll now switch sides and repeat the above movements with the left leg. Begin by bending the left knee; hold the left foot with the two hands with the knee pointing outwards.
- Finally lift both the feet up and hold the feet with the corresponding hands. Try to bring the feet up toward your forehead. Again, if it doesn’t bother your neck, shoulders or the spine, lift the head up and try to continue the effort to bring the feet closer to the forehead.
- If you are more flexible, you may rest the feet on the head or attempt to wrap the legs behind the neck. Be extremely careful not to overstretch and overdo this pose. It’s a nice pose for the hips, knees, thighs and the spine but you don’t want to injure yourself by overdoing it.
- Stay in the final post for a few more moments.
- Slowly bring the legs down, the head down and rest in Shavasana for a few breaths.
Surya Namaskara with Lizard Pose and Kapotasana (pigeon pose)
We will now practice two rounds of Surya Namaskara. In the first round, we’ll integrate the Lizard pose and in the second round, the Kapotasana (pigeion pose)
Round 1
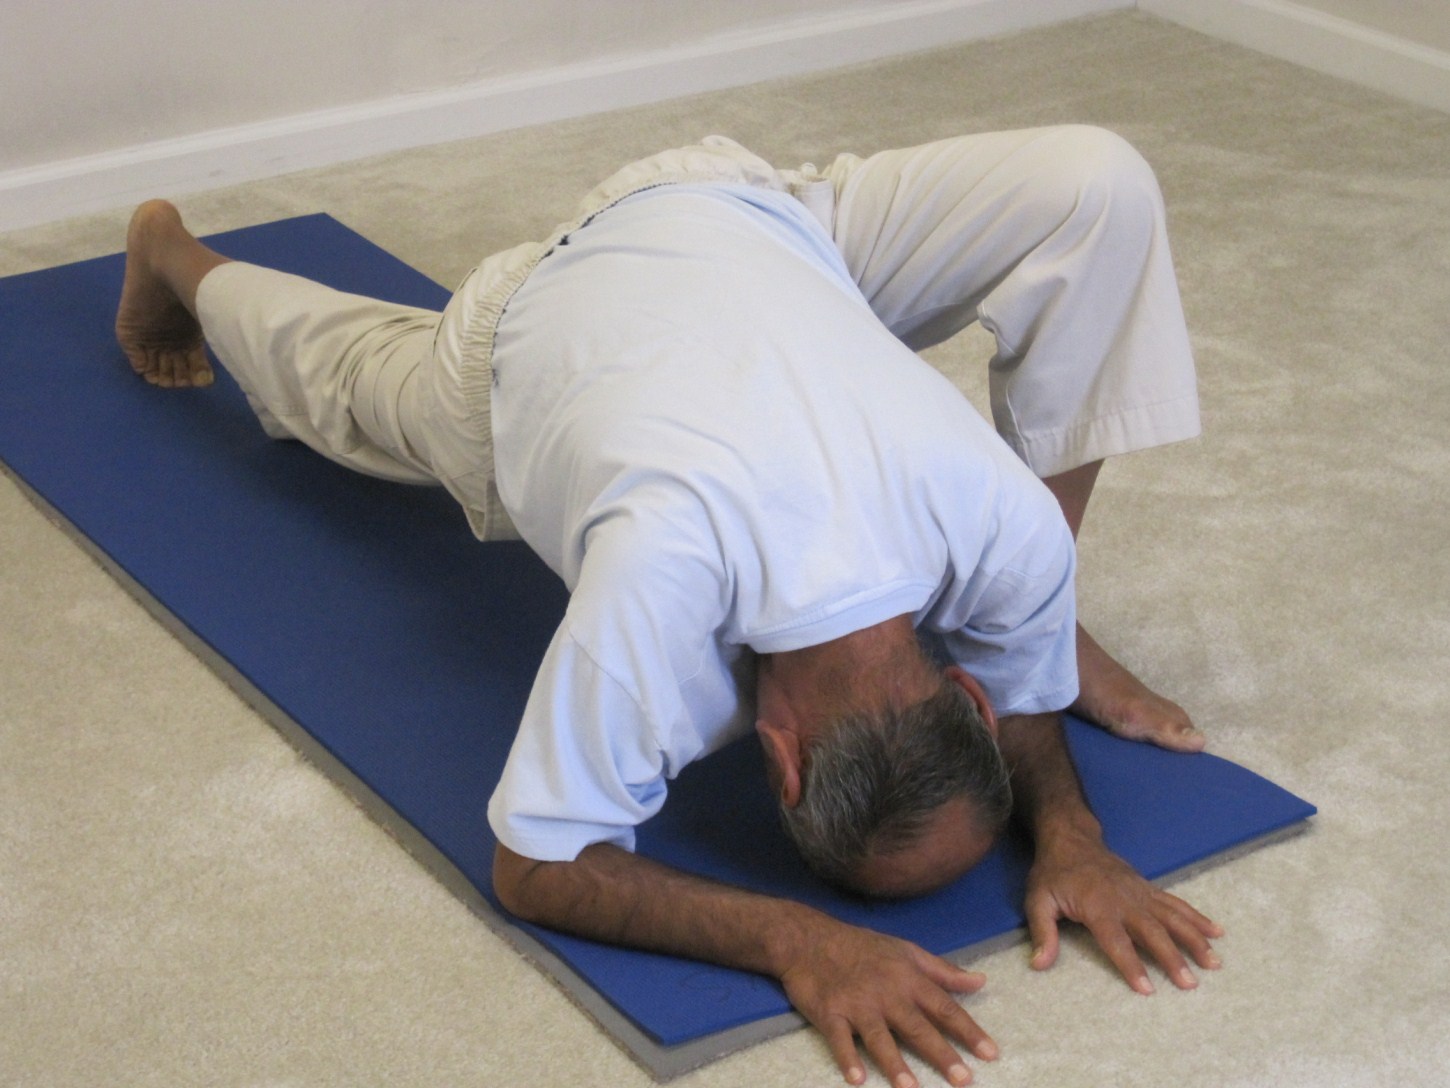
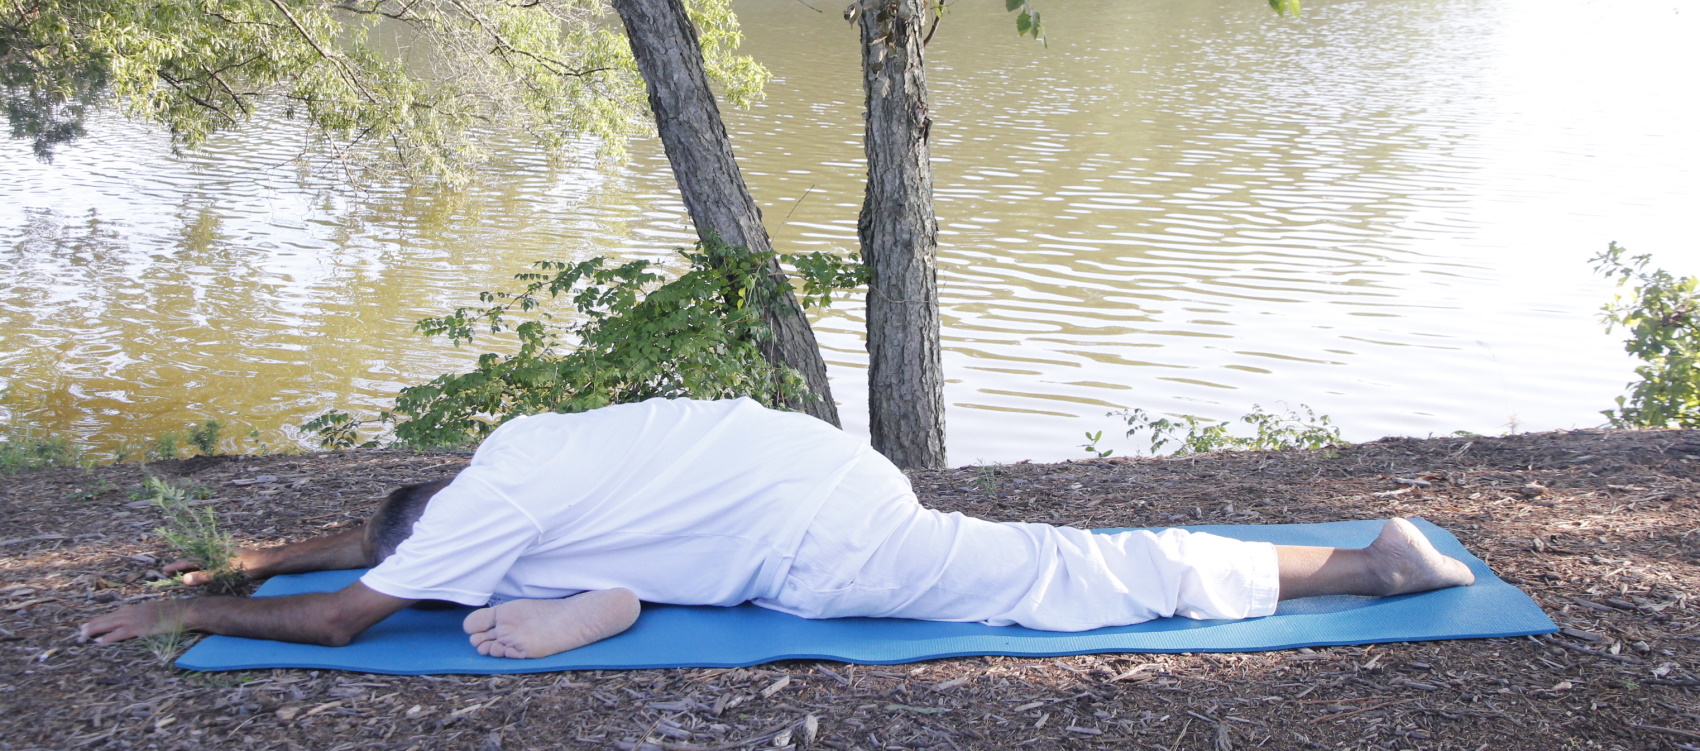
Lizard pose (uttana-prishthasana)-1
In this round we integrate the practice of Lizard Pose (uttana-pristhasana) as a part of the sequence.
- Stand close to the top of the mat with the feet together or slightly apart but parallel to each other. As you exhale, bring your hands in the prayer position in front of your chest.
- Inhaling, bring the arms to the side and then begin to raise them up and arch back from the waist. Pulls the hands up and push the arms back behind the ears. If comfortable, deepen the stretch by pressing the feet firmly into the ground, pushing the buttocks and thighs forward, keeping legs straight. Relax your neck.
- Exhaling, release the hands down and begin to bend forward. This time bring the hands behind the back, interlock the fingers and lift the hands up toward the ceiling when you inhale. When you exhale, make a gentle effort to drop the chest to close the gap with the thighs. Stay in this position for two extra breaths.
- Inhaling, bend the knees, place the palms on the floor right next to the feet. This time bring the right leg back.
- At this point, we will integrate the Lizard Pose into the sequence.
- Keep the right leg straight with the heel pushed back and the thigh lifted up. While in the Lizard pose, if you are uncomfortable keeping the leg straight, feel free to place the knee on the floor.
- Slide the left foot out toward the edge of the mat and position both the hands on the inside of the foot.
- Start walking your hands in front until the elbows and the forearms are on the floor or as close as you can get them comfortably.
- Lowering the chest down, make an effort to lower the forehead to the floor. Feel a deep stretch in the hips and inside of the thighs. Stay in the pose for a breath or two, if comfortable.
- Start walking your hands back to the original position.
- Now we will try the variation called “flying lizard”. Moving the left hand from under the left thigh, place the palm on the outside of the left foot.
- Pressing firmly with the left palm, lift the right arm. Keeping the arm straight, lift is as high as comfortable, trying to bring it to the horizontal position. Now, pressing with the left foot down, lift the left arm up and bring it up to the horizontal position, in line with the two shoulders.
- Stay in the final position for a breath or two, if comfortable. To come out, place the hands down, bringing the left hand on the outside of the left foot.
- Exhaling, and placing the palms on the floor, bring the left leg back. Lift your buttocks up to get into the Adhomukha Shvanasana (Downward Facing Dog). Try to push the thighs back, heels and forehead down, tailbone lifted up and keep your shoulders back.
- Exhaling, lower your knees to the floor and this time push the buttocks all the way back close to the heels in the child pose (Balasana). Keep the forehead on the floor and start walking your hands out in front.
- Inhaling, keeping the hands where they are, begin to slide the body forward, keeping the forehead close to the floor. Slowly begin to lift your head, neck and chest up to get into the Bhujangasana or Cobra pose. Keep the navel on the floor, legs together, elbows tucked in close to the body and shoulders rolled back. Stay in Bhujangasana for about 3-4 breaths.
- Exhaling, curl your toes under, lift the buttocks up to get back to the downward facing dog. Try to push your heels and forehead down and keep your shoulders back.
- Inhaling, lift the head up, bring the right foot forward and place it between your hands.
- Here, repeat the movements for the Lizard pose on the other side, as we did in step 5 above.
- Now, exhaling, bring the other leg also forward and bend down from the waist with th knees stretched straight. This is called Uttanasana (standing forward bending pose).
- Inhaling, stretch your arms to the side, bring them up and back overhead and bend back slowly from the waist.
- Exhaling, gently come back to an upright position and bring your arms down by your sides. Relax for a few breaths before proceeding with the next round.
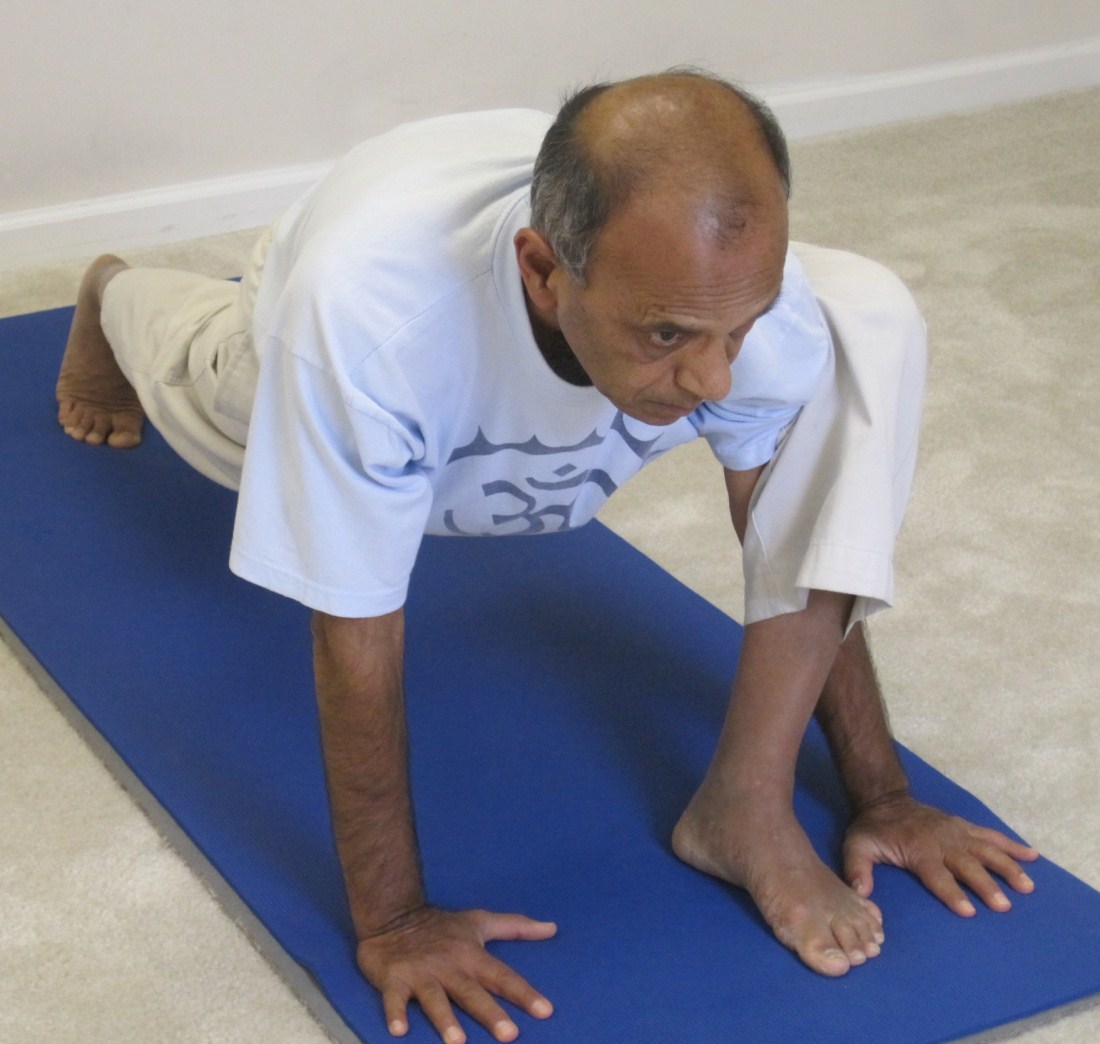
Lizard pose (uttana-prishthasana)-2
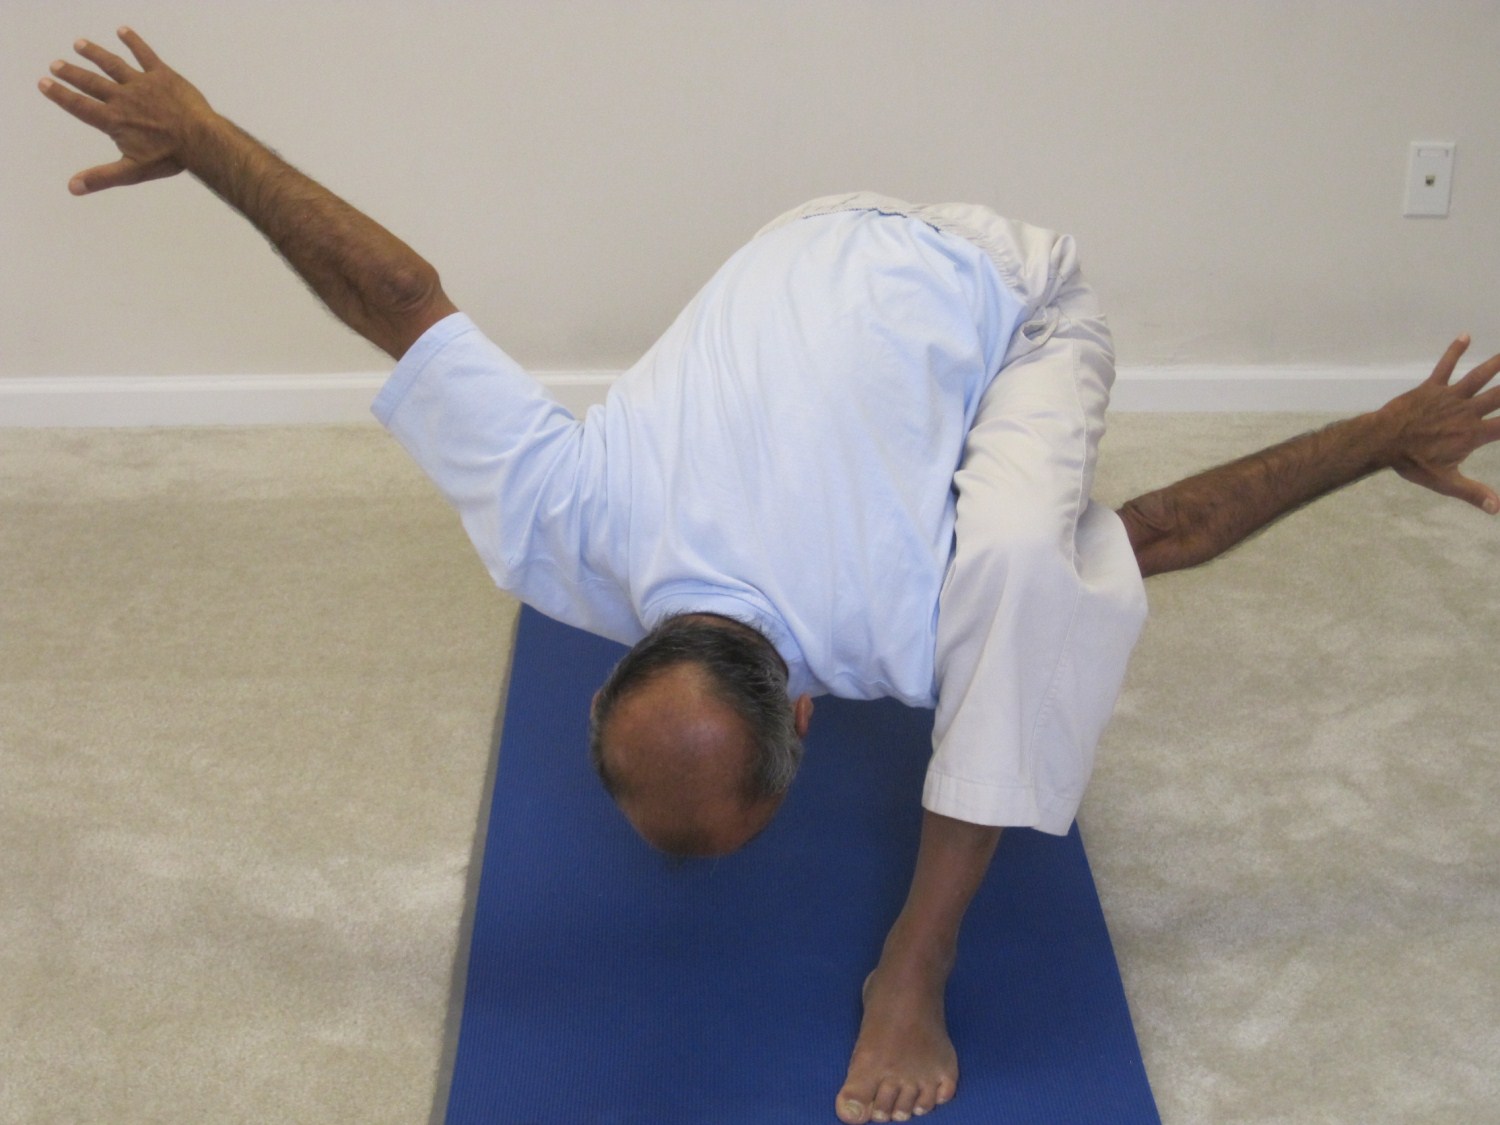
Lizard pose (uttana-prishthasana)-3
Round 2
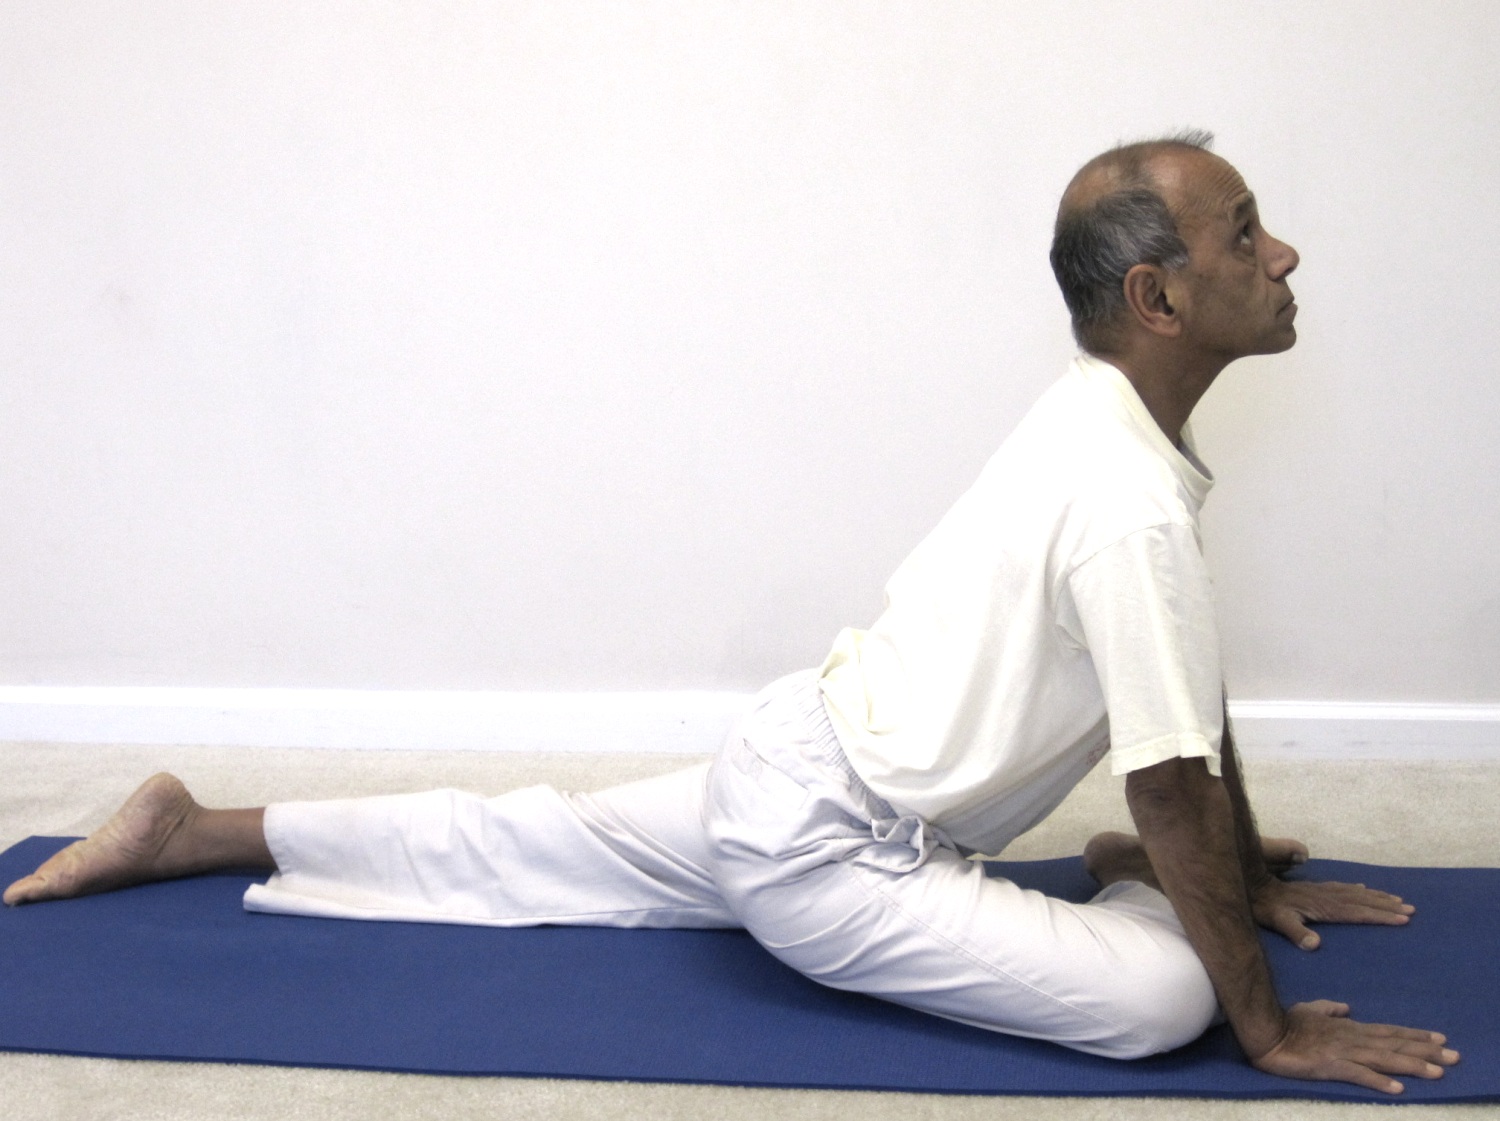
In the second round we will integrate the Kapotasana (pigeon pose), one of the poses that is highly recommended as a hip and chest opener – also called the Rajakapotasana – राजकपोतासन -(King Pigeon Pose), into the sequence. There are a few different variations of the pose, some more challenging than the others. We are going to focus on the beginner level variation which itself can be somewhat challenging for those with tight hips, knees or thighs.
Step-by-step
- Stand close to the top of the mat with the feet together or slightly apart but parallel to each other. As you exhale, bring your hands in the prayer position in front of your chest.
- Inhaling, bring the arms to the side and then begin to raise them up and arch back from the waist. Pulls the hands up and push the arms back behind the ears. If comfortable, deepen the stretch by pressing the feet firmly into the ground, pushing the buttocks and thighs forward, keeping legs straight. Relax your neck.
- Exhaling, release the hands down and begin to bend forward. This time bring the hands behind the back, interlock the fingers and lift the hands up toward the ceiling when you inhale. When you exhale, make a gentle effort to drop the chest to close the gap with the thighs. Stay in this position for two extra breaths.
- Inhaling, bend the knees, place the palms on the floor right next to the feet. This time bring the right leg back. Stretch the right leg back and place the right knee down. We’ll do a small variation here.
- Raise the arms up toward the ceiling and push the arms behind the ears while inhaling. While exhaling push the buttocks down and forward. Spend an extra breath here.
- Exhaling, and placing the palms on the floor, bring the left leg back. Lift your buttocks up to get into the Adhomukha Shvanasana (Downward Facing Dog). Try to push the thighs back, heels and forehead down, tailbone lifted up and keep your shoulders back.
- Exhaling, lower your knees to the floor and this time push the buttocks all the way back close to the heels in the child pose (Balasana). Keep the forehead on the floor and start walking your hands out in front.
- Inhaling, keeping the hands where they are, begin to slide the body forward, keeping the forehead close to the floor. Slowly begin to lift your head, neck and chest up to get into the Bhujangasana or Cobra pose. Keeping the navel on the floor, lift the chest up as high as comfortable, legs together, elbows tucked in close to the body and shoulders rolled back. Stay in Bhujangasana for about 3-4 breaths.
- Exhaling, curl your toes under, lift the buttocks up to get back to the downward facing dog. Try to push your heels and forehead down and keep your shoulders back. This is where we will integrate the Kapotasana (pigeon pose) into the sequence.
- Lift your right foot up, bend the right knee and move the leg forward. Place the leg directly below the shoulders. The right knee is placed just behind the right wrist. Try to keep the right leg parallel to the front edge of the mat. If this is not comfortable, bend the knee more so that the right foot moves closer to the left hip area.
- Slowly slide your left leg back, straightening the knee and descending the front of the thigh to the floor. Lower the outside of your right buttock to the floor.
- Exhale and slowly drop your chest down and rest it on top of the right leg. Stretch your arms forward and rest the forehead on the floor.
- With the right knee bent and right hip on the floor, make a gentle effort to drop the left hip toward the floor. This will enhance the stretch on the right hip. Stay in this position for a few breaths.
- Then slide your hands back toward the front shin and push your fingertips firmly to the floor. Lift your torso away from the thigh. Lengthen the lower back by pressing your tailbone down and forward.
- Stay in this position for a few breaths. Then, with your hands back on the floor, carefully slide the right knee forward, then exhale and lift up and back into Adhomukha-shvanasana (Downward Facing Dog Pose).
- Take a few breaths, and repeat the above steps with the legs reversed for the same length of time. Finally get back to the downward facing dog.
- Lifting the head up, bring the right foot forward and try to place it between the palms. Place the left knee down. We will repeat the same variation that we did on the other side.
- While inhaling, slowly begin to raise the arms up and try to push the arms behind the ears. While exhaling, drop the buttocks down and push them forward. Stay in the position for a couple of breaths.
- Now, exhaling, bring the other leg also forward and bend down from the waist with the knees stretched straight. This is called Uttanasana (standing forward bending pose).
- Inhaling, stretch your arms to the side, bring them up and back overhead and bend back slowly from the waist.
- Exhaling, gently come back to an upright position and bring your arms down by your sides. Relax for a few breaths before proceeding with the next round.
Contraindications and precautions
Avoid these stretches if you have had a recent spine or hip injury or have severe hip or back pain. Be careful not to overdo any of the stretches. In case of mild pain, please consult with your yoga instructor and modify the stretches, as appropriate.
Benefits
These hip opening stretches will help you make the hips, knees, thighs and the spine more flexible and reduce muscle tightness. It will improve blood circulation in these areas. These stretches are very helpful in alleviating back pain, especially in the lower back area. In general, you will feel a better sense of overall well-being.
Recent Comments