The Ardha-chandrasana (अर्धचन्द्रासन)
(Half Moon pose) and its close cousin, the revolving half moon pose, are intermediate level one-leg balancing poses. Learning these poses will require awareness, practice, strength and patience. Once you become comfortable with these poses, you will find them energizing, rejuvenating and yet restorative. These are excellent pose for developing strength in the legs and especially for stretching the hamstring and the gluteal muscles.
My friend, Maanasa, has graciously agreed to demonstrate this asana sequence. I hope you will enjoy practicing with the video.
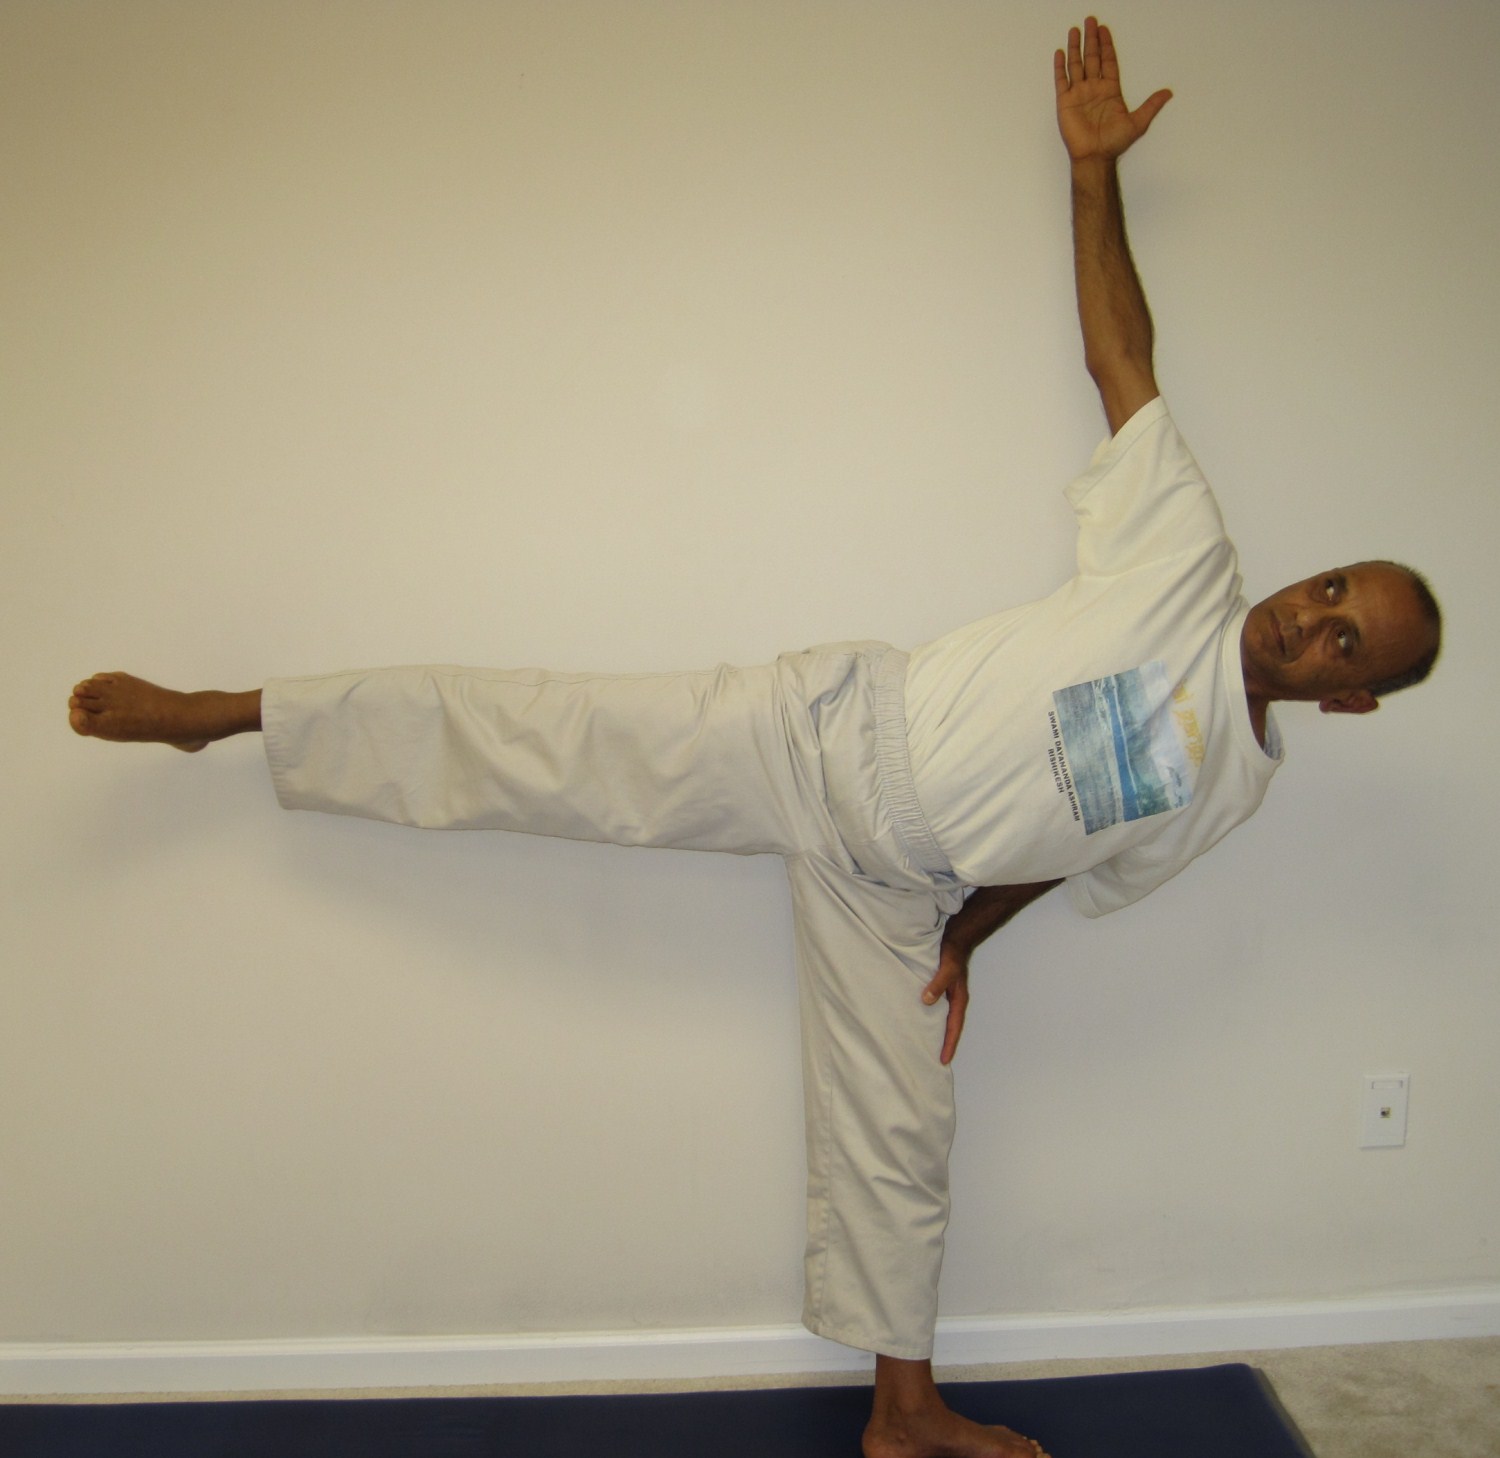
Ardha-chandrasana with wall support
This variation is recommended for beginners who are not able to maintain the balance or find it difficult to turn the torso enough to bring the body into a single vertical plane. In this variation we use the support of the wall for balance and stability.
Step-by-step
- Stand with the back facing a wall, feet about six inches away from the wall.
- Spread the legs about 3 feet apart, as if you are getting ready for the triangle pose. Turn the left foot all the way to the left, parallel to the wall. The body is completely parallel to the wall.
- Bend the left arm and rest the left hand on the left thigh and place the elbow against the wall. Place the right hand on the right hip.
- Bending the left knee slightly start shifting the weight of the body on to the left leg. At the same time start raising the right leg up and bring it to a horizontal position. Turn the head up, looking over the left shoulder.
- When you feel that the body is stable, start raising the right arm and bring it vertically above the two shoulders.
- In the beginning there is a tendency for the lower hip to be closer to the wall compared to the upper hip. Similarly, the lower shoulder tends to be closer to the wall. With effort, awareness and practice, you will be able to stack the upper shoulder and hip vertically above the lower counterparts. Which means that both the hips and shoulders should be the same distance away from the wall.
- In the final position, only the elbow is touching the wall and providing the support for balance. Both the shoulders and the right arm are in a single vertical plane. The whole body is parallel to the wall. Imagine that you are being squeezed inside two vertical glass panes.
- Maintain the final position for about 6-8 breaths, if comfortable.
- Release the pose slowly and repeat on the other side.
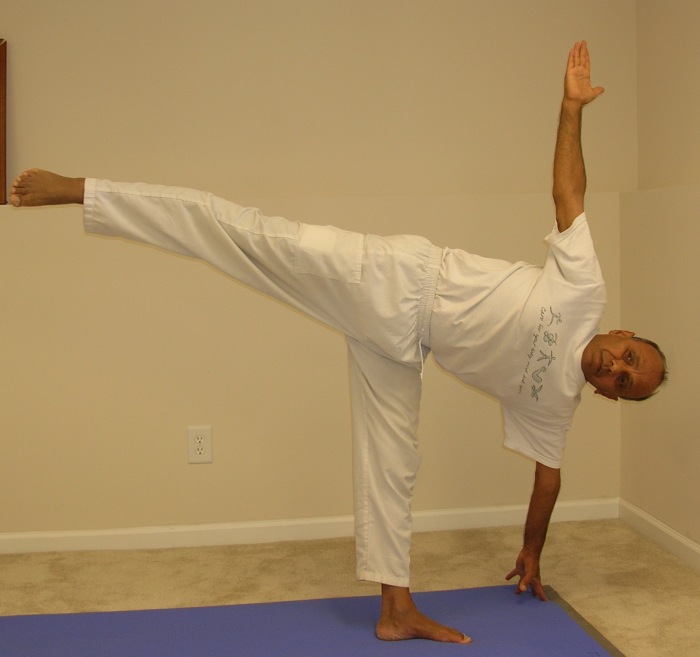
Ardha-chandrasana
Step-by-step
- Start out in the lunge position with the left leg in front.
- Lift the hands off the floor, place them on the knee, and slide your right foot about a foot in front.
- Place the left palm about 8 inches in front and slightly to the left of the left foot.
- Turn your head up, looking over the right shoulder and place the right hand on your right hip.
- Start shifting the body weight on to the left leg and begin to raise the right leg straight behind you.
- While raising the right leg, also start stretching the left leg straight.
- Try to bring the right hip vertically above the left hip, and the right shoulder vertically above the left shoulder.
- Once you feel comfortable in this position, begin to raise the right arm and bring it vertically above the two shoulders.
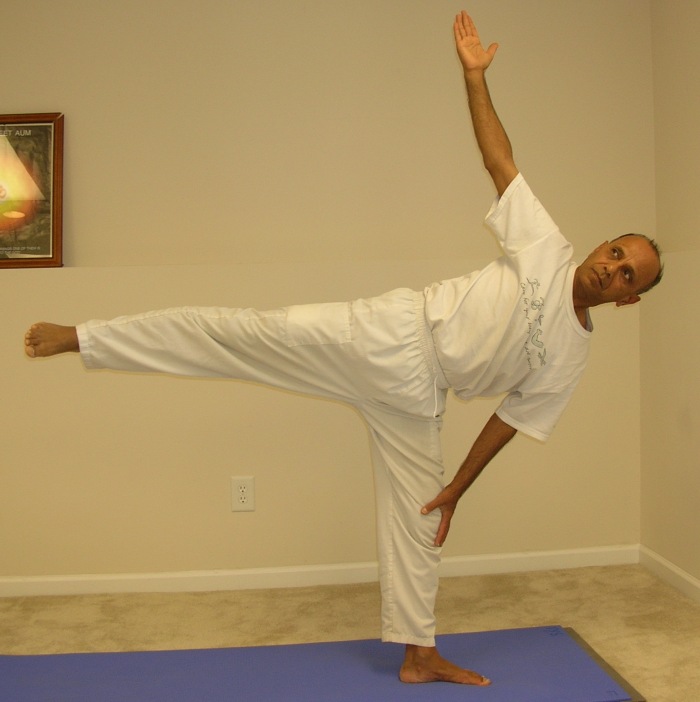
- In the final position, both the legs are straight, the right leg being fully horizontal or slightly raised above the horizontal plane. The left leg should be bearing most of the body weight; use a gentle pressure on the floor with the left hand to help maintain a good balance.
- For a slightly more challenging variation, try to lift the left hand and place it on the left side of the leg at about knee level.
- Maintain the final pose for about 6-8 breaths, if comfortable.
- To come out of the pose, slowly release the right leg down to the floor, then bring the right hand down.
- Repeat the above steps on the other side.
Revolving Ardha-chandrasana
Step-by-step
- Start out in the lunge position with the right leg in front.
- Lift the hands off the floor, place them on the knee, and slide your left foot about a foot in front.
- Place the left palm about 8 inches in front and slightly to the left of the right foot.
- Turn your head up, looking over the right shoulder and place the right hand on your right hip.
- Start shifting the body weight on to the right leg and begin to raise the left leg straight behind you.
- While raising the left leg, also start stretching the right leg straight.
- While twisting the body around, bring the right shoulder vertically above the left shoulder.
- Once you feel comfortable in this position, begin to raise the right arm up and bring it vertically above the left shoulder.
- In the final position, both the legs are straight, the left leg being fully horizontal or slightly raised above the horizontal plane. The right leg should be bearing most of the body weight; use a gentle pressure on the floor with the hand to help maintain a good balance.
- Maintain the final pose for about 6-8 breaths, if comfortable.
- To come out of the pose, slowly release the left leg down to the floor, then bring the right hand down.
- Repeat the above steps on the other side.
Benefits
- Like all balancing poses, the Half Moon pose strengthens the legs and develops deep internal focus and concentration. It also improves body coordination.
- Stretches and strengthens the ankles, thighs, hips, knees and the spine.
- This is one of the best poses for stretching the hamstring and the gluteal muscles.
- Stretches the neck muscles.
- Helps to relieve stress and improves digestion.
Contraindications
Avoid this pose if you have any of the following conditions:
- Low blood pressure
- Headache or sinus problems
- Upset stomach, diarrhea or severe indigestion
- If you have neck pain, avoid looking over the shoulder; instead, keep your gaze in front, without turning the neck
I would love to hear from you if this pose is a part of your yoga routine.


which pranayama is useful for living cold
can pranayama cure cancer
I don’t believe it can cure cancer – however, pranayama can help you deal with it much better.
awesome demonstration and explanation…Beautiful!
Thanks, Marianne, for your kind words. Glad you liked the video.