Problems with knees and low back pain are perhaps two of the most important reasons why people come to yoga for help. In this article, I am providing instructions for a 30-minute video sequence with a few simple poses that can help strengthen the knees and make them more flexible.
If you already have any kind of knee pain, please try to practice under the guidance of a yoga teacher. Be careful not to engage in any movement that causes more pain or discomfort as that can further aggravate your situation.
I hope you will enjoy practicing with the video.
Seated knee rotation
Step-by-step
- Sit with the legs stretched out in front. Lift the right leg and hold the back of the right thigh with the two hands.
- Bring the knee close to the chest. Pick one direction and begin to make circles at the knee joint. The effort should be to make a large circular movement at the knee without engaging the hips.
- After 6-7 rounds, pause, and begin to make the circles in the other direction. Pause again after 6-7 rounds.
- Relax for a few breaths.
- Repeat the above moves with the other leg.
Surya Namaskara with Warrior 2 and knee stretch
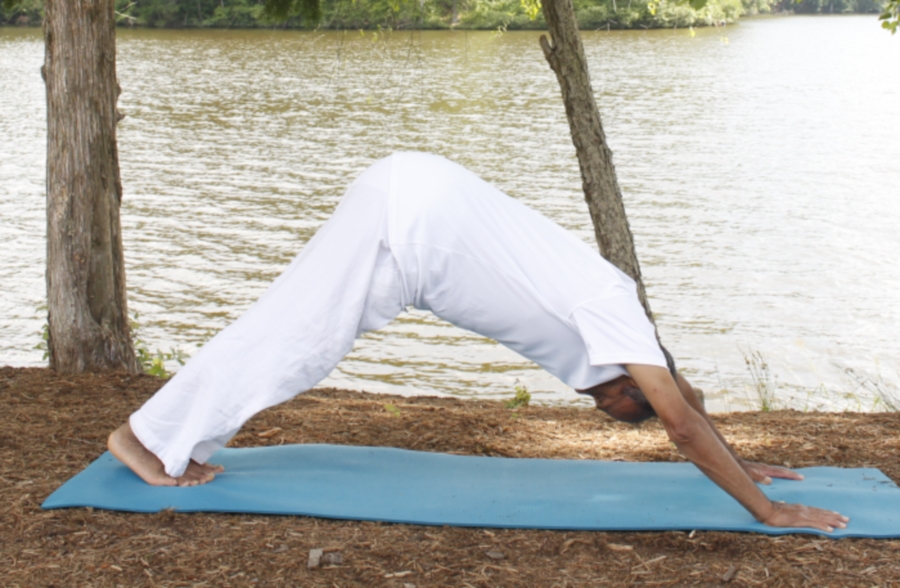
Adhomukha-shvanasana (Down Dog)
Round 1
- Stand close to the top of the mat with the feet together or slightly apart but parallel to each other. As you exhale, bring the palms together in the prayer position in front of your chest.
- Inhaling, stretch your arms out in front, raise them up and arch back from the waist, pushing the hips out, legs straight. Relax your neck.
- Exhaling, fold forward, keeping the arms alongside the ears initially. In the final position, drop the hands to get close to the toes. Try to keep the knees straight, bending slightly if necessary.
- Inhaling, bring the left leg back into the lunge position, sliding the foot as far back as comfortable and place the knee on the floor. Arch back and look up, lifting your chest and chin.
- Exhaling, bring the other leg back. Lift your buttocks up, coming into an inverted “V” shape called the Adhomukha Shvanasana or Downward Facing Dog. Try to push the thighs back, heels and forehead down, tailbone lifted up and keep your shoulders back.
- Exhaling, lower the knees, chest and the chin to the floor, keeping your buttocks lifted up. This is called the “ashtanga mudra” (the gesture with eight limbs on the floor).
- Inhaling, lower the abdomen to the floor and slowly begin to lift your head, neck and chest to get into the Bhujangasana or Cobra pose. In the first round we try to lift the palms off the floor, using the upper body strength to lift the chest higher, if comfortable. Keep the shoulders rolled back.
- Exhaling, place the palms down, curl your toes under, lift the buttocks up to get back to the downward facing dog. Try to push your heels and forehead down and keep your shoulders back (same as position 5).
- Inhaling, lift the head up, bring the left foot forward and place it between your hands. Rest the other knee on the floor and look up, as in position 4.
- Exhaling, bring the other leg forward and bend down from the waist with th knees stretched straight. This is called Uttanasana (standing forward bending pose).
- Inhaling, stretch your arms in front against the ears, lift them up and back overhead and bend back slowly from the waist, as in position 2.
- Exhaling, gently come back to an upright position and bring your arms down by your sides. Relax for a few breaths before proceeding with the next round.
Round 2
In this round we integrate the practice of Warrior 2 with knee stretching variation as a part of the sequence.
- Stand close to the top of the mat with the feet together or slightly apart but parallel to each other. As you exhale, bring your hands in the prayer position in front of your chest.
- Inhaling, bring the arms to the side and then begin to raise them up and arch back from the waist. Pulls the hands up and push the arms back behind the ears. If comfortable, deepen the stretch by pressing the feet firmly into the ground, pushing the buttocks and thighs forward, keeping legs straight. Relax your neck.
- Exhaling, release the hands down and begin to bend forward. This time bring the hands behind the back, interlock the fingers and lift the hands up toward the ceiling when you inhale. When you exhale, make a gentle effort to drop the chest to close the gap with the thighs. Stay in this position for two extra breaths.
- Inhaling, bend the knees, place the palms on the floor right next to the feet. This time bring the right leg back.
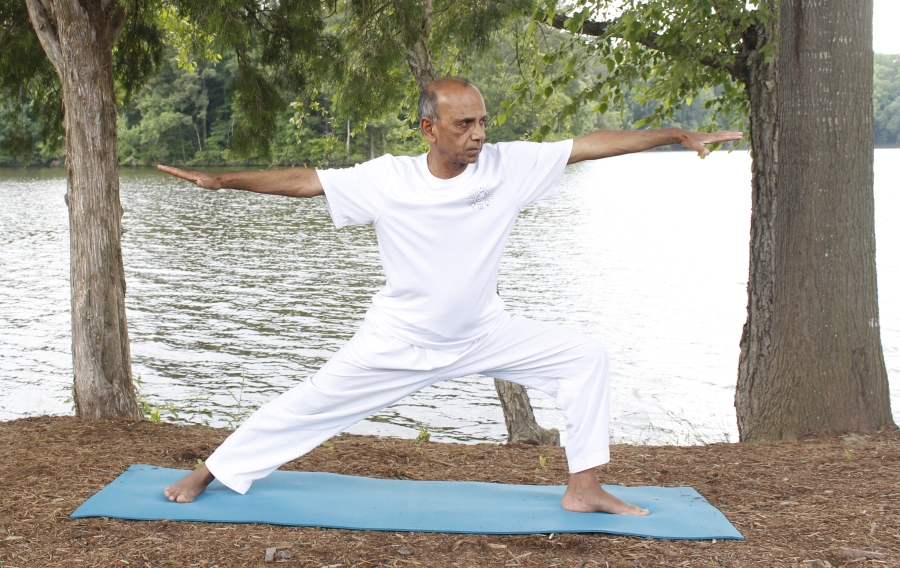
- To get into the Warrior 2 pose, turn the body sideways, the whole body being parallel to the side wall. Keep the right foot flat on the floor with the heel pressing firmly into the ground. Try to keep the right leg straight with the toes turned slightly toward the front foot. Keep the front foot facing forward with the heels, buttocks and the shoulders in one vertical plane. Bend the front knee, trying to bring it close to 90 degrees. Keep the arms horizontal, in line with the shoulders. As you inhale pull the hands gently away from each other. As you exhale, try to drop the buttocks down, bending the front knee closer to 90 degrees. Make sure that the front knee is positioned vertically above the ankle. You may need to adjust the distance between the feet to keep the knee at 90 degress and vertically above the ankle. You may spend three to four breaths in this pose.
- From the Warrior 2, we’ll transition to a variation to stretch the knees. Keeping both legs straight, stand with the legs apart, facing the side wall with the toes pointing to the two corners of the mat. Place the hands on the knees. Keeping the right leg straight, begin to bend the left knee by lowering the buttocks down. Make the effort to close the gap between the left hip and the left heel. In the final position, bring the palms to the prayer position, making sure that the torso is upright. Continue the effort to bring the left hip closer to the left heel.
- To come out, release the hands, turn the body to face the front.
- Exhaling, bend the front knee and placing the palms on the floor, bring the other leg back. Lift your buttocks up to get into the Adhomukha Shvanasana (Downward Facing Dog). Try to push the thighs back, heels and forehead down, tailbone lifted up and keep your shoulders back.
- Exhaling, lower your knees to the floor and this time push the buttocks all the way back close to the heels in the child pose (Balasana). Keep the forehead on the floor and start walking your hands out in front.
- Inhaling, keeping the hands where they are, begin to slide the body forward, keeping the forehead close to the floor. Slowly begin to lift your head, neck and chest up to get into the Bhujangasana or Cobra pose. Keep the navel on the floor, legs together, elbows tucked in close to the body and shoulders rolled back. Stay in Bhujangasana for about 3-4 breaths.
- Exhaling, curl your toes under, lift the buttocks up to get back to the downward facing dog. Try to push your heels and forehead down and keep your shoulders back.
- Inhaling, lift the head up, bring the right foot forward and place it between your hands. Here we will repeat the movements for the Warrior 2 pose as we did before.
- Repeat steps 5 and 6 for Warrior 2 and the variation for the knees, as described earlier.
- Now bend the front knee and place the palms on the floor. Exhaling, bring the other leg forward and bend down from the waist with the knees stretched straight. This is called Uttanasana (standing forward bending pose).
- Inhaling, stretch your arms to the side, bring them up. Keep the torso straight and bend the knees. Pause before you begin to feel any discomfort in the knees or the hips. This is called the Utkatasana (half chair pose).
- Stay in the pose for a couple of breaths. Now, stretch the arms straight out in front and begin to lower the buttocks to get into a squat with the feet together. The effort is to keep the heels on the ground. If that’s not comfortable, you can put a cushion or a pillow under your heels to get a good stretch for the knees.
- Slowly begin to come back up, stretch the arms up and stretch them back. Then straighten the body and release the arms. Relax.
Standing knee rotation
Come to a standing position with the feet together or slightly apart. Bend the knees and place your hands on the knees.
Stay in the pose for a couple of breaths. Now pick one direction begin to rotate the knees in circles. Keep the knees bent. Try to maintain a comfortable pace, not too slow or too fast. Also, make sure that you don’t strain the knees while doing these circles. Try to engage only the knees, not the hips or the waist in these movements. Pause briefly after 6-7 rotations.
Now, begin the rotations in the opposite direction. Again, after 6-7 rotations, pause, then come to a standing position and relax for a few breaths.
Virtual Chair pose and the squat
Step-by-step
- Spread the feet so that they are a little wider than shoulder width apart.
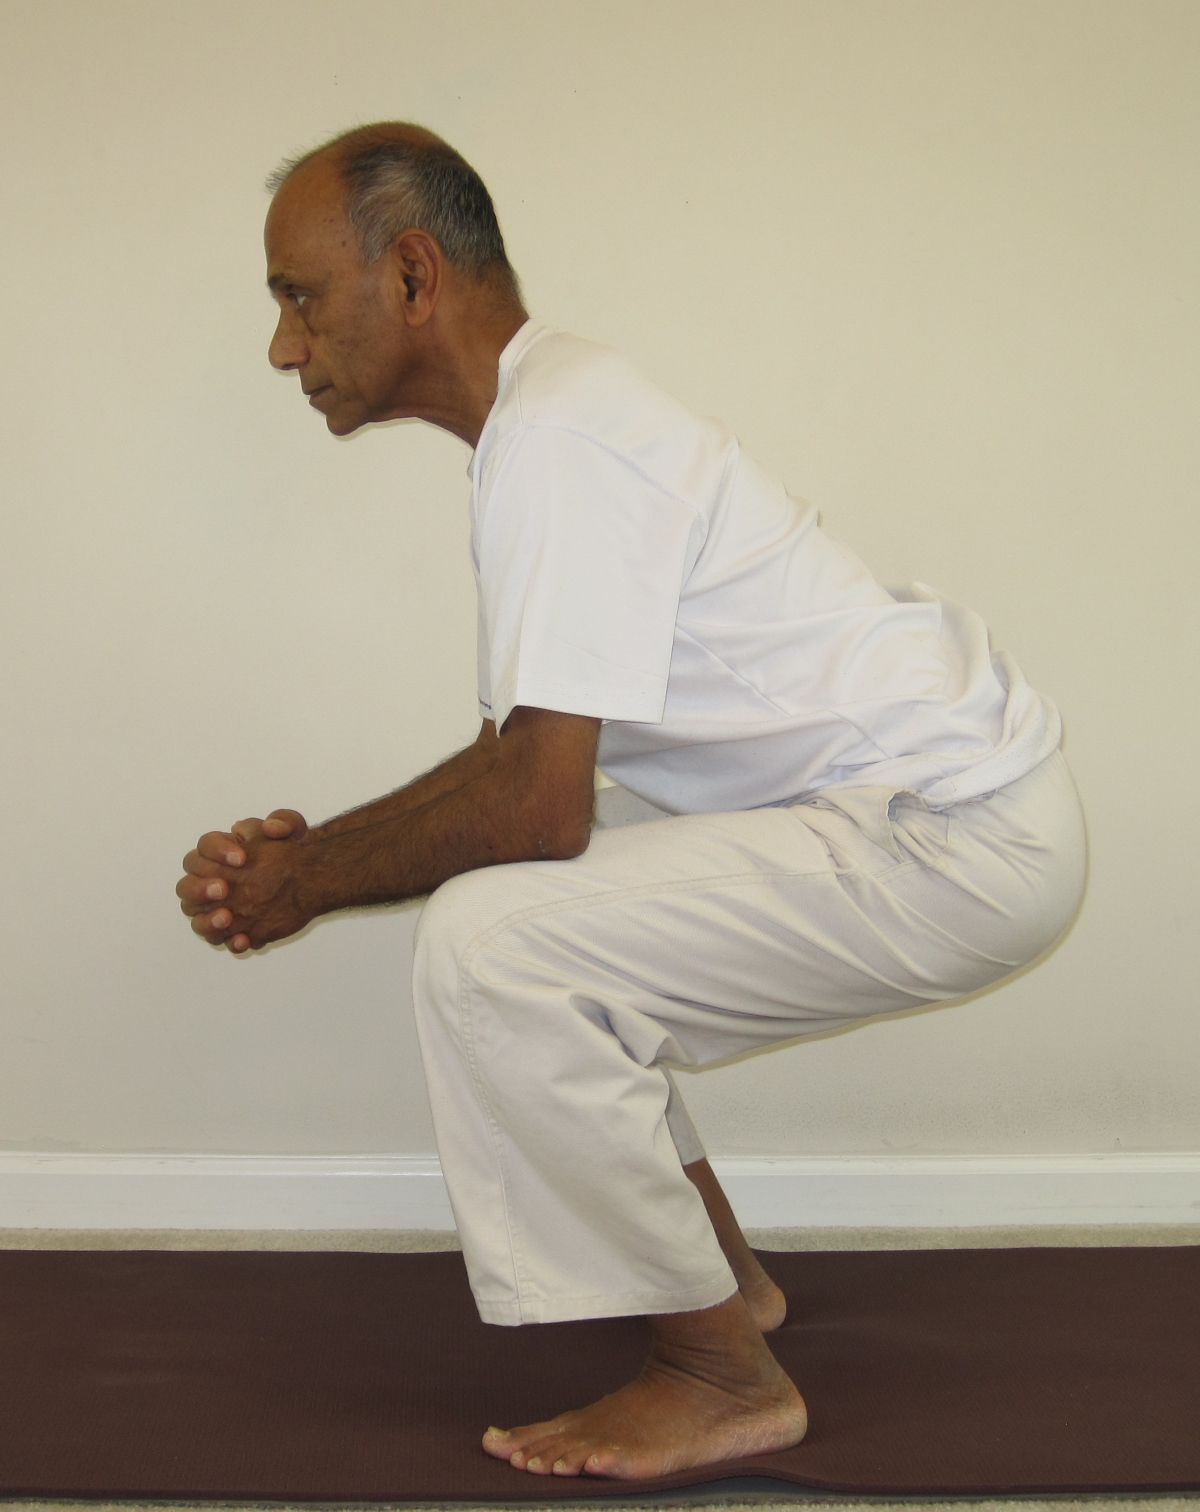
- Begin to bend the knees by lowering the buttocks slowly until the thighs are roughly parallel to the floor. Try to keep the torso straight and upright; avoid tilting the body forward.
- Rest the elbows on the knees and interlock the fingers. Stay in this position, which looks like a virtual chair, for a duration that is comfortable for you.
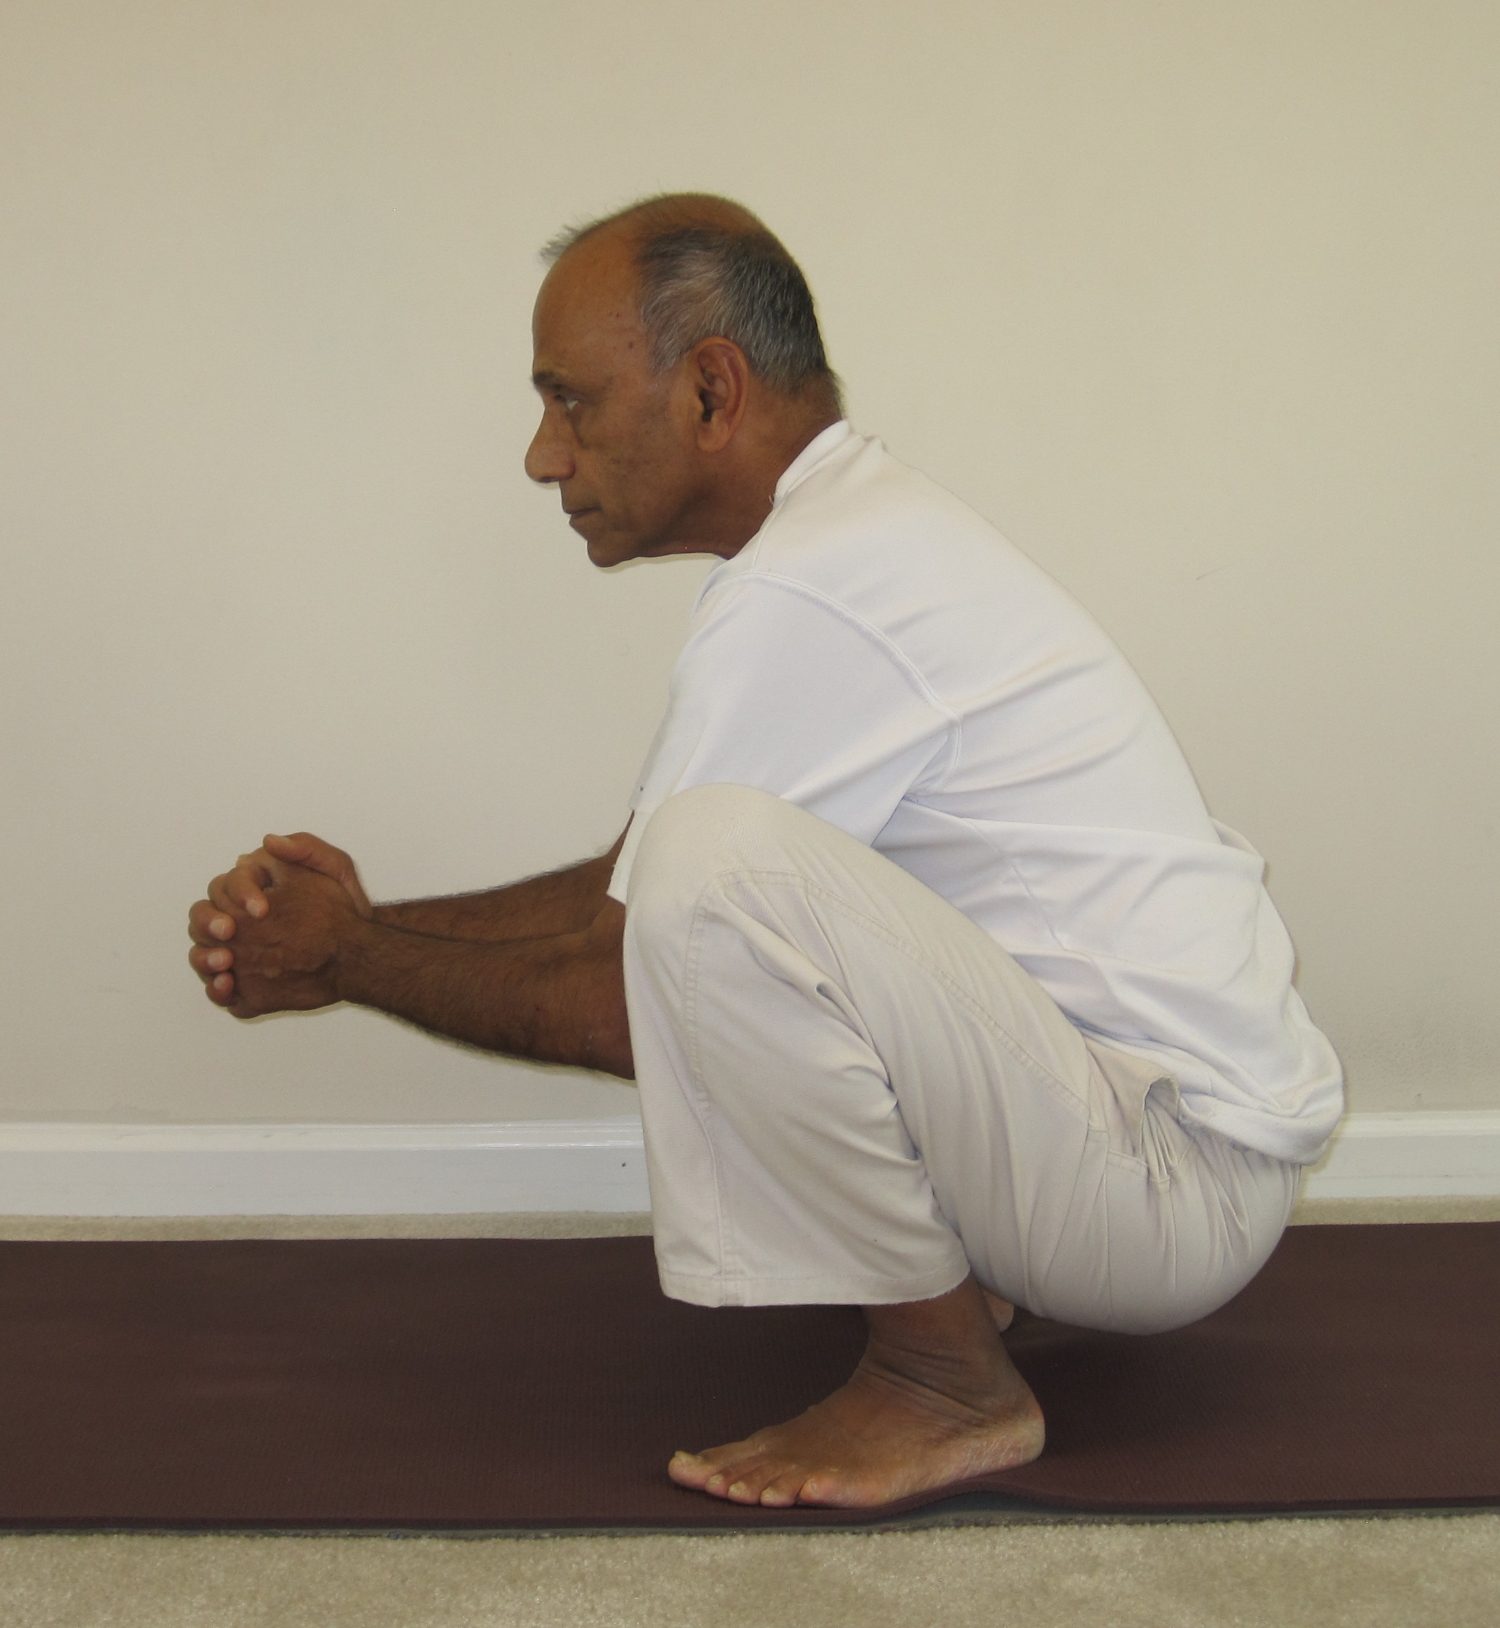
- Now begin to lower the buttocks all the way down until you come into the full squat position. In this position, try to keep the feet flat on the ground. If the ankles are tight and you are unable to keep the feet flat on the ground, you may like to put a cushion or a pillow under the heels.
- Place the elbows on the inside of the knees and again interlock the fingers. Try to keep the torso upright.
- Stay in the squat position for 8-10 breaths or whatever duration that is comfortable for you.
- Slowly get back up to the virtual chair position, as before. This time try to add a little rocking movement to the knees. Try to move the knees forward and backward in a gentle rhythmic manner, making sure that you don’t strain the knees. This movement will deepen the stretch on the knees. Be careful not to overdo these movements.
- Once again, slowly lower yourself down to the full squat. After the intense knee workout, the squat can actually feel like a relaxing pose. Stay in the squat for another 6-7 breaths. Finally, slowly come back up to a full standing position and rest there for a few breaths.
Super-brain yoga
Please read my blog article on this topic here.
Step-by-step
- Come to a standing position with the feet slightly wider than shoulder width apart. Lightly hold the right earlobe with the left hand, and the left earlobe with the right.
- Keeping the torse upright, as you exhale, begin to lower the buttocks down, finally coming into a full squat. While coming down, avoid bending forward. Pause briefly and with the next inhalation, slowly come back up to the standing position. Again, avoid bending forward while coming up.
- Continue in this manner for about 8-10 breaths or as long as comfortable. Finally, come back to the standing position and relax.
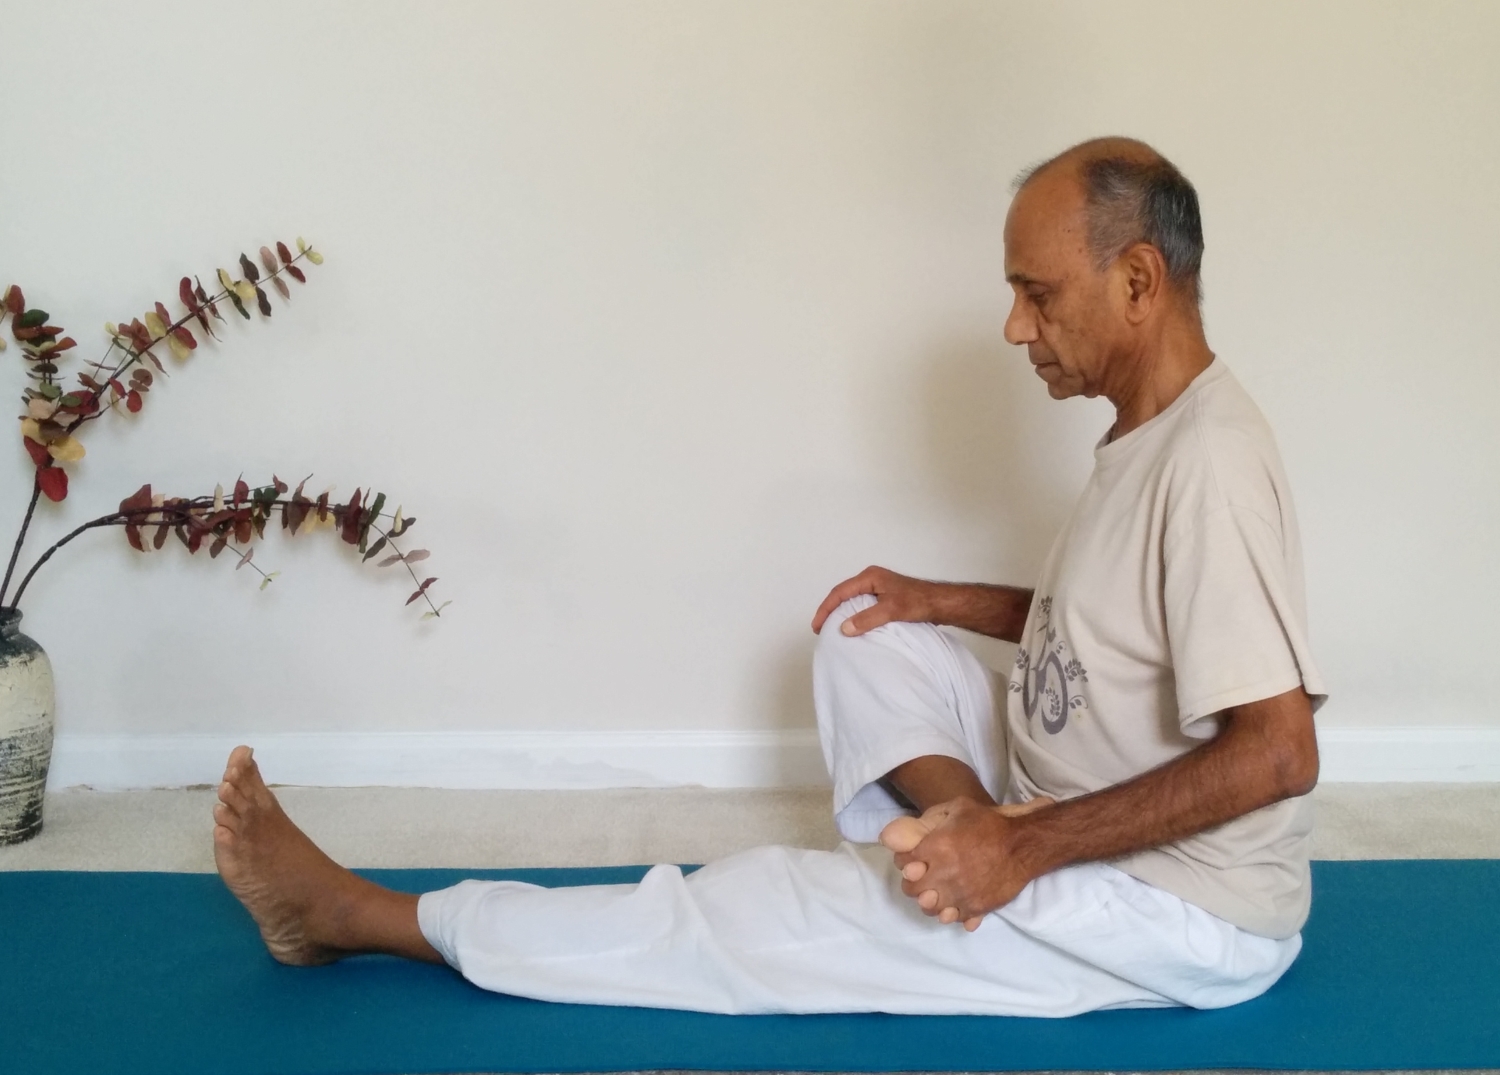
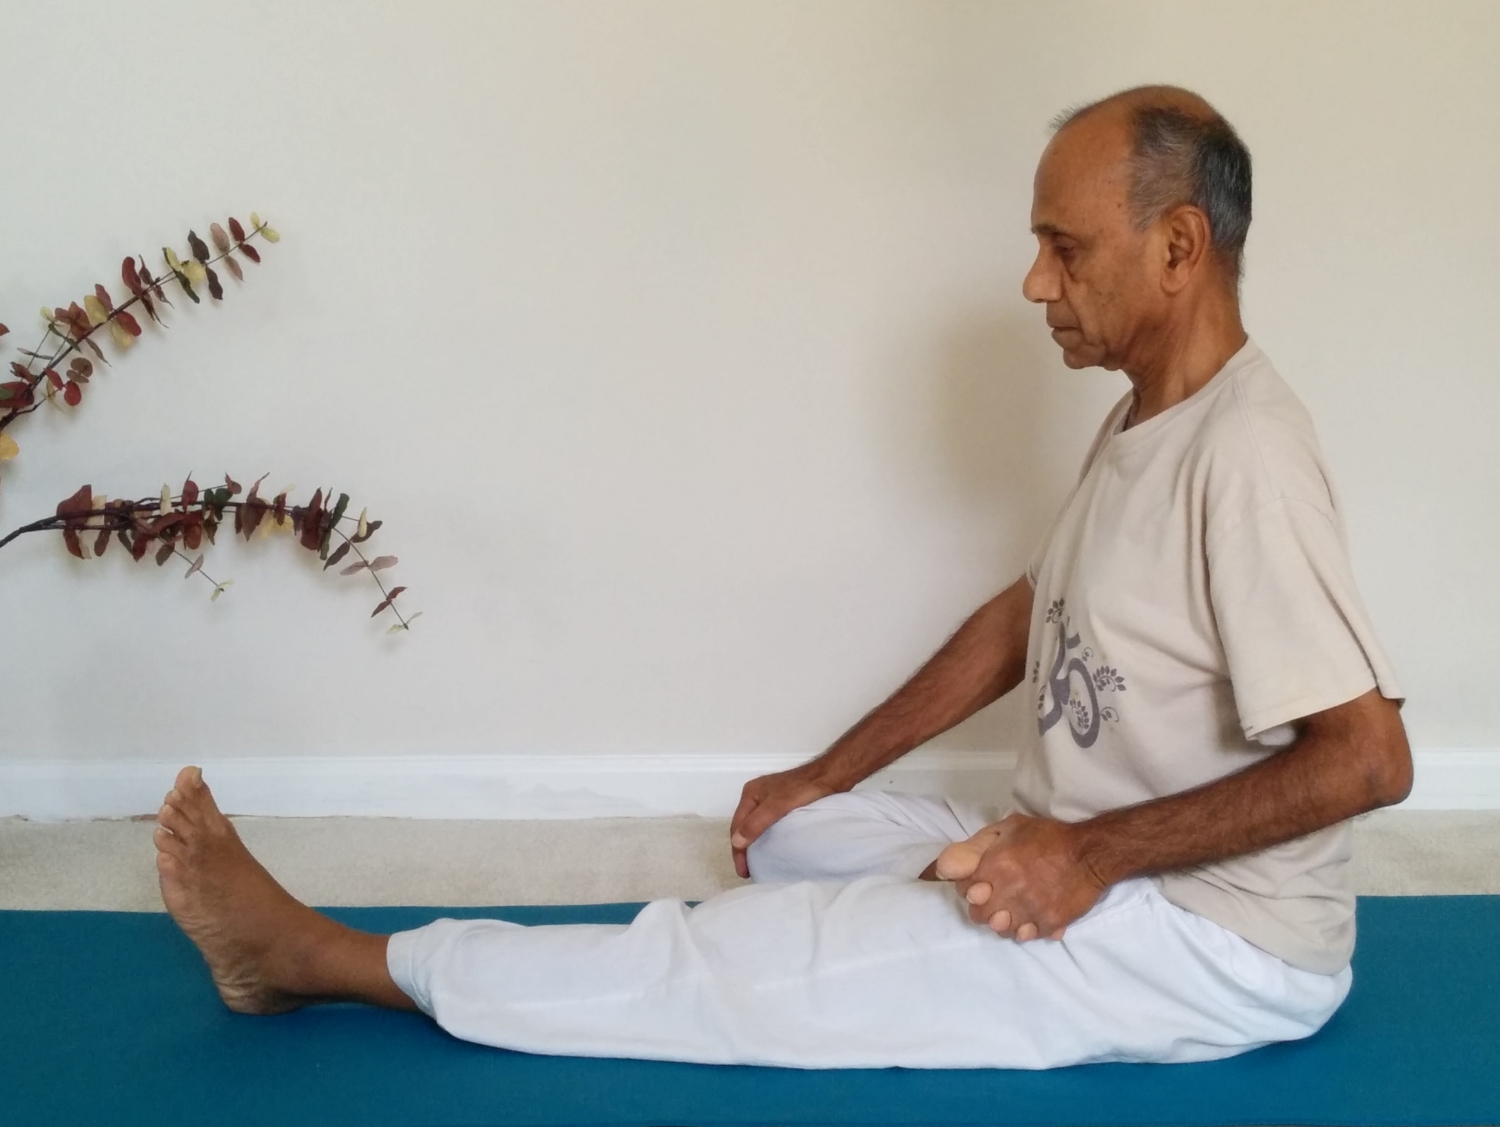
Seated hip rotation and half butterfly
Step-by-step
- Sit down with the legs stretched out in front, keeping the spine tall and straight.
- Bend the right knee and place the right foot on top of the left thigh. Slide the heel as far back as comfortable.
- Thread the fingers of the left hand through the toes to stretch the toes.
- Lightly hold the right knee with the right hand. To create a smooth hip rotation, start by pushing the knee forward, push it down, pull it all the way back and lift it up to bring it up all the way in front again. Repeat this movement 5-6 times.
- Now switch the direction of hip rotation. Lift the knee up, pull it all the way back, push it down and bring it all the way in front. Repeat this rotation 5-6 times.
- Pause briefly and begin the half butterfly move by rhythmically moving the right knee up and down. With every move, make a gentle effort to bring the knee close to the floor. Repeat this move 6-8 times.
- Now switch the position of the feet by stretching the right leg straight out in front and placing the left foot on top of the right thigh.
- Repeat the same rotational movements and the half butterfly, as above, with the left hip.
- Stretch both legs in front and relax for a few moments.
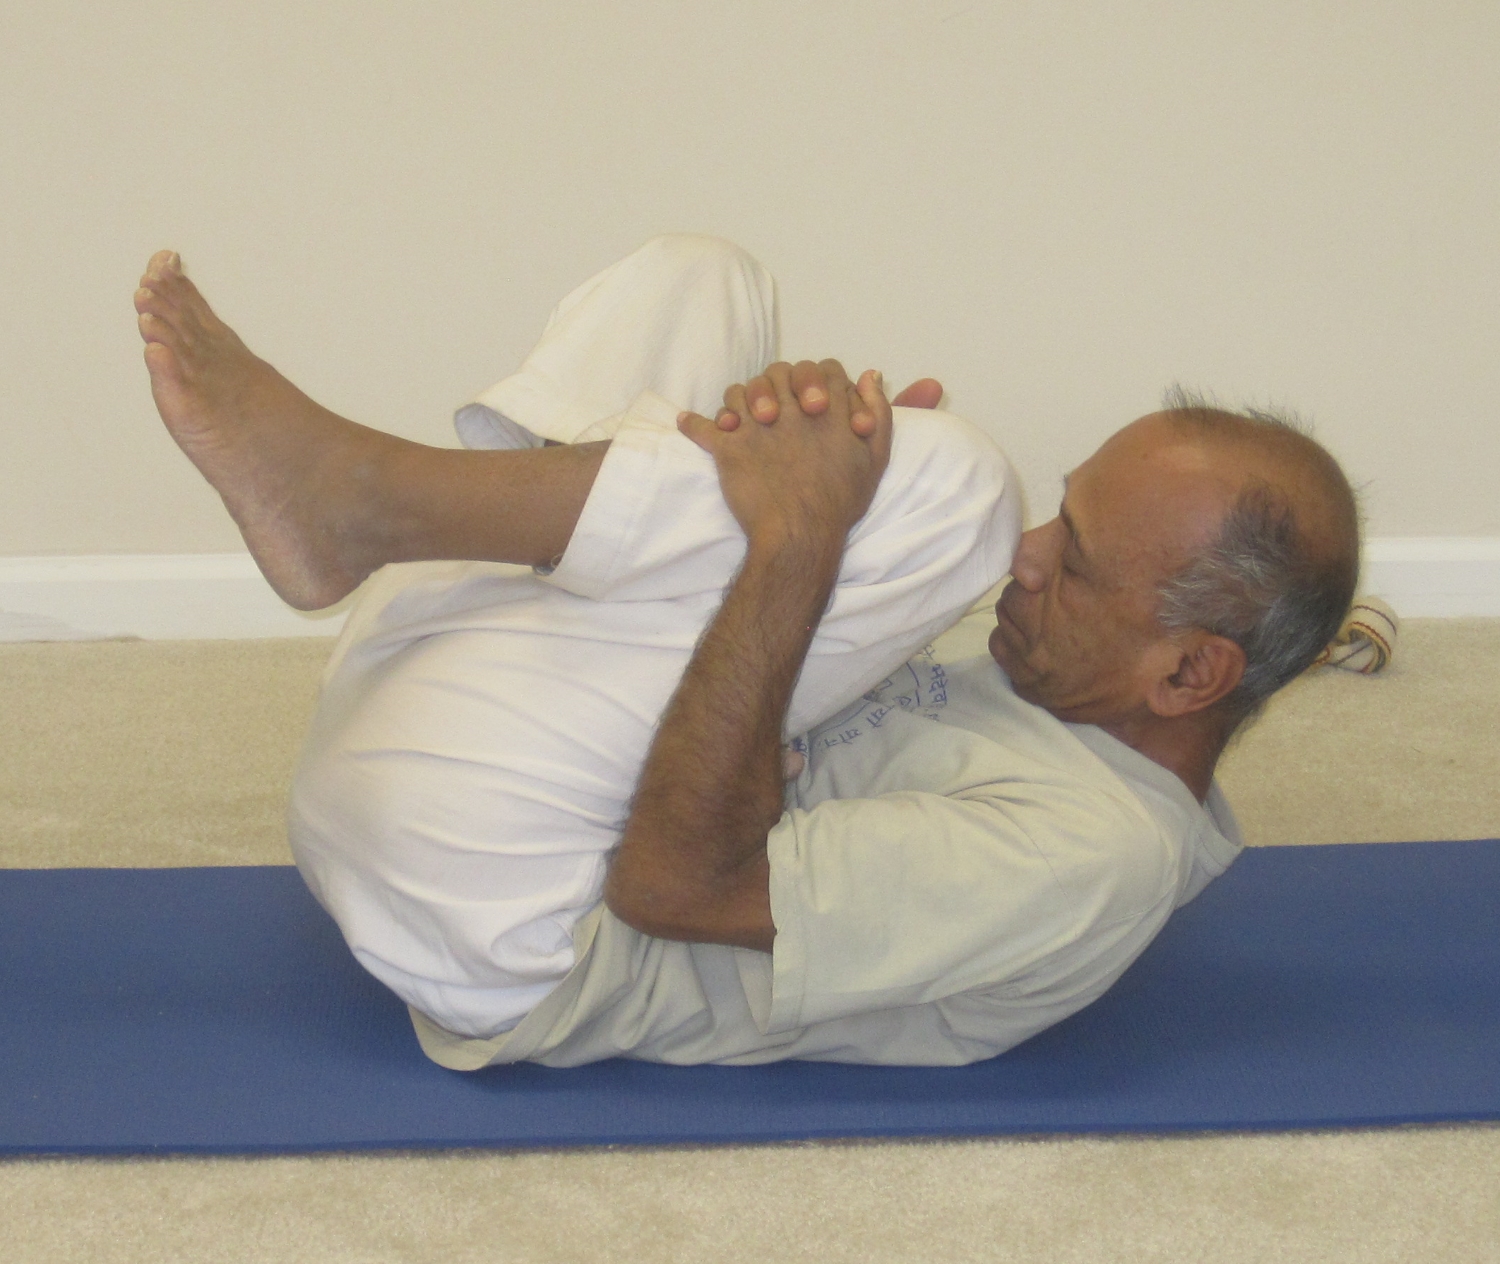
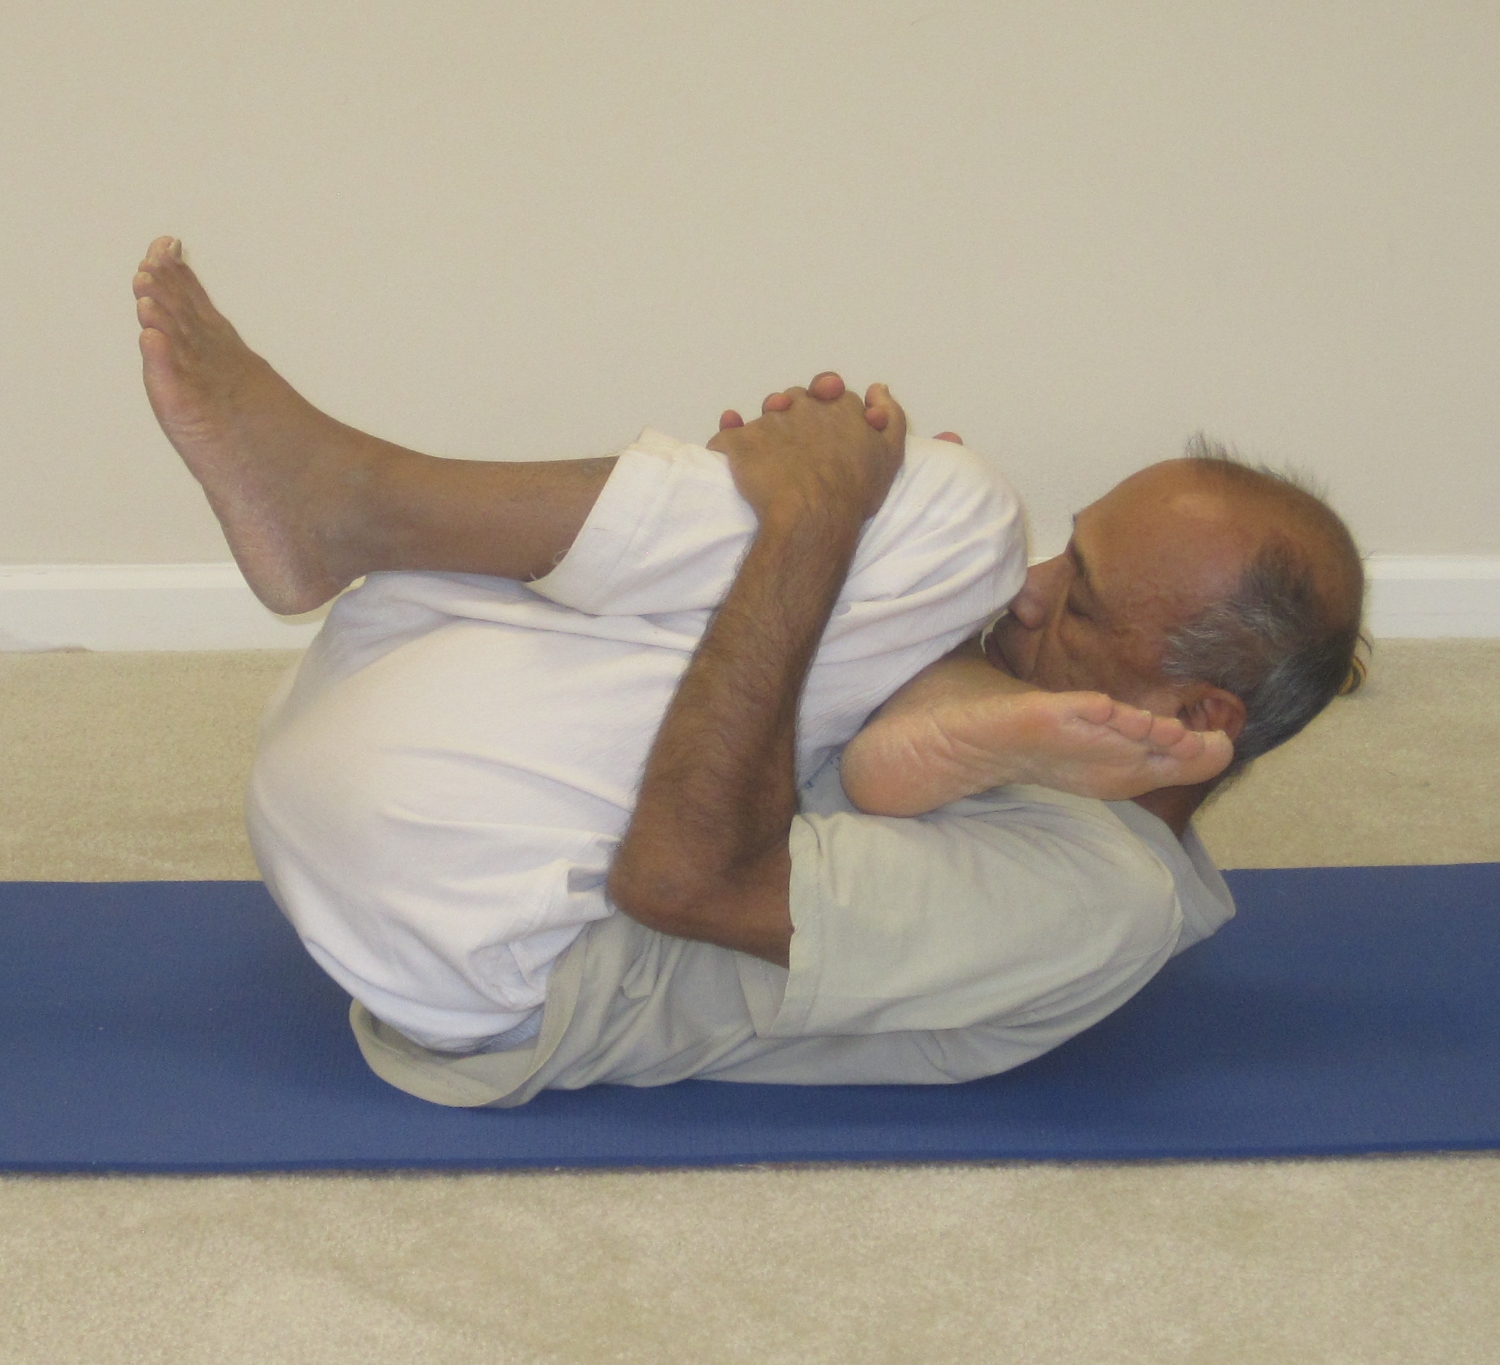
Reclining Figure-4 stretch
This pose is a variation of the Pawana-muktasana (wind-releasing pose)
Step-by-step
- Lie down on your back with the knees bent.
- Lift the right foot up and place the top of the foot on top of the left thigh. Try to slide the foot all the way down the thigh so the heel is close to the thigh joint.
- Lift the left foot off the floor and holding the left shin with the two hands try to guide the left knee close to the chest.
- At this point if it doesn’t bother your neck or the spine, lift the head up, lower the chin down to the chest and gently guide the left knee closer to the forehead.
- Maintain the final pose for a couple of breaths.
- Slowly release the head down and slide the right foot up and place it on top of the left knee.
- This time thread the right arm from under the leg and hold the shin with the two hands, as before. Try to guide the left knee close to the chest.
- At this point if it doesn’t bother your neck or the spine, lift the head up, lower the chin down to the chest and gently guide the left knee closer to the forehead.
- Maintain the final pose for a couple of breaths.
- Bring the head and the foot down and relax for a couple of breaths.
- Repeat the above steps on the other side.
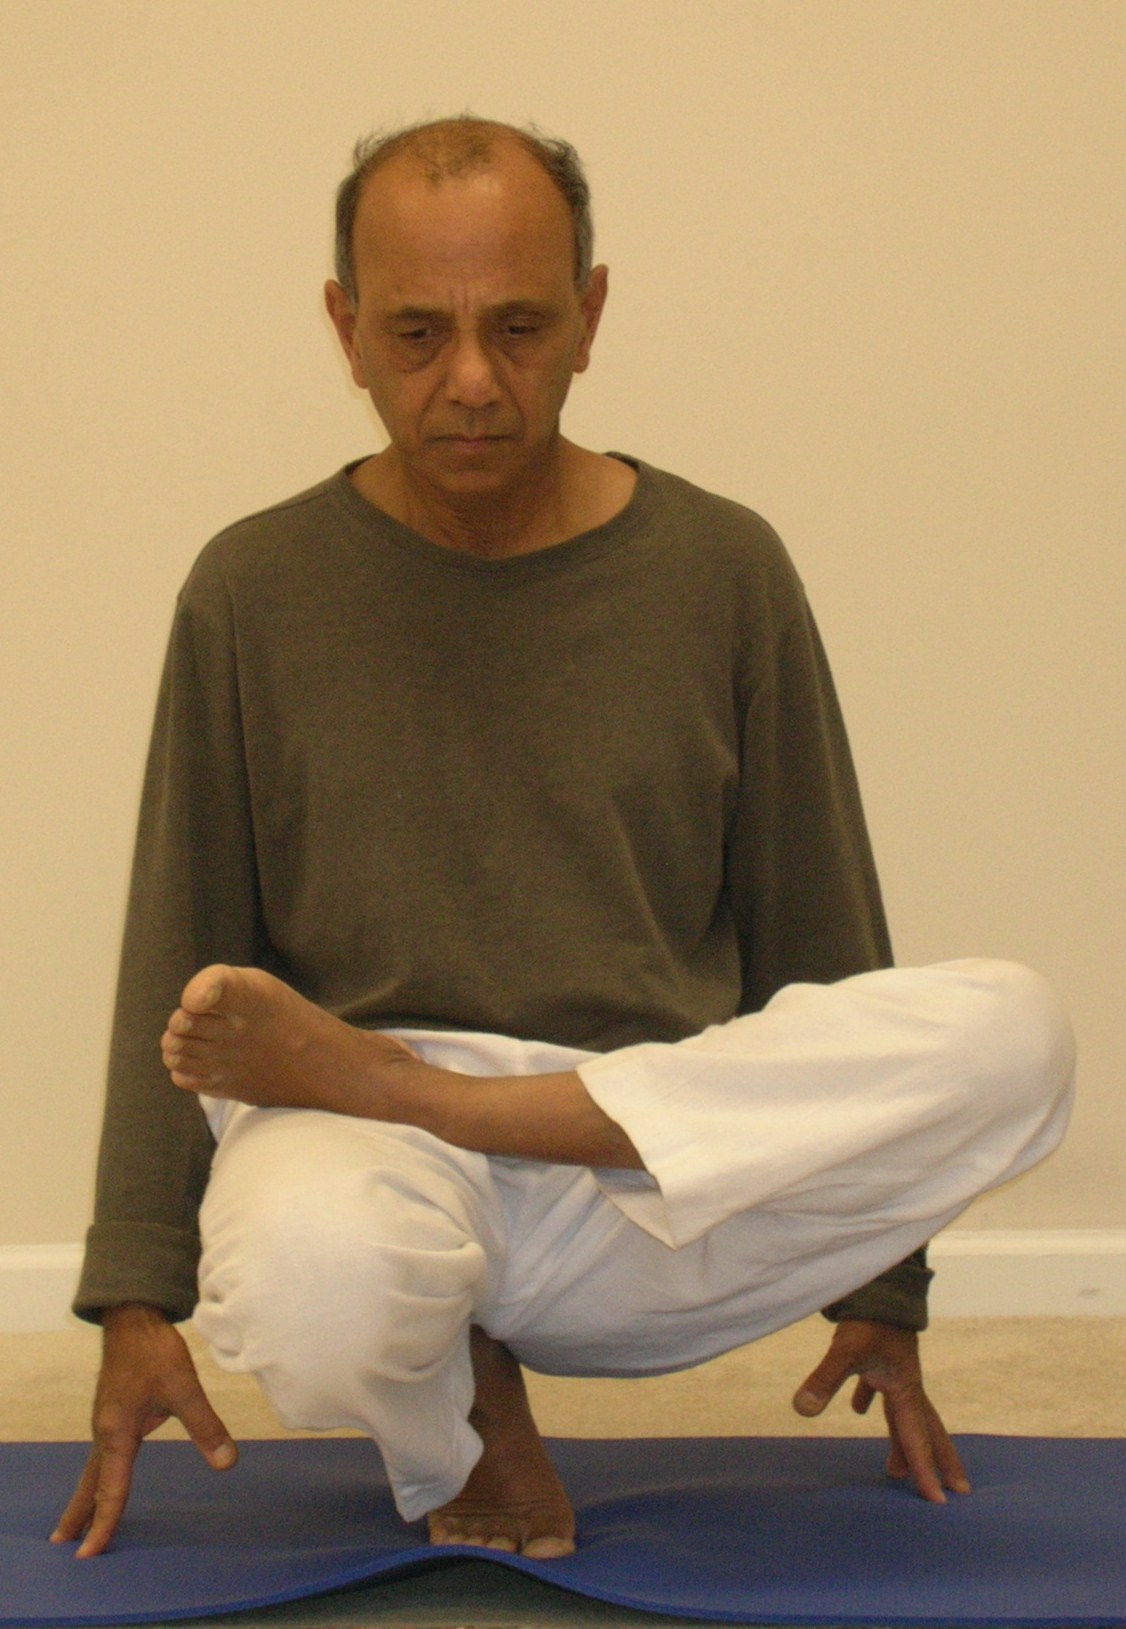
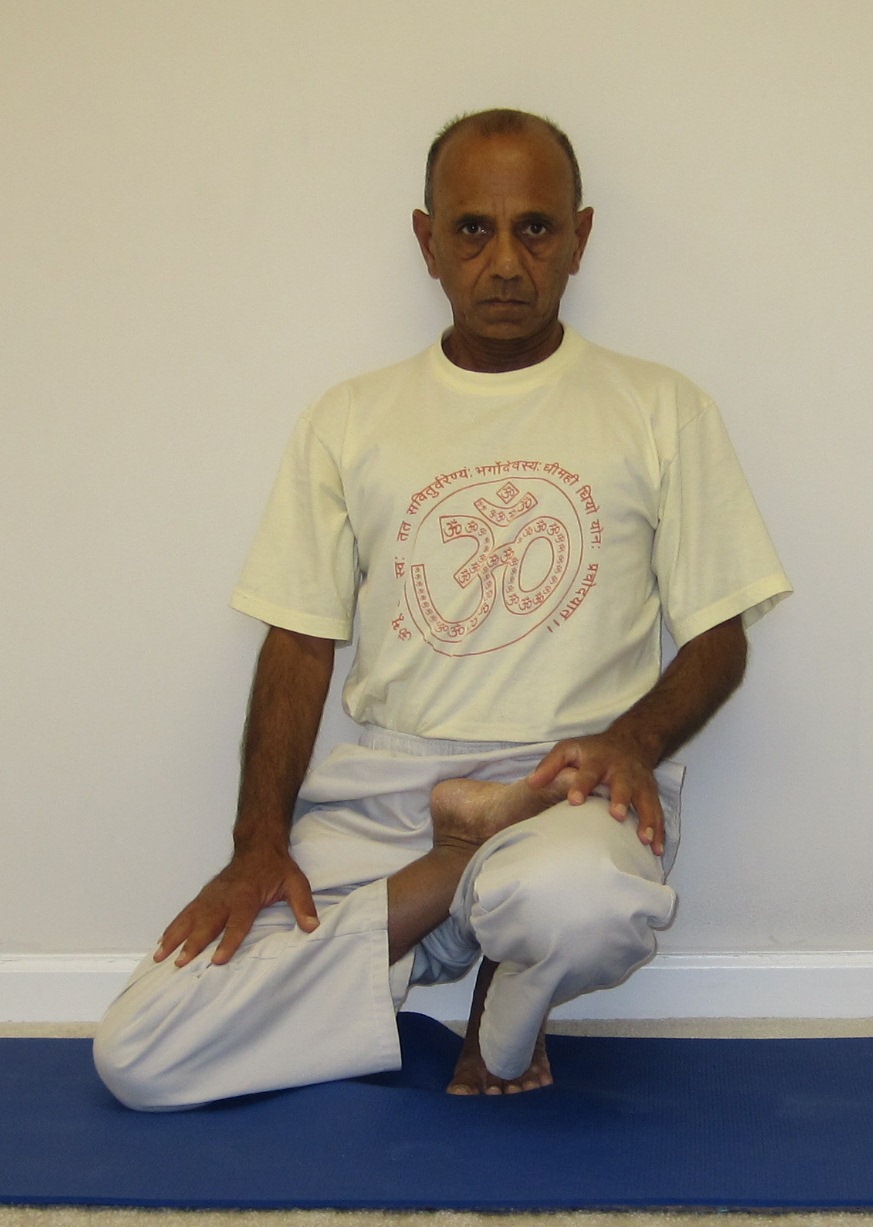
Tiptoe balancing pose
- Start by sitting in a squatting position. Lift the heels up and sit on your toes. Adjust the left heel so it is directly under the perineum.
- Place the right hand on the floor by the side of the right thigh for support. With the left hand lift the right foot up and place the top of the foot on the left thigh. The sole of the right foot should be facing up.
- Getting into this position is itself quite challenging for many beginning students. It requires flexibility in the toes, ankles, knees and hips. If you find it hard to place the foot on the opposite thigh, you may want to rest your back against a wall for support. Alternately, if you happen to be close to a pillar or a railing, you may hold on to the railing for support. The support will allow you to put the foot on top of the opposite thigh without losing balance and falling down.
- Once the right foot is in place on top of the thigh, you can place the left hand also on the floor on the side of the left thigh for additional support.
- In the final position of the pose, try to dynamically move the knee up and down a few times, trying to bring the knee close to the floor with each movement. Finally, you can try to place the knee on the floor and maintain balance.
- Bring the foot down and relax in the squat for a moment. Then repeat the above steps in the other direction.
- Finally relax in a comfortable seated position.
I hope you’d find this ~30-minute sequence of asanas to keep the knees strong and flexible helpful. I’d love to receive your feedback.

Recent Comments