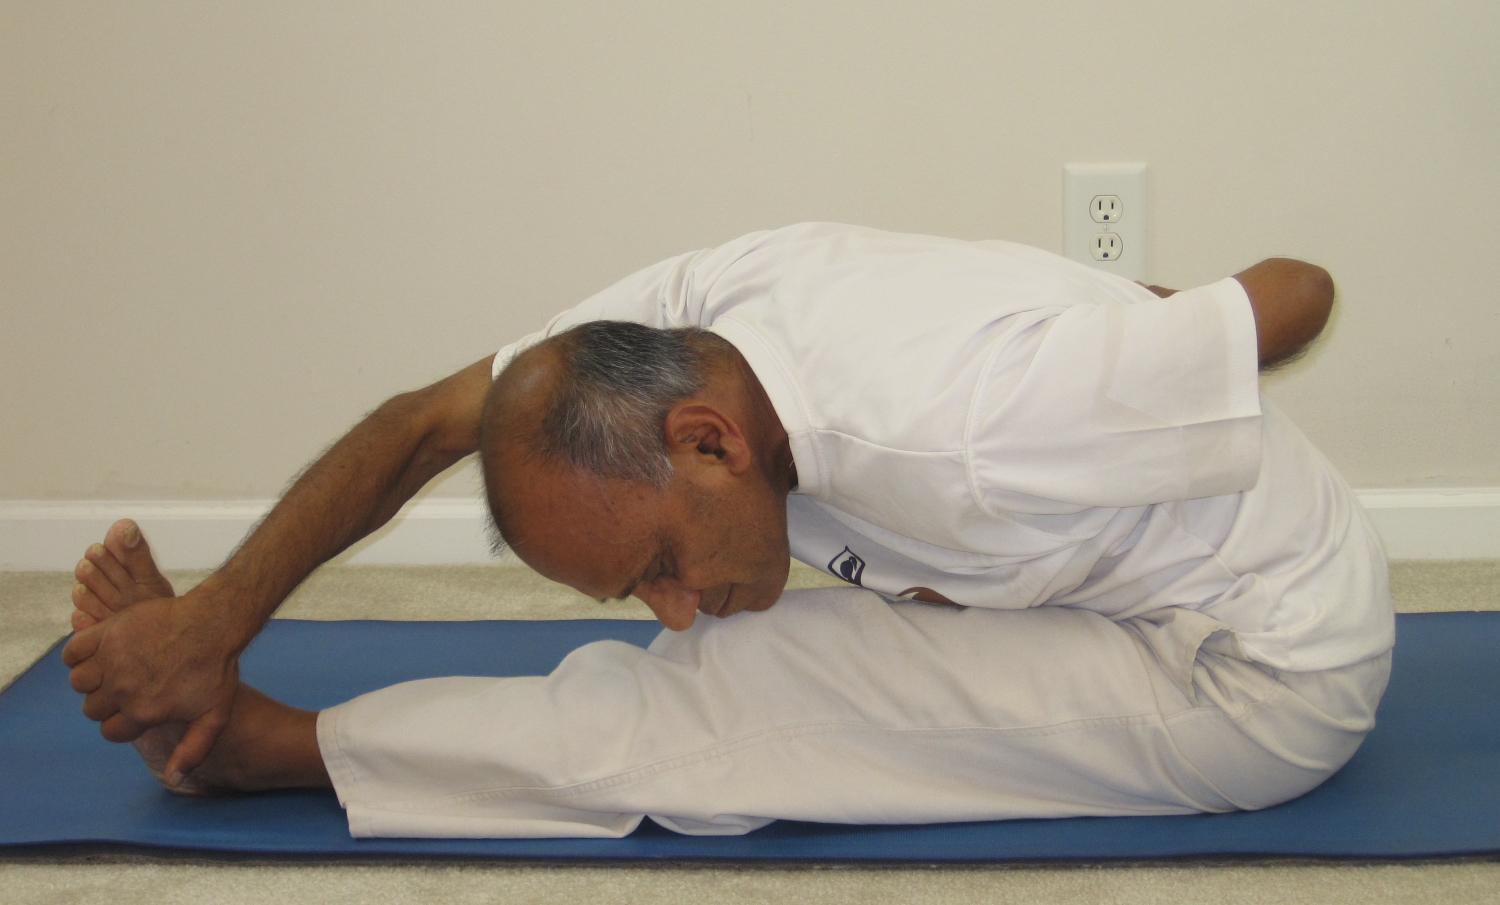
Janu-shirshasana (जानु-शीर्षासन) –
Twisting Janu-shirshasana is a variation on the traditional head-to-knee pose. In this pose, in addition to the forward bending stretch, we also add the element of spinal twist which brings about great relief to any stiffness or mild pain that you might have in your back.
Step-by-step
Twisting Janu-Shirshasana (Twisting head-to-knee pose)

Twisting Head-to-knee pose
Here are the audio instructions –
- Sit on the yoga mat with your legs stretched out in front. Keep the spine upright and as close to being vertical as comfortable.
- Bend the left knee and put the sole of the left foot against the inside of the right thigh, bringing the heel as close to the perineum as comfortable. Try to keep the left knee close to the floor and the right leg fully stretched out.
- Wrap the right arm behind your back and place the left hand on the outside of the outstretched right leg.
- While exhaling, begin to bend forward, bending from the hips, aligning the chest with the right thigh and keeping the spine unrounded. As you are bending forward, slide the left hand towards the foot, keeping it on the outside of the leg.
- If the left hand doesn’t reach the foot, keep it on the outside of the leg wherever it reaches.
- Once you are in the final pose, use your breath as a guide to deepen the experience of the stretch – while inhaling, try to roll the right shoulder back, looking gently over the shoulder. While exhaling, try to drop the chest closer to the thigh in front.
- Hold the final position for 5 to 7 breaths, if possible. Maintain full awareness on the stretch and the breath, paying close attention to the parts of the body where the stretch is felt most. This awareness will help you maintain the pose at a comfortable level and prevent any injury.
- To come out of the pose, while inhaling, begin to slide the hand up the leg and finally come up to the full seated position.
- We’ll now repeat the above steps with the left leg stretched out.
- Bend the right knee and place the sole of the right foot against the inside of the left thigh, bringing the heel as close to the perineum as comfortable. Try to keep the right knee close to the floor and the left leg fully stretched out.
- Wrap the left arm behind your back and place the right hand on the outside of the outstretched left leg.
- While exhaling, begin to bend forward, bending from the hips, aligning the chest with the left thigh and keeping the spine unrounded. As you are bending forward, slide the right hand close to the foot, keeping it on the outside of the leg.
- If the right hand doesn’t reach the foot, keep it on the outside of the leg wherever it reaches.
- Once you are in the final pose, use your breath as a guide to deepen the experience of the stretch – while inhaling, try to roll the left shoulder back, looking gently over the shoulder. While exhaling, try to drop the chest closer to the thigh in front.
- Hold the final position for 5 to 7 breaths, if possible. Maintain full awareness on the stretch and the breath, paying close attention to the parts of the body where the stretch is felt most. This awareness will help you maintain the pose at a comfortable level and prevent any injury.
- To come out of the pose, while inhaling, begin to slide the hand up the leg and finally come up to the full seated position.
- Take a few natural, comfortable breaths and relax.
Contraindications
Avoid this pose in case of diarrhea, asthma and a recent knee, neck or back injury. In case of knee pain, avoid bringing the heel close to the perineum and/or keep a folded blanket under the bent knee for support.
Benefits
The twisting janu shirshasana stretches the back and deeply stretches the back of the legs. The twisting move brings relief to any tension or tightness that you might have in your lower back. This posture calms the mind and emotions, stimulates the nervous, reproductive, endocrine and urinary systems.
Pashchimottanasana

Pashchimottanasana
Pashchimottanasana -पश्चिमोत्तानासन-
Step-by-step
- Sit on your mat and stretch the legs out in front. Try to maintain the spine upright. The feet should be together and the knees straight but not hyper-extended.
- Stretch both the arms out in front and while inhaling raise the arms up all the way above the shoulders. Keeping the spine elongated, while exhaling begin to bend forward, bending from the hips. Finally, hold on to the toes, the ankles, calves or wherever your hands reach. The effort in this pose is to keep the spine unrounded.
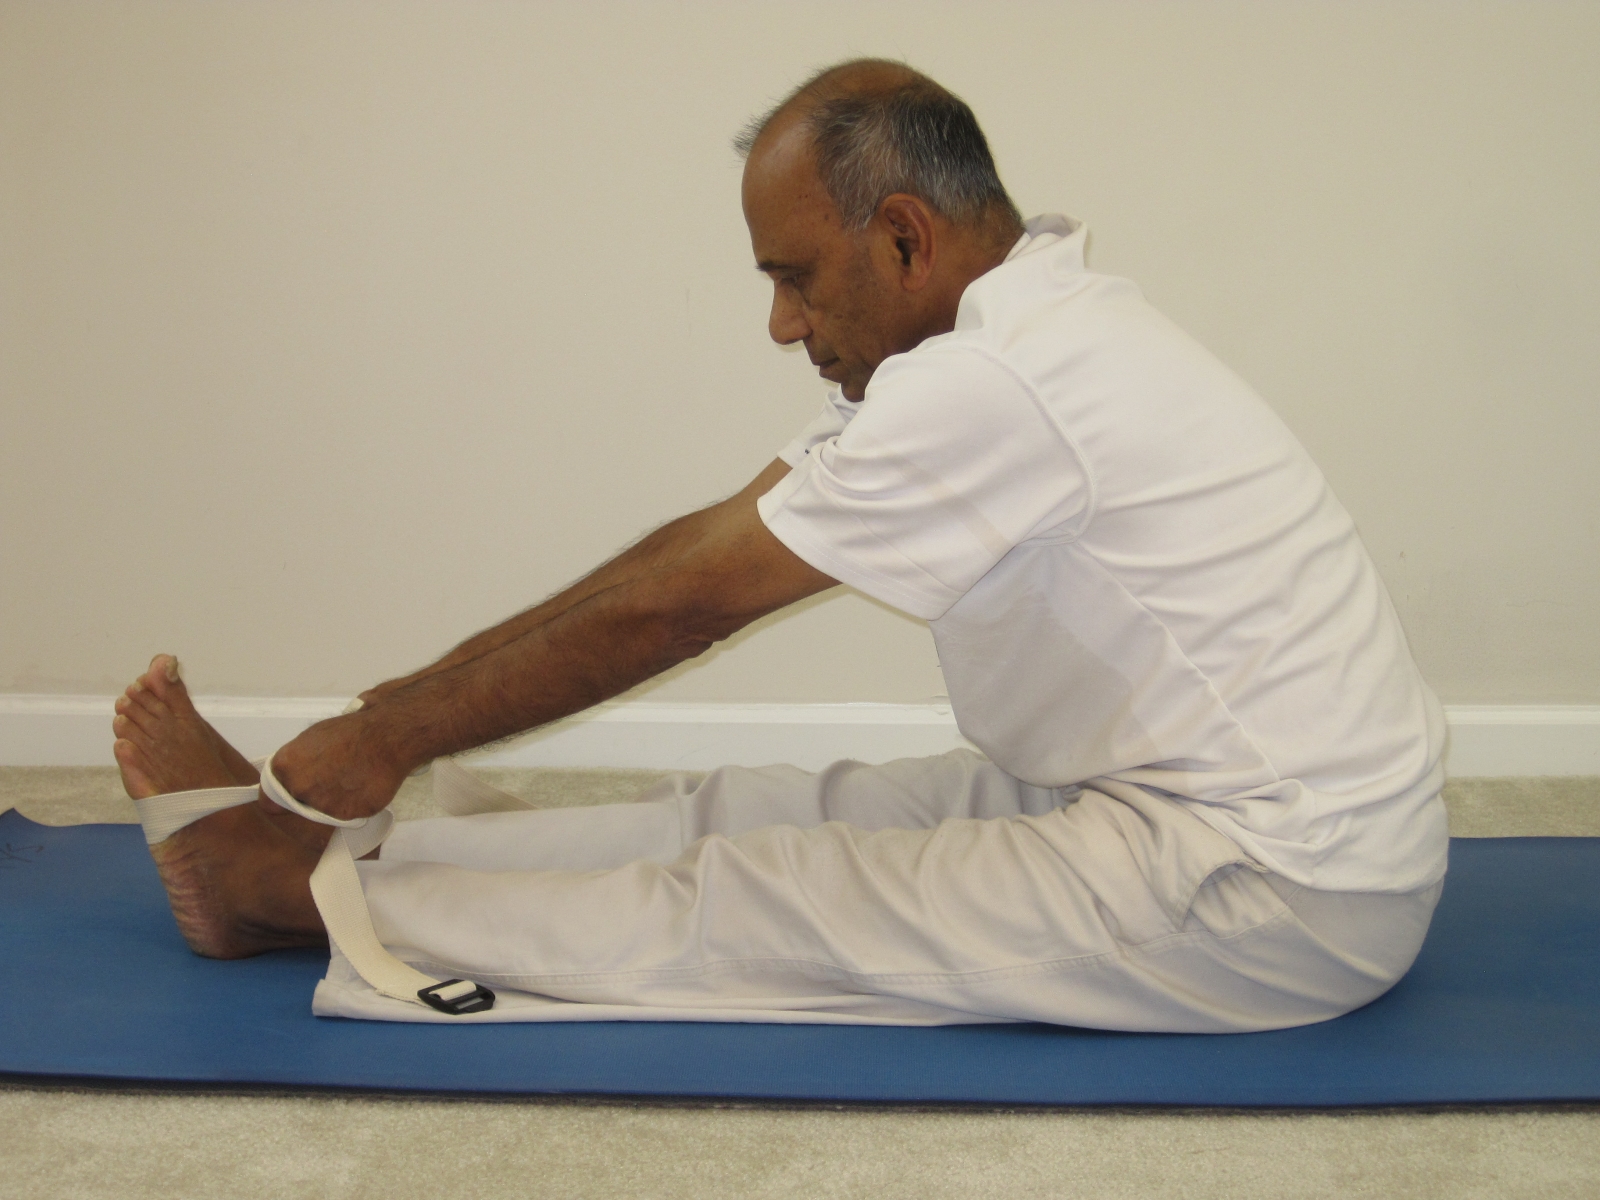
- If your hands do not reach the toes, you may use a strap looped around the soles of the feet to keep the awareness on the spine. While using a strap, keep the elbows straight. Try to keep the knees straight. If it becomes uncomfortable to keep the knees straight, bend them slightly. With practice, you will be able to straighten the knees.
- To enhance the experience of the stretch, use the breath as a guide – while inhaling, lengthen the spine and while exhaling try to drop the chest down. At no time you should feel any strain or pain. Hold the position for about 6 to 8 breaths.
- While you are holding the pose, maintain total awareness on the stretch and the breath. By becoming aware of the part(s) of the body where the stretch is felt most, you will avoid any injury.
- To come out of the pose, stretch the arms out and with an inhalation, begin to straighten the spine up, raising the arms overhead. Finally, release the arms while exhaling and rest for a couple of breaths.

Pashchimottanasana with strap
Contraindications
This pose stretches the spine from the top to its base. Use caution if you have an existing spinal injury and avoid attempting a deeper forward stretch. Pregnant women should spread their feet apart while practicing the forward bend. Avoid the pose in case of slipped disc, sciatica, diarrhea and asthma.
Benefits
Pashchimottanasana helps open the hips and groins while deeply stretching the legs and back. Because this pose requires the pelvis to turn into the extended legs while tipping forward, it stretches the hip joints and groins in several directions at once. And because the back of the extended legs, hamstrings in particular, and the front of the spine must lengthen to go deeply into this forward bend, it’s very effective at stretching those areas. This asana also tones the liver, spleen, pancreas, adrenal glands and kidneys and stimulates the pelvic organs and sex glands while cooling the body and quieting the mind. It stimulates circulation to the nerves and muscles of the spine.
At a subtler level, this asana is traditionally known for its value in harmonizing the nerves and the pranic nadis (the psychic nervous system) in the body and as such is helpful in preparing for meditation.
Recent Comments