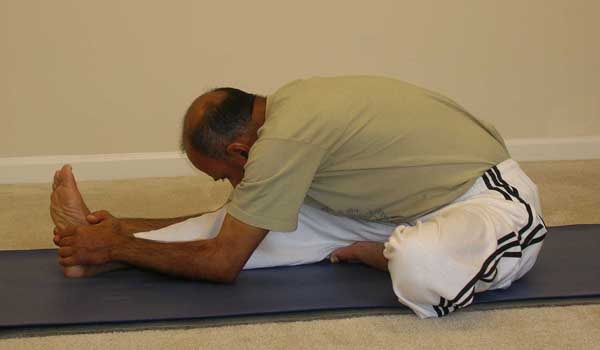
Head-to-knee pose
In a previous article, I wrote about the basic, classical technique of practicing the Janushirshasana (head-to-knee pose). In today’s article, I will be presenting a few variations to the standard pose that you can add to your practice. As always, try to maintain full awareness at the body, breath and the mind level so you don’t overdo any of the poses.
I hope you will enjoy practicing with the video.
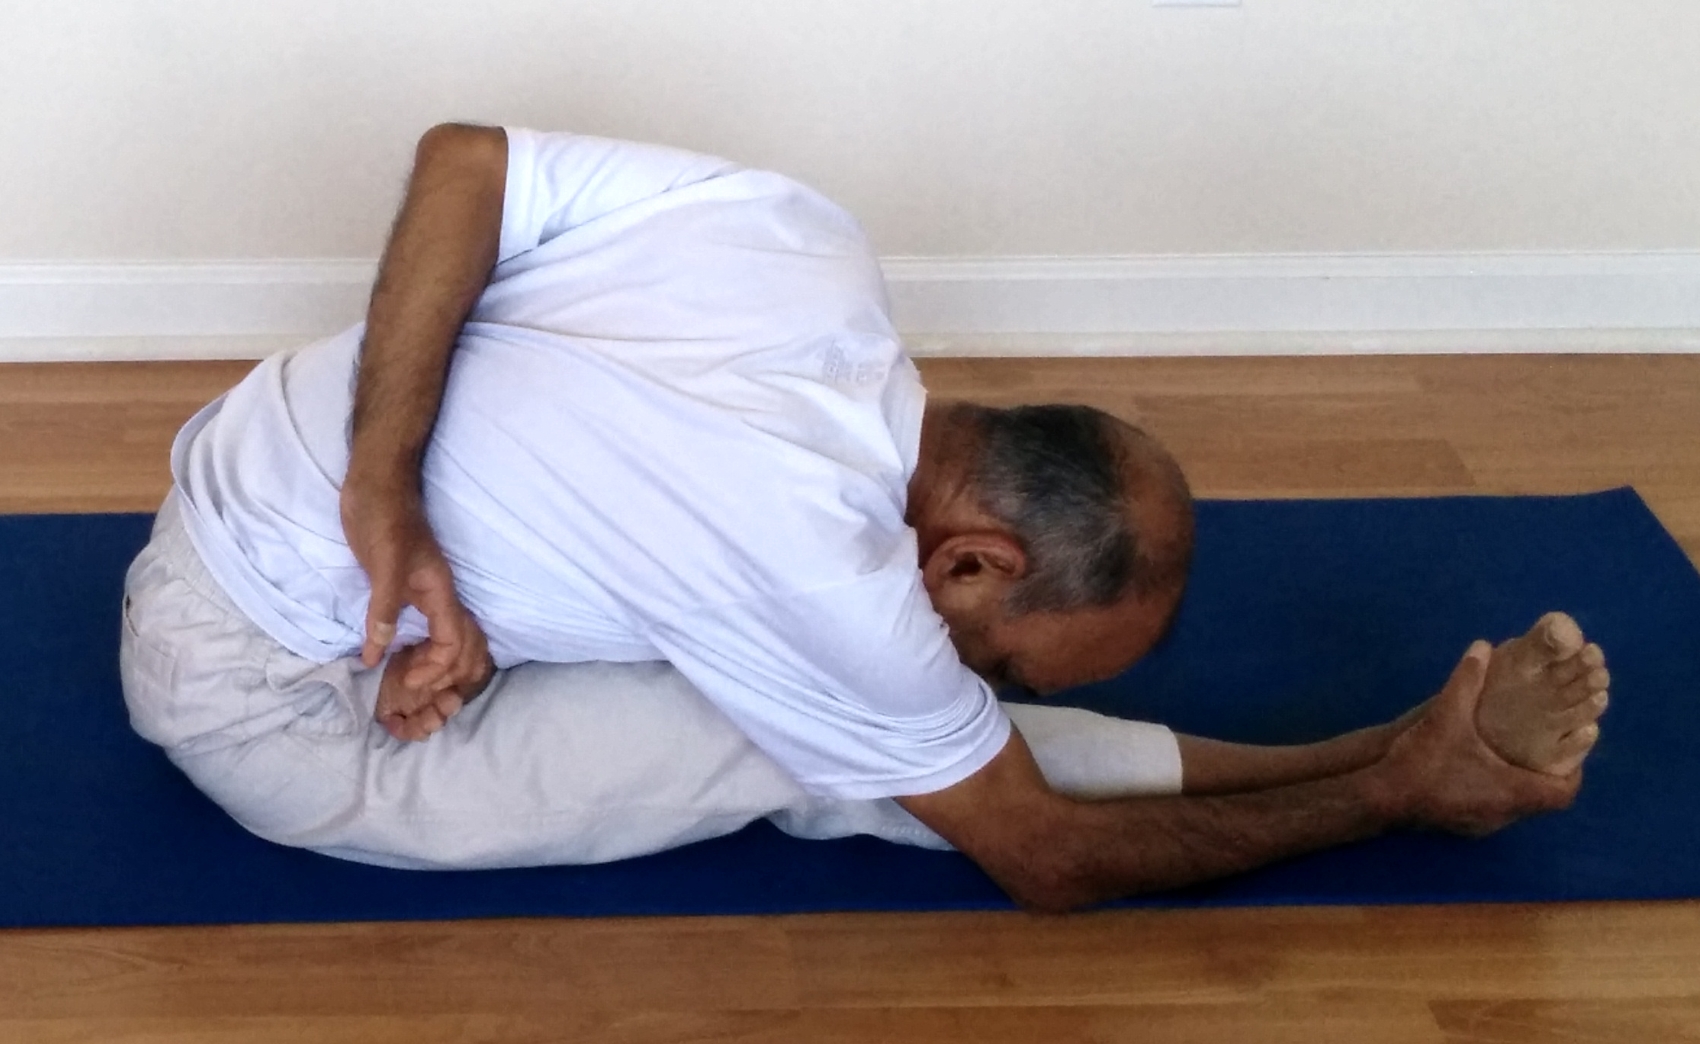
Janushirshasana variation #1 – Baddha Padma (bound lotus) Janushirshasana

Bound Lotus Head-to-knee pose
Step-by-step
- Sit on the yoga mat with your legs stretched out in front. Keep the spine upright and as close to being vertical as comfortable.
- Bend the left knee and place the foot on top of the right thigh in the half lotus position, bringing the heel as close to the hip joint as comfortable. Try to keep the left knee close to the floor and the right leg fully stretched out on the floor.
- Wrap the left arm behind the back and try to hold the big toe of the left foot. It may help to use the right elbow or the hand to push the foot further back so the left hand can get to the toe easily. In case you are not able to hold the big toe, keep the arm wrapped behind the back with the left hand as close to the big toe as comfortable.
- While exhaling, extend the right arm in front and begin to bend forward, bending from the hips, aligning the chest with the right thigh and keeping the spine unrounded. Try to slowly reach the the right foot. If the hand doesn’t reach the toes, try to get to the ankles or calves depending upon your level of flexibility.
- Once you are in the final pose, use your breath as a guide to deepen the experience of the stretch – while inhaling, elongate the spine and while exhaling allow the gravity to pull the chest down closer to the thigh.
- Hold the position for 5 to 7 breaths, if possible. Maintain full awareness on the stretch and the breath, paying close attention to the parts of the body where the stretch is felt most. This awareness will help you maintain the pose at a comfortable level and prevent any injury.
- To come out of the pose, begin to come up slowly while inhaling. Finally, release the arms, stretch both the legs in front and relax for a few breaths.
- Now repeat the above steps with the other leg stretched out.
- After completing the sequence on both sides, take a few natural, comfortable breaths and relax.
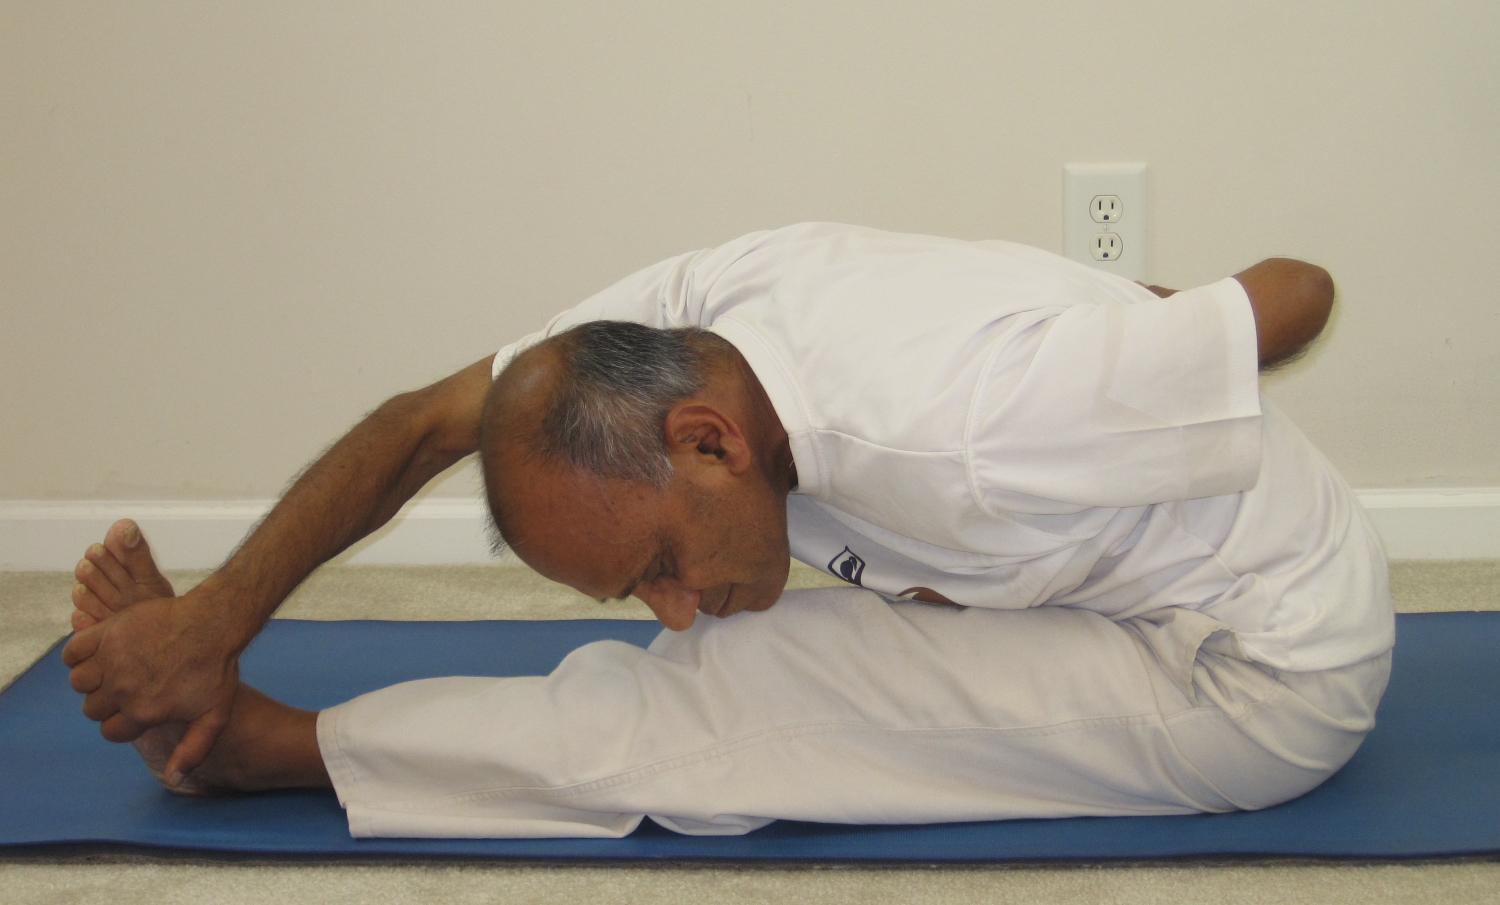
Janushirshasana variation #2 – Twisting Janushirshasana

Twisting Head-to-knee pose
Step-by-step

Twisting Head-to-knee pose
- Sit on the yoga mat with your legs stretched out in front. Keep the spine upright and as close to being vertical as comfortable.
- Bend the left knee and place the left foot on top of the right thigh in the half lotus position with the heel as close to the hip joint as comfortable. If placing the foot on top of the thigh doesn’t feel comfortable, you can position the sole of the foot against the thigh. Try to keep the left knee close to the floor and the right leg fully stretched out on the floor.
- Wrap the right arm behind your back and place the left hand on the outside of the outstretched right leg.
- While exhaling, begin to bend forward, bending from the hips, aligning the chest with the right thigh and keeping the spine unrounded. As you are bending forward, slide the left hand towards the foot, keeping it on the outside of the leg. Finally hold the outside of the foot.
- If the left hand doesn’t reach the foot, keep it on the outside of the leg wherever it reaches.
- Once you are in the final pose, use your breath as a guide to deepen the experience of the stretch. While inhaling, deepen the twisting experience by trying to roll the right shoulder back, looking gently over that shoulder. While exhaling, try to drop the chest closer to the thigh in front to deepen the forward bending experience.
- Hold the final position for 5 to 7 breaths, if possible. Maintain full awareness on the stretch and the breath, paying close attention to the parts of the body where the stretch is felt most. This awareness will help you maintain the pose at a comfortable level and prevent any injury.
- To come out of the pose, while inhaling, slowly begin to come up, sliding the hand up the leg and finally come up to the full seated position. Relax for a couple of breaths.
- We’ll now repeat the above steps with the left leg stretched out.
- Bend the right knee and place the right foot on top of the left thigh in the half lotus position with the heel as close to the hip joint as comfortable. If placing the foot on top of the thigh doesn’t feel comfortable, you can position the sole of the foot against the thigh. Try to keep the right knee close to the floor and the left leg fully stretched out.
- Wrap the left arm behind your back and place the right hand on the outside of the outstretched left leg.
- While exhaling, begin to bend forward, bending from the hips, aligning the chest with the left thigh and keeping the spine unrounded. As you are bending forward, slide the right hand close to the foot, keeping it on the outside of the leg. Finally try to hold the outside of the foot.
- If the right hand doesn’t reach the foot, keep it on the outside of the leg wherever it reaches.
- Once you are in the final pose, use your breath as a guide to deepen the experience of the stretch. While inhaling, deepen the twisting experience by trying to roll the left shoulder back, looking gently over that shoulder. While exhaling, try to drop the chest closer to the thigh in front to deepen the forward bending experience.
- Hold the final position for 5 to 7 breaths, if possible. Maintain full awareness on the stretch and the breath, paying close attention to the parts of the body where the stretch is felt most. This awareness will help you maintain the pose at a comfortable level and prevent any injury.
- To come out of the pose, while inhaling, begin to slide the hand up the leg and finally come up to the full seated position.
- Take a few natural, comfortable breaths and relax.
Janushirshasana variation #3 – Parivritta (Revolving) Janushirshasana – legs spread out wide

Revolving Head-to-knee pose
Step-by-step
- Sit on the yoga mat with your legs stretched out in front. Keep the spine upright and as close to being vertical as comfortable.
- Slowly spread the legs wide apart, trying to keep the legs straight and firmly on the ground.
- While inhaling stretch the arms out horizontal, in line with the shoulders.
- While exhaling, turn the body to the left, stretch the right arm in front and place it on the outside of the left leg. You can either place the left hand behind your back on the floor or wrap it behind the back.
- On every exhalation, make a gentle effort to slide the right hand toward the left foot. In the final position, try to hold the outside of the left foot. If the hand does not reach the foot, keep it on the outside of the leg as far as it goes.
- Wrap the right arm behind your back and place the left hand on the outside of the outstretched right leg.
- While exhaling, begin to bend forward, bending from the hips, aligning the chest with the right thigh and keeping the spine unrounded. As you are bending forward, slide the left hand towards the foot, keeping it on the outside of the leg. Finally hold the outside of the foot.
- If the left hand doesn’t reach the foot, keep it on the outside of the leg wherever it reaches.
- Once you are in the final pose, use your breath as a guide to deepen the experience of the stretch. While inhaling, deepen the twisting experience by trying to roll the right shoulder back, looking gently over that shoulder. While exhaling, try to drop the chest closer to the thigh in front to deepen the forward bending experience.
- Hold the final position for 5 to 7 breaths, if possible. Maintain full awareness on the stretch and the breath, paying close attention to the parts of the body where the stretch is felt most. This awareness will help you maintain the pose at a comfortable level and prevent any injury.
- To come out of the pose, while inhaling, slowly begin to come up, sliding the hand up the leg and finally come up to the full seated position. Relax for a couple of breaths.
- Now repeat the above steps on the other side.
- After completing the sequence on both sides, take a few natural, comfortable breaths and relax.
Contraindications
Avoid this pose in case of diarrhea, asthma and a recent knee, neck or back injury. In case of knee pain, avoid bringing the heel close to the perineum and/or keep a folded blanket under the bent knee for support.
Benefits
- Calms the brain and helps relieve mild depression
- Stretches the entire back, shoulders, hamstrings, and groins
- The twisting variations stimulate the liver, pancreas and the kidneys
- The wide angle variation provides a nice stretch for the inside of the knees, legs and thighs
- Massages the intestines and improves digestion
- Stimulates the nervous, reproductive, endocrine and urinary systems
- Helps relieve the symptoms of menopause
- Relieves anxiety, fatigue, headache, menstrual discomfort
- Therapeutic for high blood pressure, insomnia, and sinusitis
- During pregnancy, helps stretch and strengthen the back muscles, hips, thighs and legs (up to second trimester)
Recent Comments