The quadriceps, a group of four muscles located on the front of the thigh, play a crucial role in activities such as walking, running, jumping, and cycling. As we know from our yoga practice, strong and flexible quads can help us do many of the yoga asanas more comfortably. Healthy quads can help in the mobility and health of the knees, hips and the spine.
The quads can become tight and inflexible for a variety of reasons such as prolonged sitting; overuse and repetitive activities; inactivity and lack of stretching; recent injury; age etc.
In this article, I am presenting a sequence of asanas that will help develop strong and flexible quadriceps.
I hope you’ll enjoy practicing with the video demonstration.
In this 20-minute video, we’ll be practicing the following asanas:
- Marjarasana (cat and cow)
- Ushtrasana (Half camel and full camel)
- Vajrasana variation (lift butts up)
- Tip-toe (lift butts up)
- Surya Namaskar (in the lunge position, pulling heels to the buttocks)
- Chair against wall
- Supta vajrasana (reclining vajrasana)
- Setu-bandhasana (bridge pose)
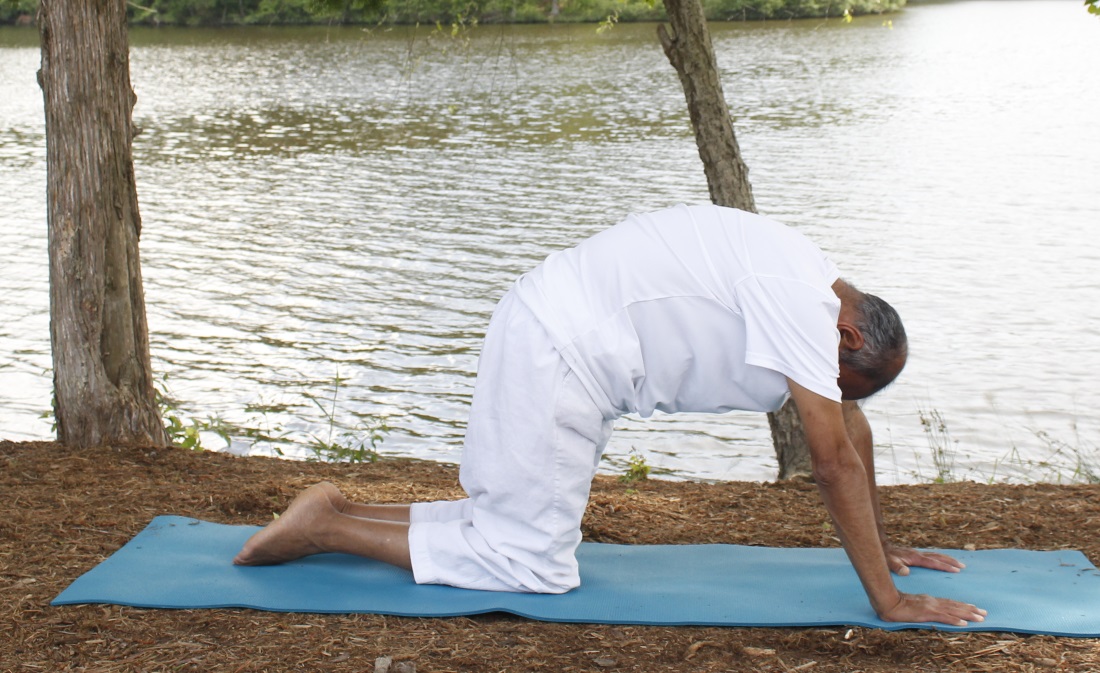
Cat and cow (marjarasana)
- Come on to all fours on your mat with your hands positioned vertically under the shoulders and the knees vertically under the hips. Keep the knees hip width apart and the hands shoulder width apart. Spread the fingers wide and try to keep the palms flat and firm on the ground.
- In the starting position, the spine is flat like a tabletop. While inhaling, lift the head and chest up, tail bone up, and lower the navel down toward the ground. This will create an arch in the spine. Think of it as a little valley in the spine.
- While exhaling, lower the chin down to the chest, tuck the tail bone in, and lift the navel up. This will create a rounding of the spine. Think of it as creating a small hill on the spine.
- Using the “ujjayi” pattern of breath, keep the breathing long and smooth and keep the movements of the spine synchronized with the breath. At the end of each inhalation and exhalation, give a small pause so you can become aware of the transition of the breath as well as of the spinal movement.
- Continue these movements for 5-6 breaths. Finally bring the spine back to the neutral, flat tabletop position and pause there for a couple of breaths. Then sit comfortably in a cross-legged position and relax.
Please visit my blog here for more details on the basic pose as well as some variations of the pose.
Ushtrasana (dynamic half camel pose)
- Start in the kneeling position. Place the hands on the waist, joining the thumbs together at the soft spot on the lower part of the spine. Throughout the practice, try to maintain the thighs vertical.
- While inhaling, push the thumbs forwards, while tilting the head back, creating an arch in the spine.
- While exhaling, straighten the spine and bring the buttocks on top of the heels.
- There is a normal tendency to bend forward while lowering the buttocks down to the heels. In order to develop strong quadriceps, make an effort to keep the spine vertical, without bending forward, while lowering the buttocks.
- Again, while inhaling, raise the buttocks up, pushing with the thumbs forward, tilt the head back, creating an arch in the spine.
- Repeat the above movements 5-6 times, if comfortable. Finally rest in the Vajrasana.
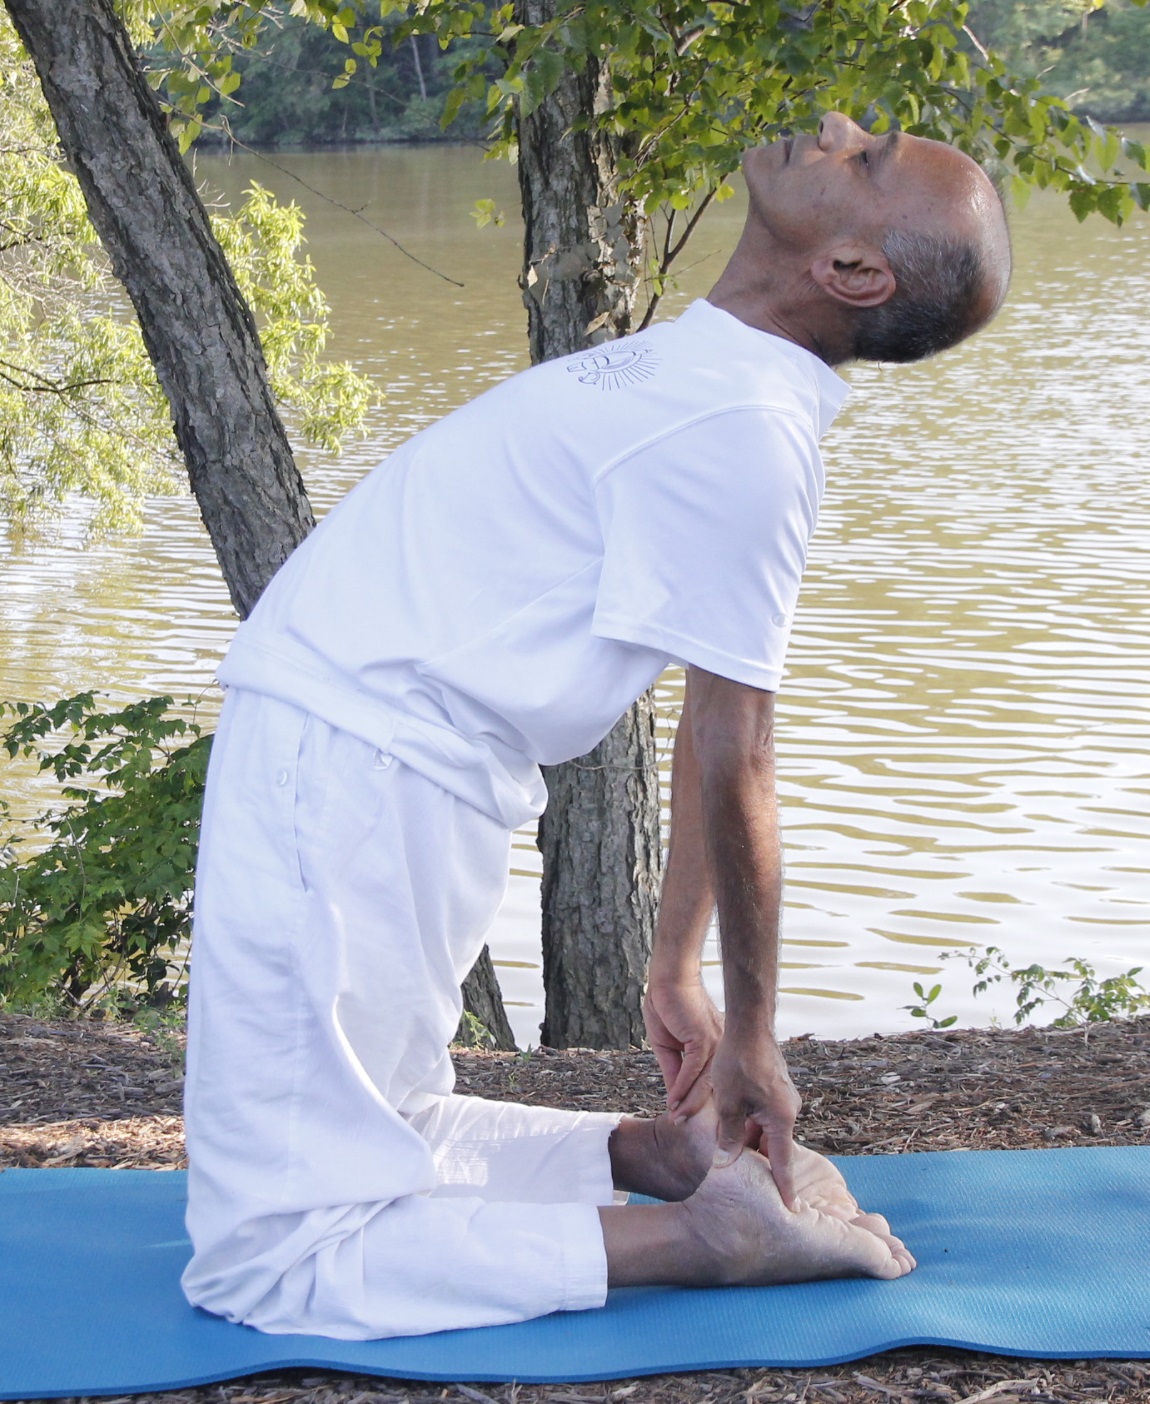
(Ushtrasana) Full camel Pose
- Sit on the mat in Vajrasana (Diamond Pose)
- Lift your buttocks up and kneel with your knees hip width apart keeping the thighs vertical. Throughout the pose try to keep the thighs perpendicular to the floor.
- Rest your hands on the buttocks, fingers pointing down. Inhale and lift your chest up by rolling the shoulders back so the shoulder blades are close to each other. Tilt the head back.
- Slide one hand down and try to reach the corresponding heel. Then slide the other hand also, now holding both the heels.
- In the final position, make an effort again to push the buttocks forward so the thighs remain vertical.
- Stay in the final pose for 5 to 6 breaths or as long as comfortable. Relax for a few breaths.
- Repeat the pose two more times.
Please visit my blog here for some more optional variations and modifications to the camel pose.
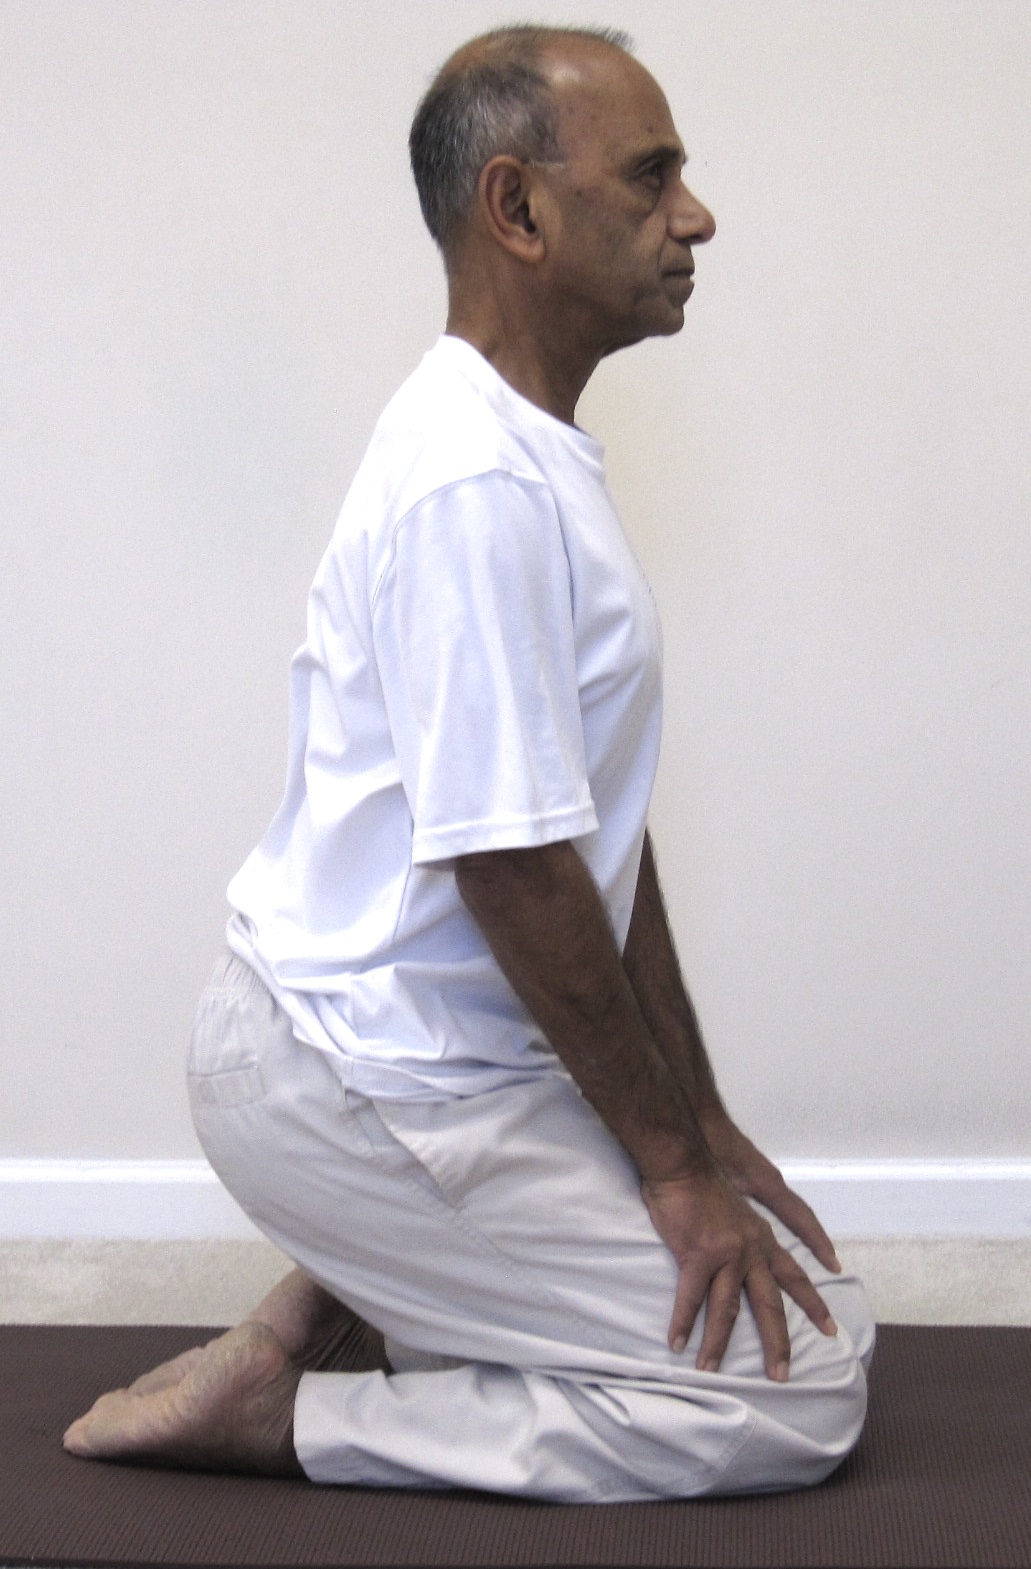
Vajrasana variation for a deep quad stretch
Vajrasana is a simple pose and yet challenging for those with tight quads, knees or ankles. The technique is to sit on the heels with the tops of the feet flat on the ground.
If you are not comfortable getting into the pose, you may want to try placing a cushion under the feet. To make it easier, you may additionally place a cushion between your buttocks and heels as well. If even that doesn’t work, you can try sitting on a high bolster and then try to bring the top of the feet on the ground.
Once you are in the pose, it provides a nice stretch for the quads and the ankles.
For a deep quad stretch, while sitting in Vajrasana, lift your buttocks about one to two inches above the heels and hold this position for as long as comfortable. Within a short time you will start feeling a slight burning type sensation in the quad area indicating a deep stretch of the muscles.
Tip-toe quad stretch
This stretch is very similar to the one above. Here, we begin by getting into the tip-toe position with the buttocks resting on the heels. Now, lift your buttocks about two inches above the heels and hold this position for as long as comfortable. Within a short time, you will start feeling a slight burning type sensation in the quad area indicating a deep stretch of the muscles.
Surya namaskara with quad stretch in the lunge position
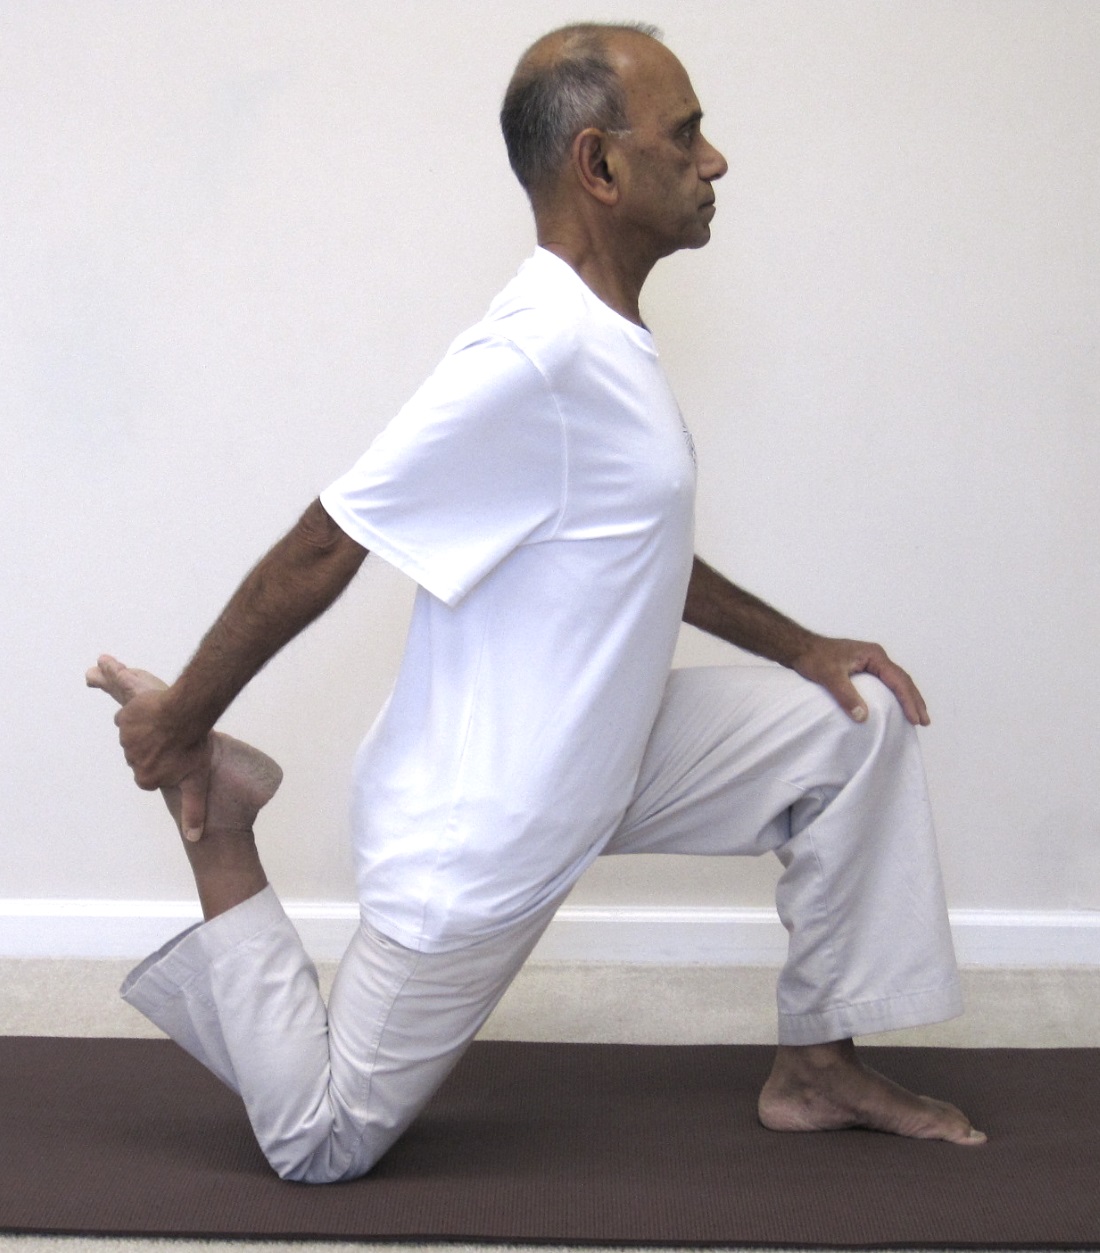
Lunge – holding ankle 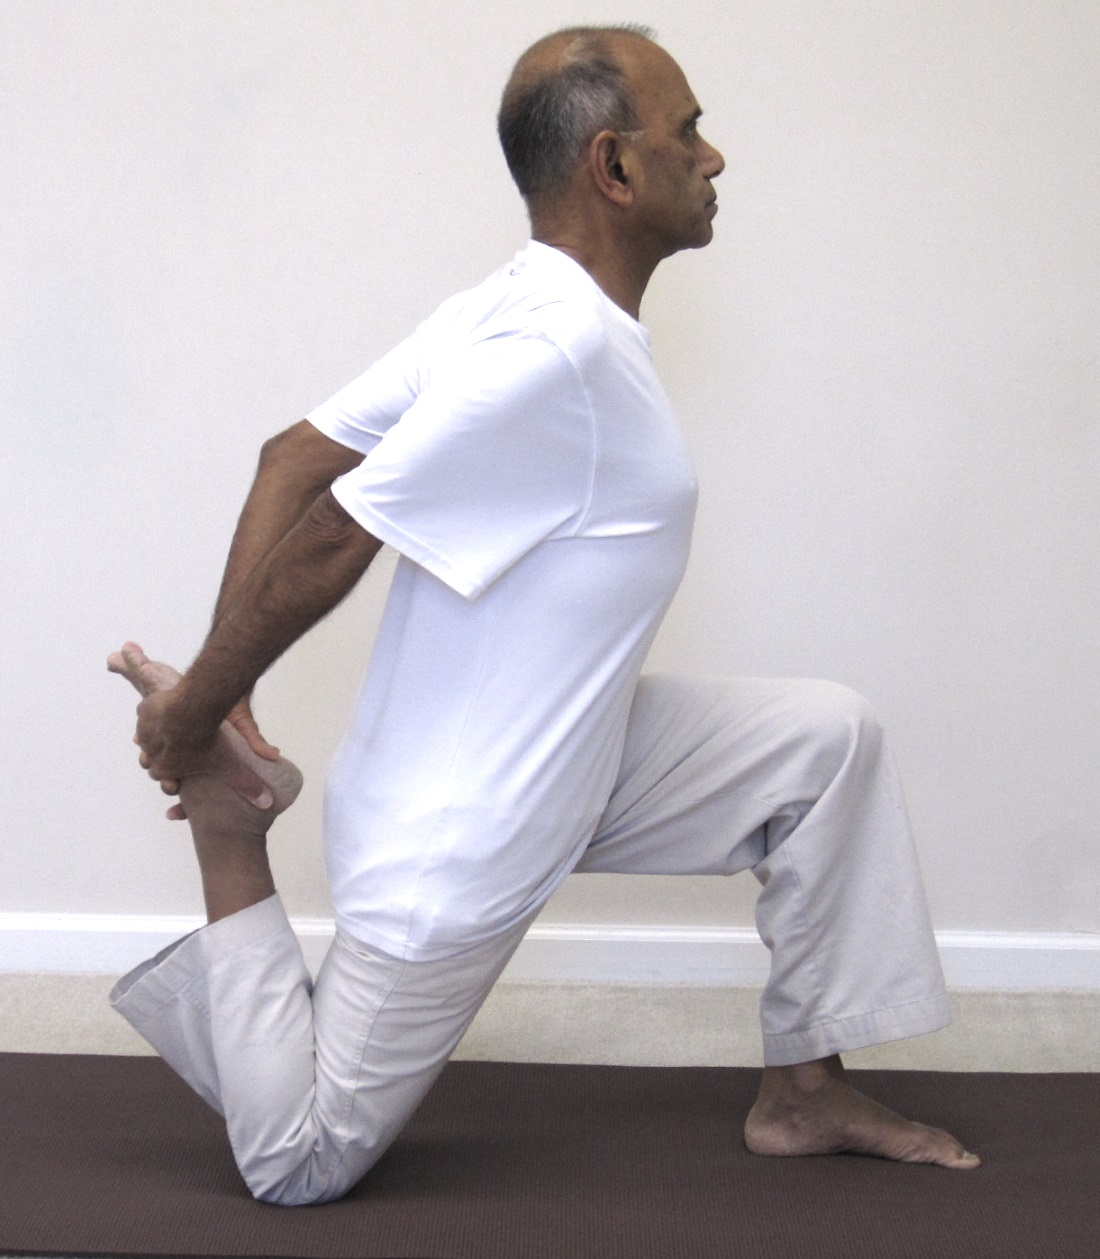
Holding ankle with two hands
We’ll practice two rounds of Surya Namaskara. The first one is a basic round and will help us stretch and loosen the body in a gentle manner. In the second round, to get a good stretch for the quad area, follow the following variation from the lunge position. Please follow the video for more detailed instructions
- When in the lunge position, for a deep stretch, try to place the knee as far back as comfortable.
- Lift the back foot up and try to hold the ankle with one hand. When the right foot is back, hold the right ankle with the left hand and place the right hand on the knee with the arm straight. Keep the shoulders rolled back with the spine upright, or even rolled back slightly.
- If it feels comfortable, you may attempt to hold the ankle with both hands.
- If the floor feels too harsh for the knees, you may like to keep a folded blanket or a cushion under the knee before lifting the foot up.
- If you are unable to hold on to the ankle with the hands, you can use a strap to hold the ankle.
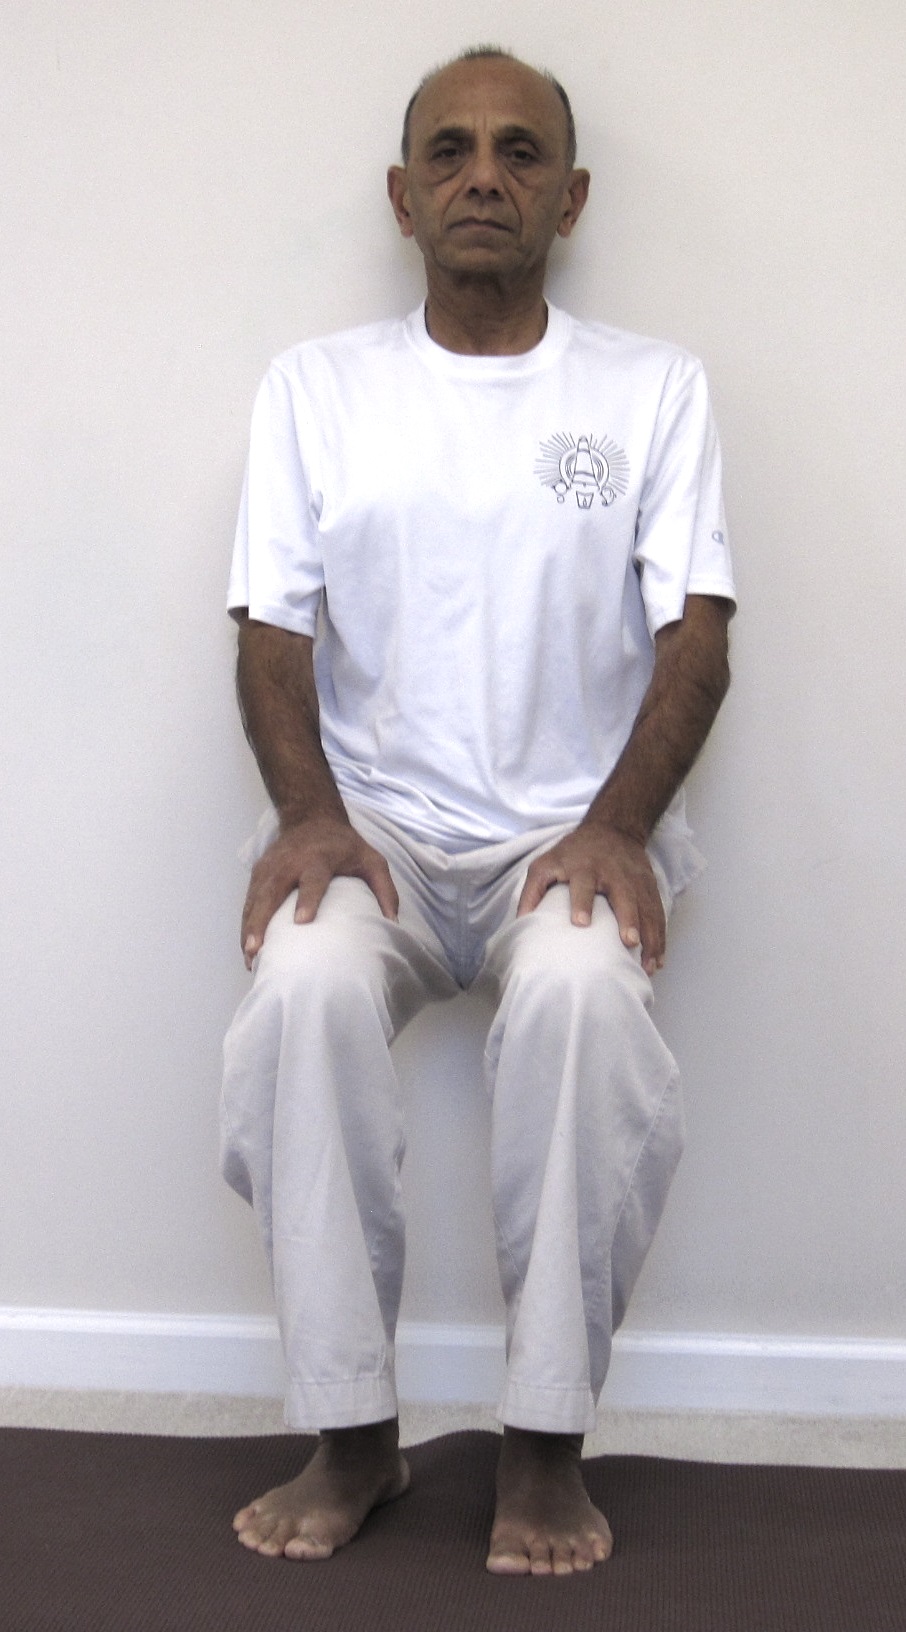
Chair against the wall
Even though this is a very simple asana to practice, it is, in my opinion, perhaps the most effective in building strong upper thighs.
- Begin by resting the back, shoulders and the head against the wall, the feet about 10-12 inches away from the wall.
- Keep the feet and the knees parallel to each other, hip distance apart.
- Slowly begin to slide the back down the wall until the knees are bent at 90 degrees. Make any necessary adjustments to the position of the feet that will bring the thighs parallel to the floor. Place the hands on the knees or thighs. Optionally, you can raise the arms vertically up for a deeper stretch to the thighs.
- Stay in the pose for as long as it comfortable. After a short while, you may begin to feel a slight burning sensation in the upper thighs. This is normal and indicates that the quads are being worked on.
- To come out of the pose, gradually come back up to a standing position.
- When the body is back to a relaxed state, repeat the above steps one more time.
- Relax briefly either in Shavasana (on the back) or in a sitting position.
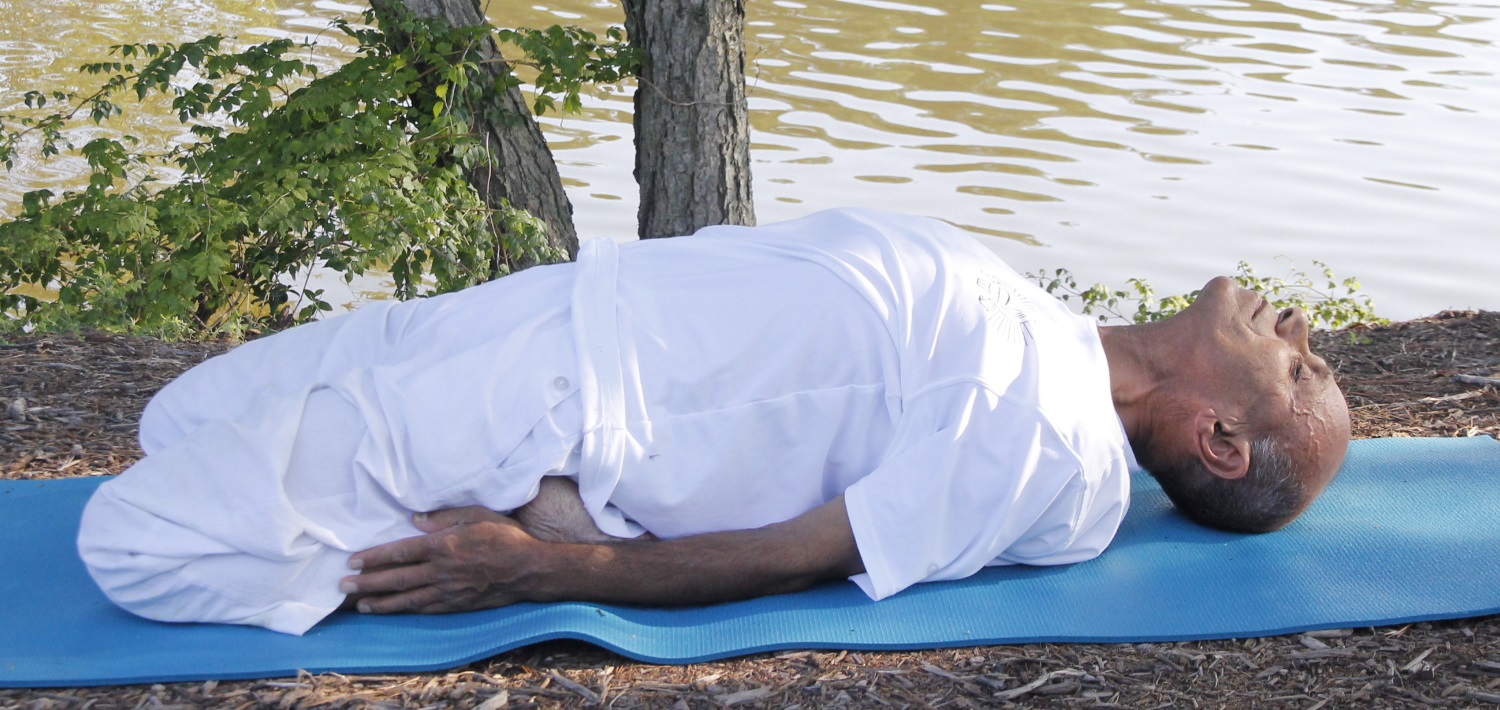
Supta Vajrasana (reclining vajrasana)
Supta Vajrasana takes the quad stretch a step further and deeper. So, if you are unable to sit in either Vajrasana or Veerasana, then obviously you shouldn’t be attempting the reclining version of the pose.
To get into the pose, begin by sitting in Vajrasana. Now, start leaning the torso backwards until you can rest the elbows on the ground behind you. With the forearms resting on the ground, begin to slide the hands toward the feet while at the same time trying to lower the back of the head to the ground. This position is also considered to be a variation on the fish pose (Matsyasana) which is practiced as the counter pose for the Shoulder Stand (Sarvangasana). In this position, the chest is lifted up and you are trying to maintain the knees on the ground and also close to each other.
In a minor variation of the pose, try to slide the shoulders back until the back is fully resting on the ground. As you do that, your knees may come off the floor. Again, the effort is still to keep the knees on the ground and, if possible, close to each other.
For a slightly different experience of this stretch, you can practice the pose starting in the Virasana (hero pose).
This reclining pose provides a deep stretch to the quads, knees and the ankles.
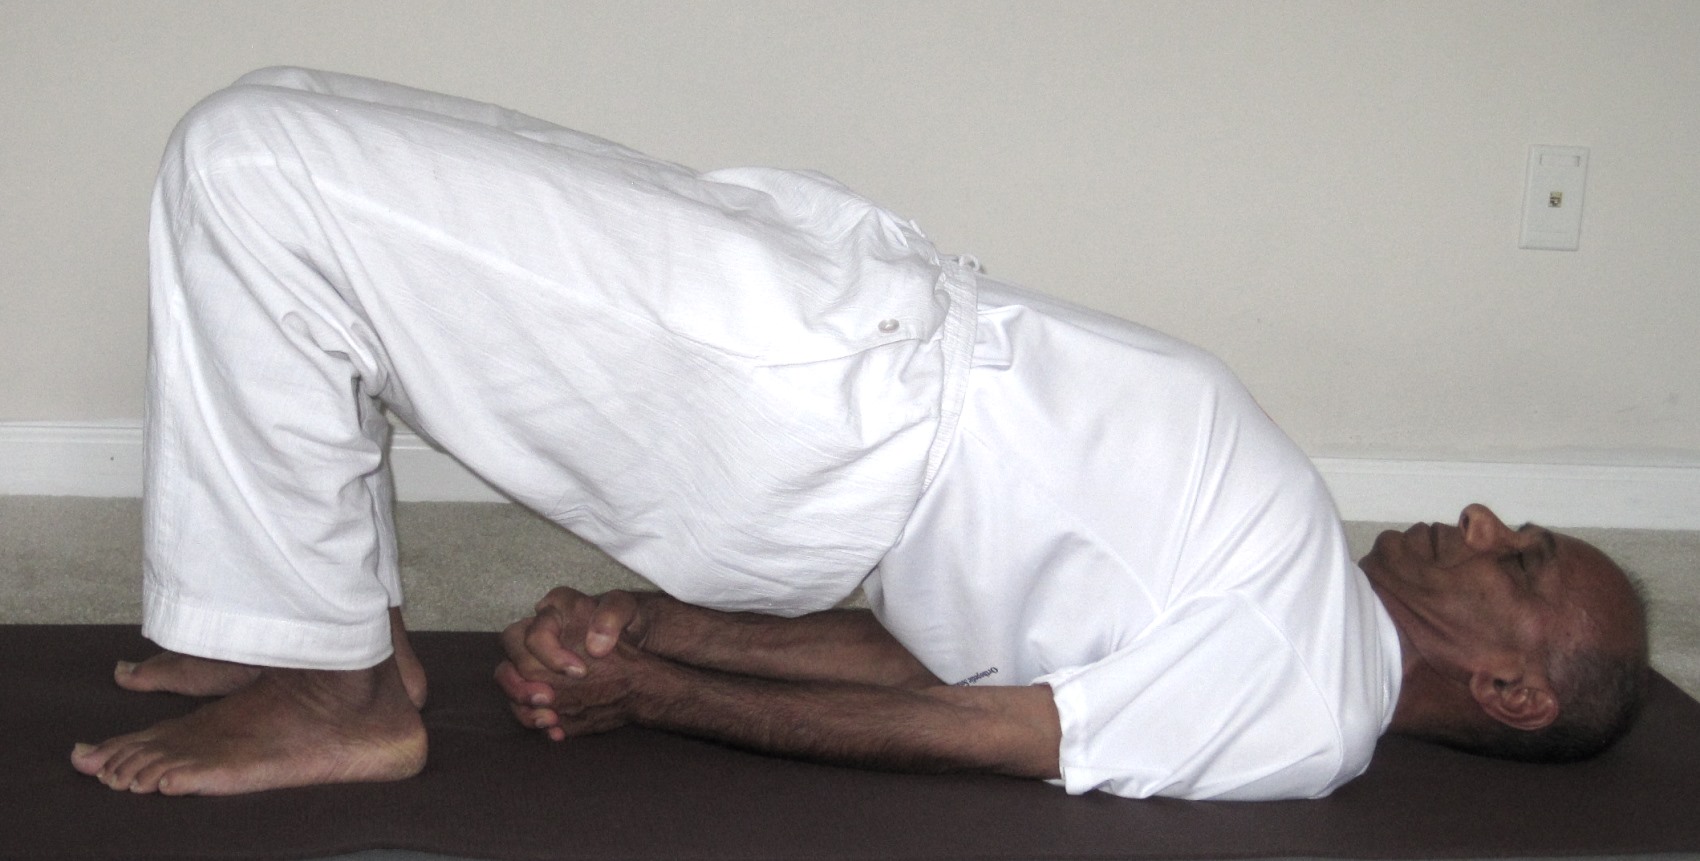
Setu-bandhasana (bridge pose)
- Lie down flat on your back with arms alongside the body, palms facing down.
- Bend your knees and place the feet flat on the floor. Keep your feet hip width apart, parallel to each other, and with the heels as close to the buttocks as possible.
- Pressing the upper arms and feet into the floor, while inhaling begin to lift your buttocks up towards the ceiling. Try to distribute your weight equally across the inside and outside of your feet.
- If you comfortably can, clasp the hands under your back, interlock the fingers and pull the hands away, toward the feet. Keep the arms on the ground and the elbows straight. This position of the hands naturally helps roll the shoulders back and lift the chest up higher.
- If you are unable to clasp the hands together, keep the arms parallel to each other with the palms facing down, just as before.
- Once in the final position, continue to breathe your normal breathing pattern. Rolling from side to side try to roll the shoulders back, bringing the shoulder blades close to each other. This will help lift the chest up higher and bring the chest closer to the chin.
- In the final position, maintain a gentle pressure with the heels and the upper arms to keep the buttocks and chest lifted up. Try to stay in the final position for about 8 to 10 breaths, if comfortable.
- To come out of the pose, while exhaling, slowly release the buttocks and the back down and rest in Shavasana for a few breaths.
Please visit my blog here for more details of the basic pose and some of the variations.

Recent Comments