I hope you’ve been enjoying practicing the seated hip opening poses presented earlier in part 1 and part 2 of this series of articles. In today’s post, part 3, I am presenting the following additional hip opening poses from the seated position:
- Wide-legged Revolving head-to-knee pose (Prasarita Parivritta Janu-shirshasana)
- Wide-legged forward bending pose (Upavishta Konasana)
- Spinal twist (Ardha-matsyendrasana)
- Sage Pose (Marichyasana)
I hope you will enjoy practicing with the video presentation.
Parivritta Janushirshasana (Revolving head-to-knee pose)
Please visit my blog post here to learn about the different variations of the Janu-shirshasana (head-to-knee pose) that are commonly practiced.

Revolving Head-to-knee pose
Step-by-step
- Sit on the yoga mat with your legs stretched out in front. Keep the spine upright and as close to being vertical as comfortable.
- Slowly spread the legs wide apart, trying to keep the legs straight and firmly on the ground.
- While inhaling stretch the arms out horizontal, in line with the shoulders. Pause briefly.
- While exhaling, turn the body to the left, stretch the right arm in front and place it on the outside of the left leg. You can place the left hand either behind your back on the floor or wrap it behind the back. Keep the chest lined directly on top of the thigh.
- Make a gentle effort to slide the right hand toward the left foot. If the hand does not reach the foot, keep it on the outside of the leg as far as it goes. Pause briefly in the final pose.
- With the next inhalation begin to come back up and when fully seated, spread the arms out horizontal, as before. Pause briefly.
- While exhaling, turn your body to the right and begin to bend forward, bending from the hips, aligning the chest with the right thigh and keeping the spine unrounded. As you are bending forward, slide the left hand towards the foot, keeping it on the outside of the leg. Finally you may attempt to hold the outside of the foot or keep it on the outside of the leg wherever it reaches. You can place the right hand either behind your back on the floor or wrap it behind the back. Keep the chest lined directly on top of the thigh. Pause briefly in the final pose.
- With the next inhalation begin to come back up and when fully seated, spread the arms out horizontal, as before. Pause briefly.
- Continue in this manner for four to five more breaths. With each inhalation, come back to the center with the arms spread out horizontal; with each exhalation, turn to the side and bend forward maintaining a gentle twist in the spine.
- After completing the sequence, come back up to a seated position and sit in a comforable cross-legged posture for a few breaths and relax.
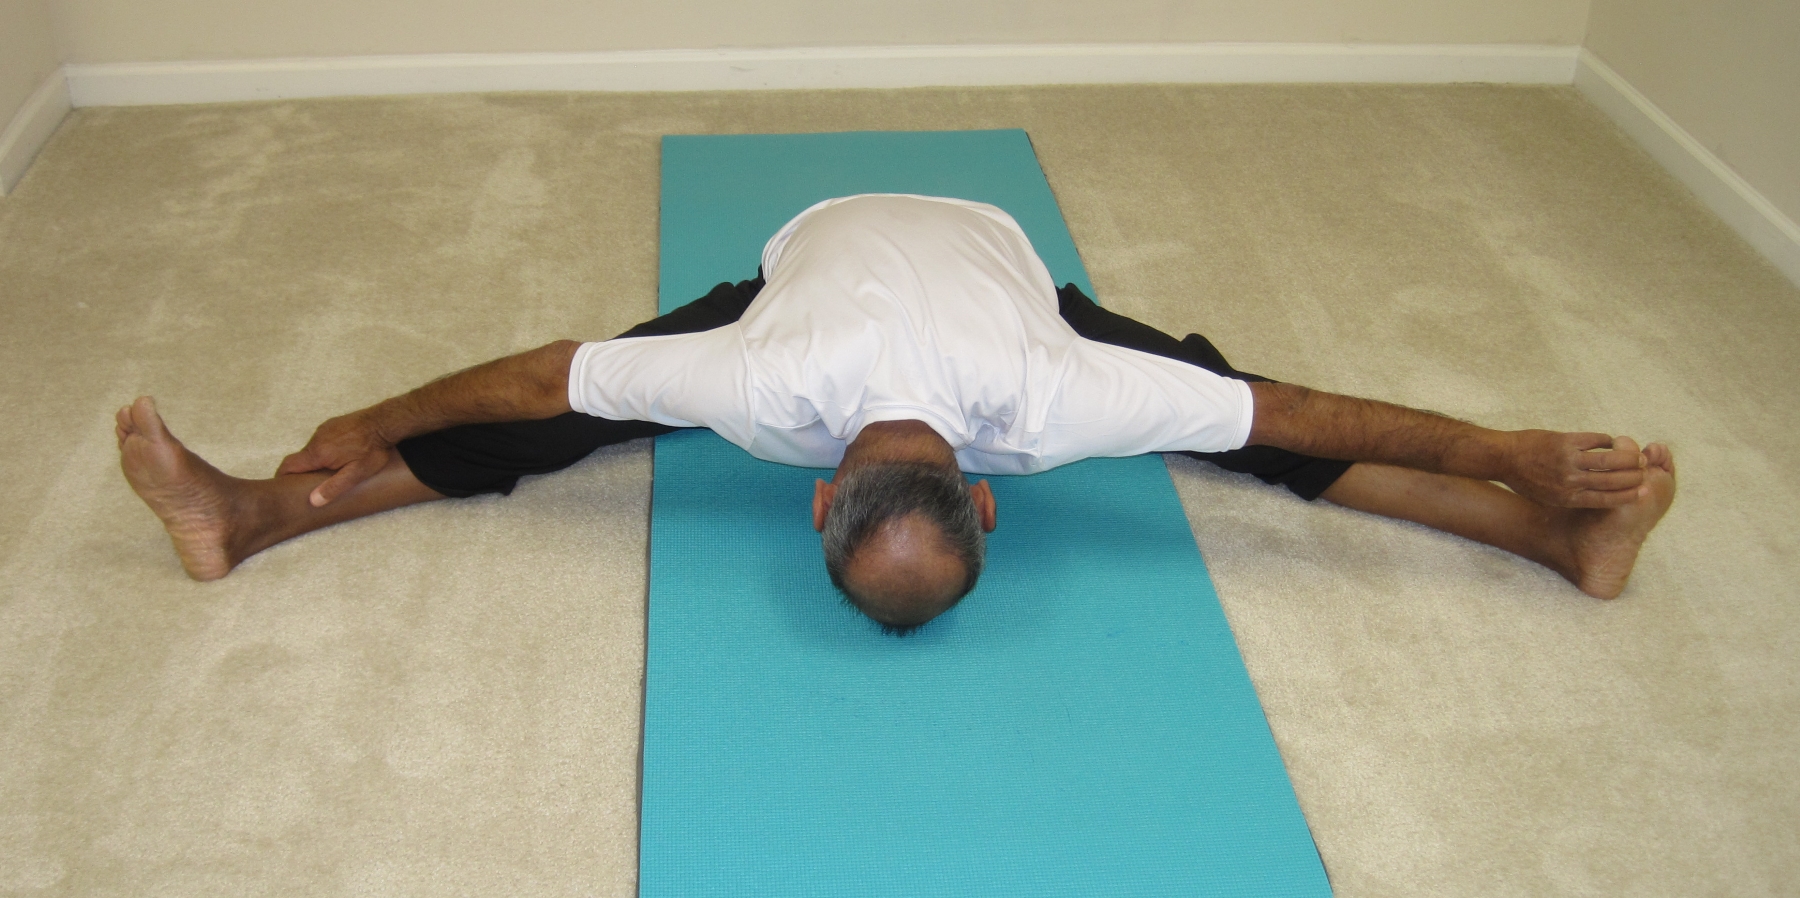
Upavishta Konasana (Seated wide-legged forward bend)

Upavishta-konasana
Upavishta Konasana – उपविष्ट-कोणासन –
Step-by-step
- Sit on your mat with your legs stretched straight in front.
- Place your hands on the floor behind you and lean your torso back slightly. Then begin to widen your legs as far as it is comfortable for you. Pressing the hands firmly into the floor, try to bring your buttocks forward along the floor. This should help widen the legs even further. In your final position, the legs could be 90 degrees apart or even wider.
- Try to keep the kneecaps and the toes pointing upward. With your spine elongated and straight, place the hands on the floor in front of you. Now, slowly begin to walk your hands forward, away from you. As you move your hands away, fold from the hips, not the waist. Avoid rounding the spine. Go only as far as it feels comfortable.
- Continue to increase your forward bend until you feel a stretch in your hamstrings, inner thighs and inside of the knees. As soon as you begin to feel a resistance from any part of the body, back off a little and try to relax the muscles. When the muscles are loose and relaxed, they may be willing to go for a deeper stretch.
- When you feel that you have reached your final pose, spread your arms to the sides and try to hold your big toes by making a loop with your thumbs and first two fingers. If you are unable to get to the toes, hold on to any part of the legs that you can reach with the hands.
- Depending upon the level of your flexibility, you may be able to bring your forehead or your chin to the floor.
- Maintain the final position for as long as it feels comfortable. Try to build up your capacity to stay in the pose for a minute or longer.
- To come out of the pose, gently begin to walk your hands back toward your body, bringing your torso upright while keeping your spine long.
- Relax in any cross-legged position for a few breaths.
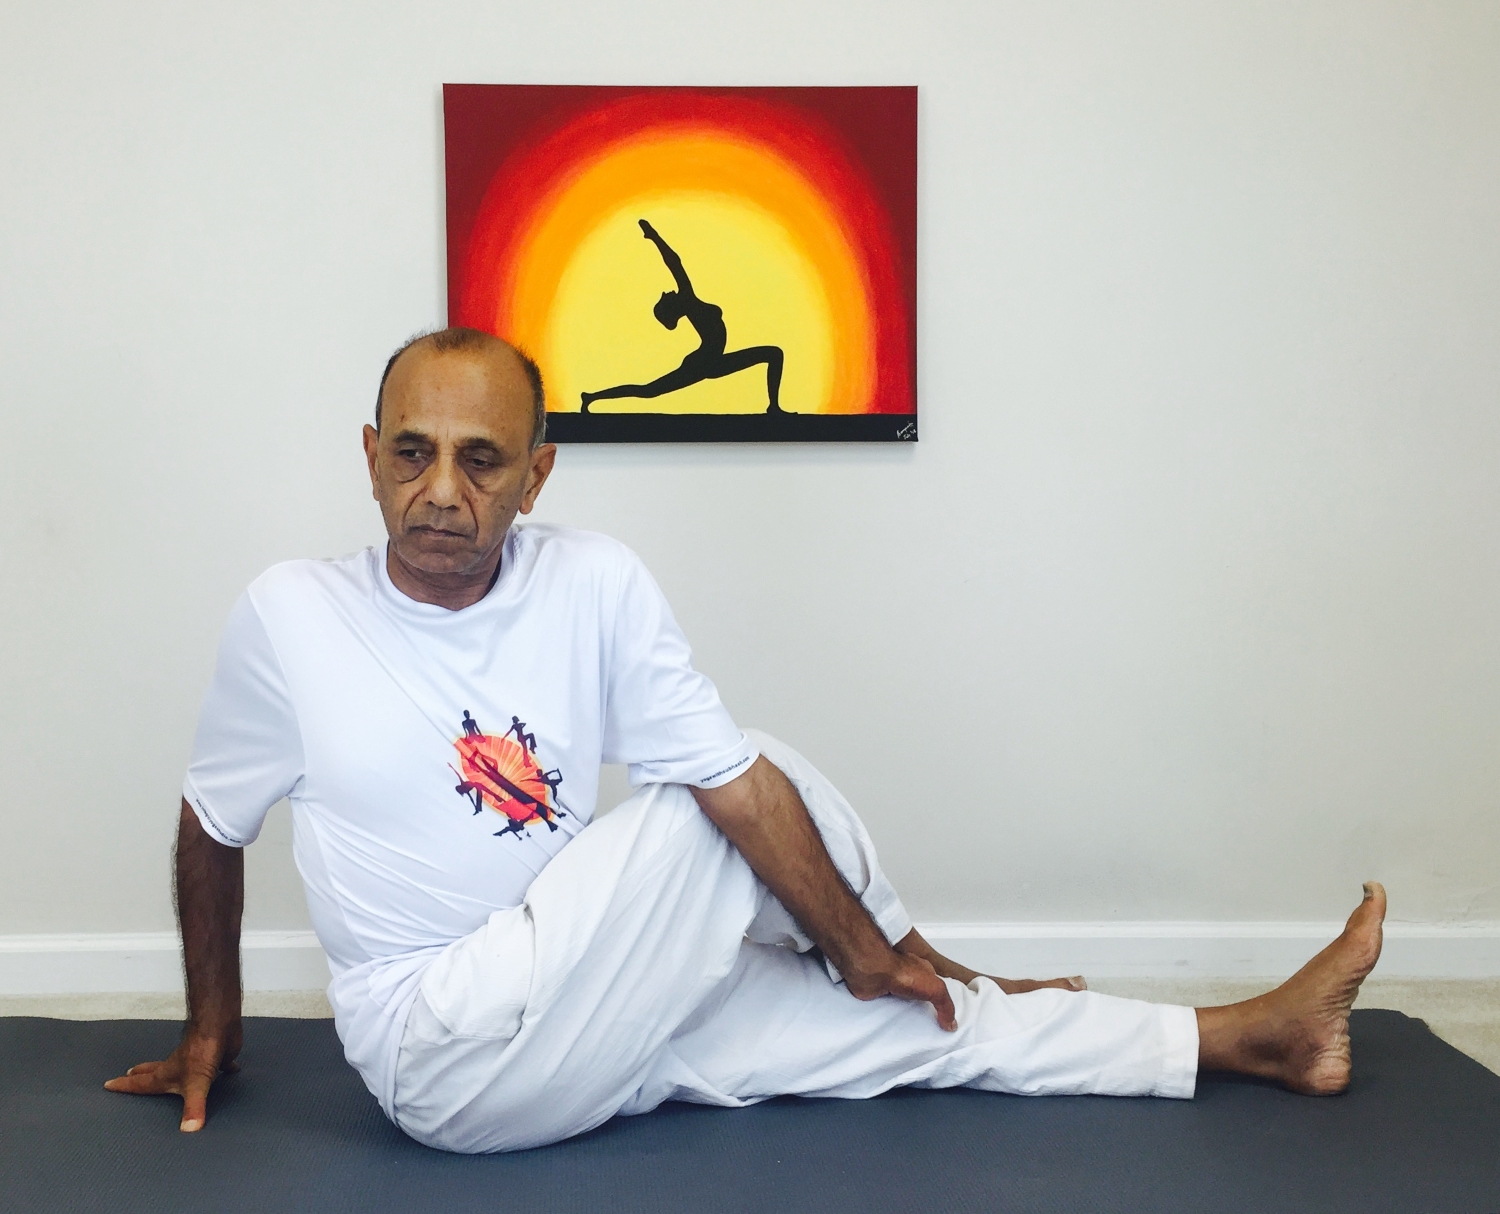
Ardha-Matsyendrasana (seated spinal twist)

Ardha-Matsyendrasana (spinal Twist)
(Ardha-Matsyendrasana – अर्धमत्स्येन्द्रासन)
Please visit my blog post here to learn about some of the variations that are commonly practiced for this pose.
Step-by-step
- Sit on the floor with the legs stretched out straight ahead. Keep the spine upright, shoulders relaxed.
- Fold the right knee and put the right foot on the outside of the left knee. Try to keep the foot flat on the floor and the knee vertical.
- Raise the left arm and place the elbow on the outside of the right knee. Try to push the knee inward with the left elbow and with the left hand try to hold the left knee. When you push the knee, allow the thigh to put a gentle pressure against the abdomen.
- Raise the right arm, twist the body around, and place the right hand on the floor behind the spine making sure that the spine stays tall, vertical and relaxed.
- Make a gentle effort to roll the right shoulder back and away from you. Look over the right shoulder, providing a gentle stretch for the neck as well, without straining the neck. Try not to twist the spine more than its natural flexibility will allow. Over time, with practice, the muscles will become suppler and provide a greater degree of flexibility.
- Breathe your natural, regular breaths and keep the awareness on the entire length of the spine.
- You may close the eyes and visualize the spine being twisted from top to bottom and giving a nice massage to the vertebras and the disks in the spine.
- Hold the position for about 40 seconds, if comfortable.
- Release the pose gently and repeat on the other side.
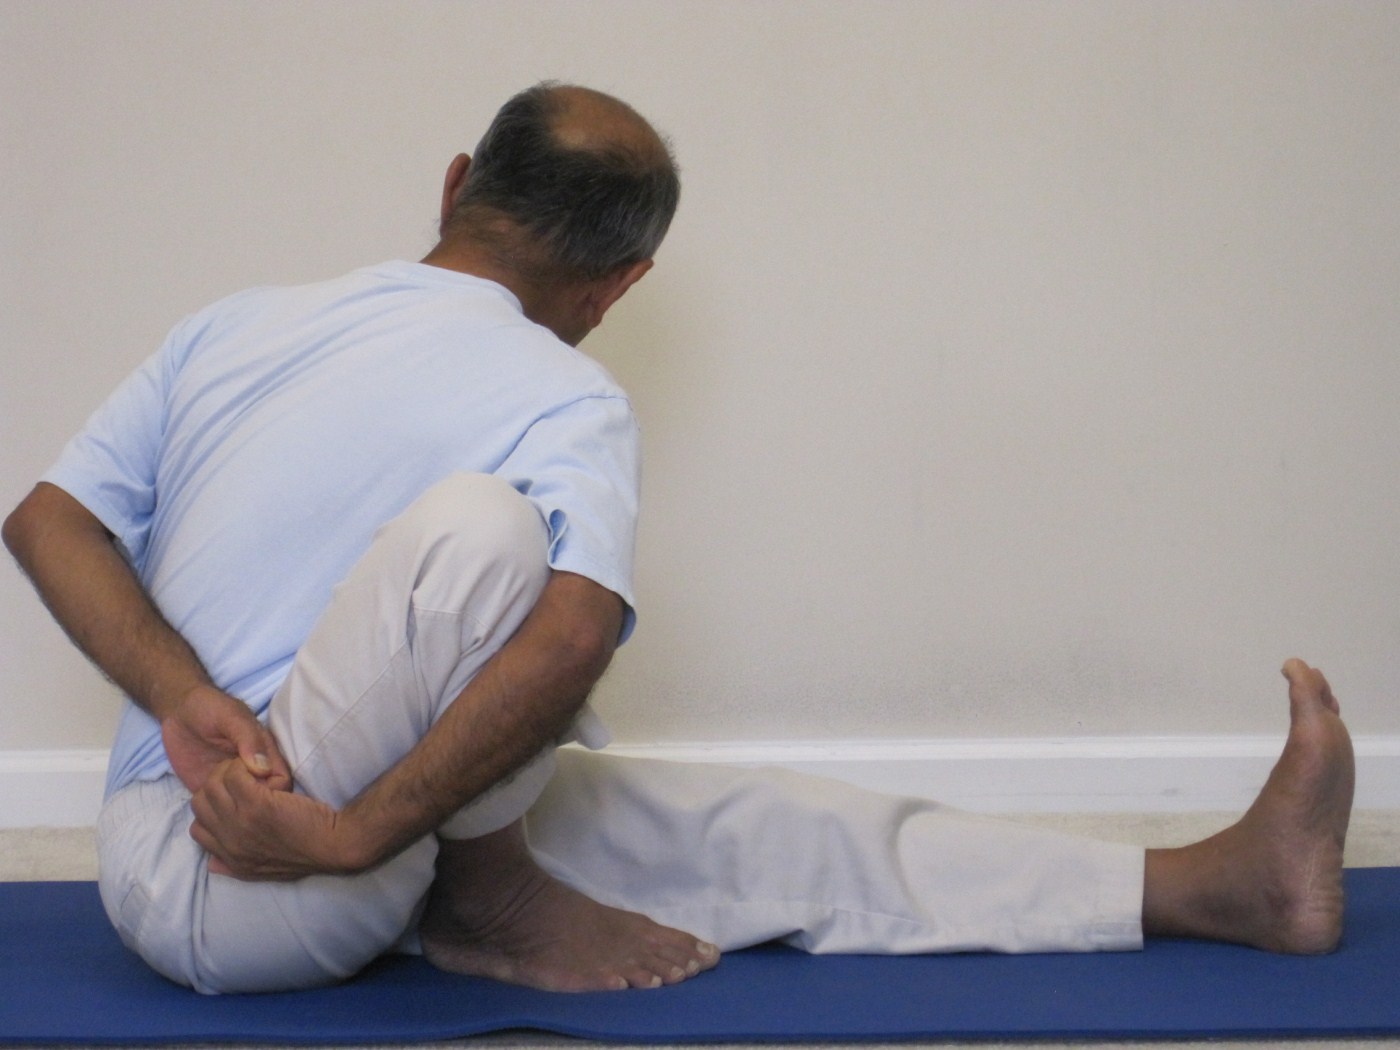
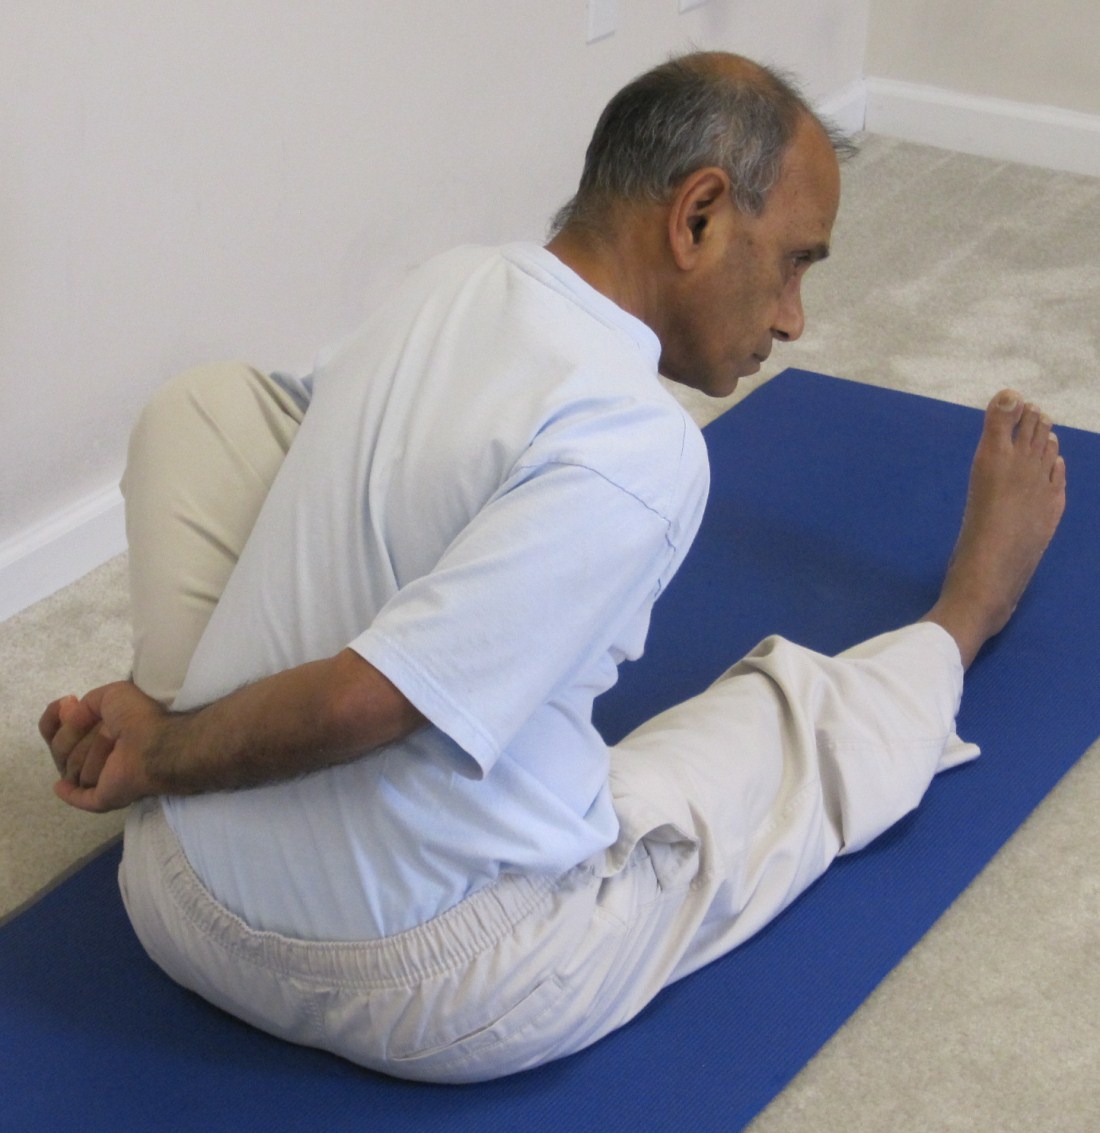
Marichyasana (Sage Pose)
Marichyasana (मरीच्यासन) is named after the sage Marichi (not sure why!). The word Marichi (मरीचि) literally means a ray of light. As per the Hindu mythology, Marichi was the son of Brahma and chief of the Maruts (also called vayu or wind-gods). He’s one of the seven (sometimes 10 or 12) sages (rishis) or lords of creation (prajapatis), who intuitively “see” and determine the divine law of the universe (dharma).
This asana can be performed in addition to or as an alternative to the more commonly practiced Ardha Matsyendrasana (Spinal Twist). It offers many of the same benefits as the Spinal twist.
Please visit my blog post here to learn about more variations of the pose that are commonly practiced.
Step by Step
- Sit with the legs stretched out straight in front. Keep the spine upright.
- Bend the right knee and place the sole of the foot on the floor, with the heel as close to the right sitting bone as possible. Keep the left leg strong and straight, pressing the thigh firmly into the floor. Keep the spine straight (unrounded) throughout the pose.
- Bending slightly forward, turn the bent knee slightly to the outside and place the right upper arm on the inside of the right thigh with the palm facing outward. Bend the right elbow and bring the right hand toward the back.
- Wrap the left arm behind the back and try to hold the two hands together. If the hands don’t reach each other, you may use a strap with the two hands and try to bridge the gap between the two hands. Look over the right shoulder. Remember to keep your straight leg and bent-knee foot firmly grounded. Continue lengthening the spine with each inhalation, and twist a little more with each exhalation.
- Hold the pose for about 10 breaths. Then release and repeat on the other side.
- Sit with the legs stretched out straight in front. Keep the spine upright.
- Bend the left knee and place the sole of the foot on the floor, with the heel as close to the left sitting bone as possible. Keep the right leg strong and straight, pressing the thigh firmly into the floor. Keep the spine straight (unrounded) throughout the pose.
- Bending slightly forward, turn the bent knee slightly to the outside and place the left upper arm on the inside of the left thigh with the palm facing outward. Bend the left elbow and bring the left hand toward the back.
- Wrap the right arm behind the back and try to hold the two hands together. If the hands don’t reach each other, you may use a strap with the two hands and try to bridge the gap between the hands. Look over the left shoulder. Remember to keep your straight leg and bent-knee foot firmly grounded.
- Hold the pose for about 10 breaths. Then release and relax.


Ardha Matsyendrasana and Maricyasana, besides hip opening, providing really nice twist of my back and noticing the nice compression to my abdomen as well, especially internal organs noticing the belching coming out of the mouth, noticing the movement of internal organs and all the other poses included here are really effective,…really thankful for posting this article…
Thanks, Jitendra, for your kind feedback. Indeed, these asanas impact multiple parts and organs in the body – they are all connected!