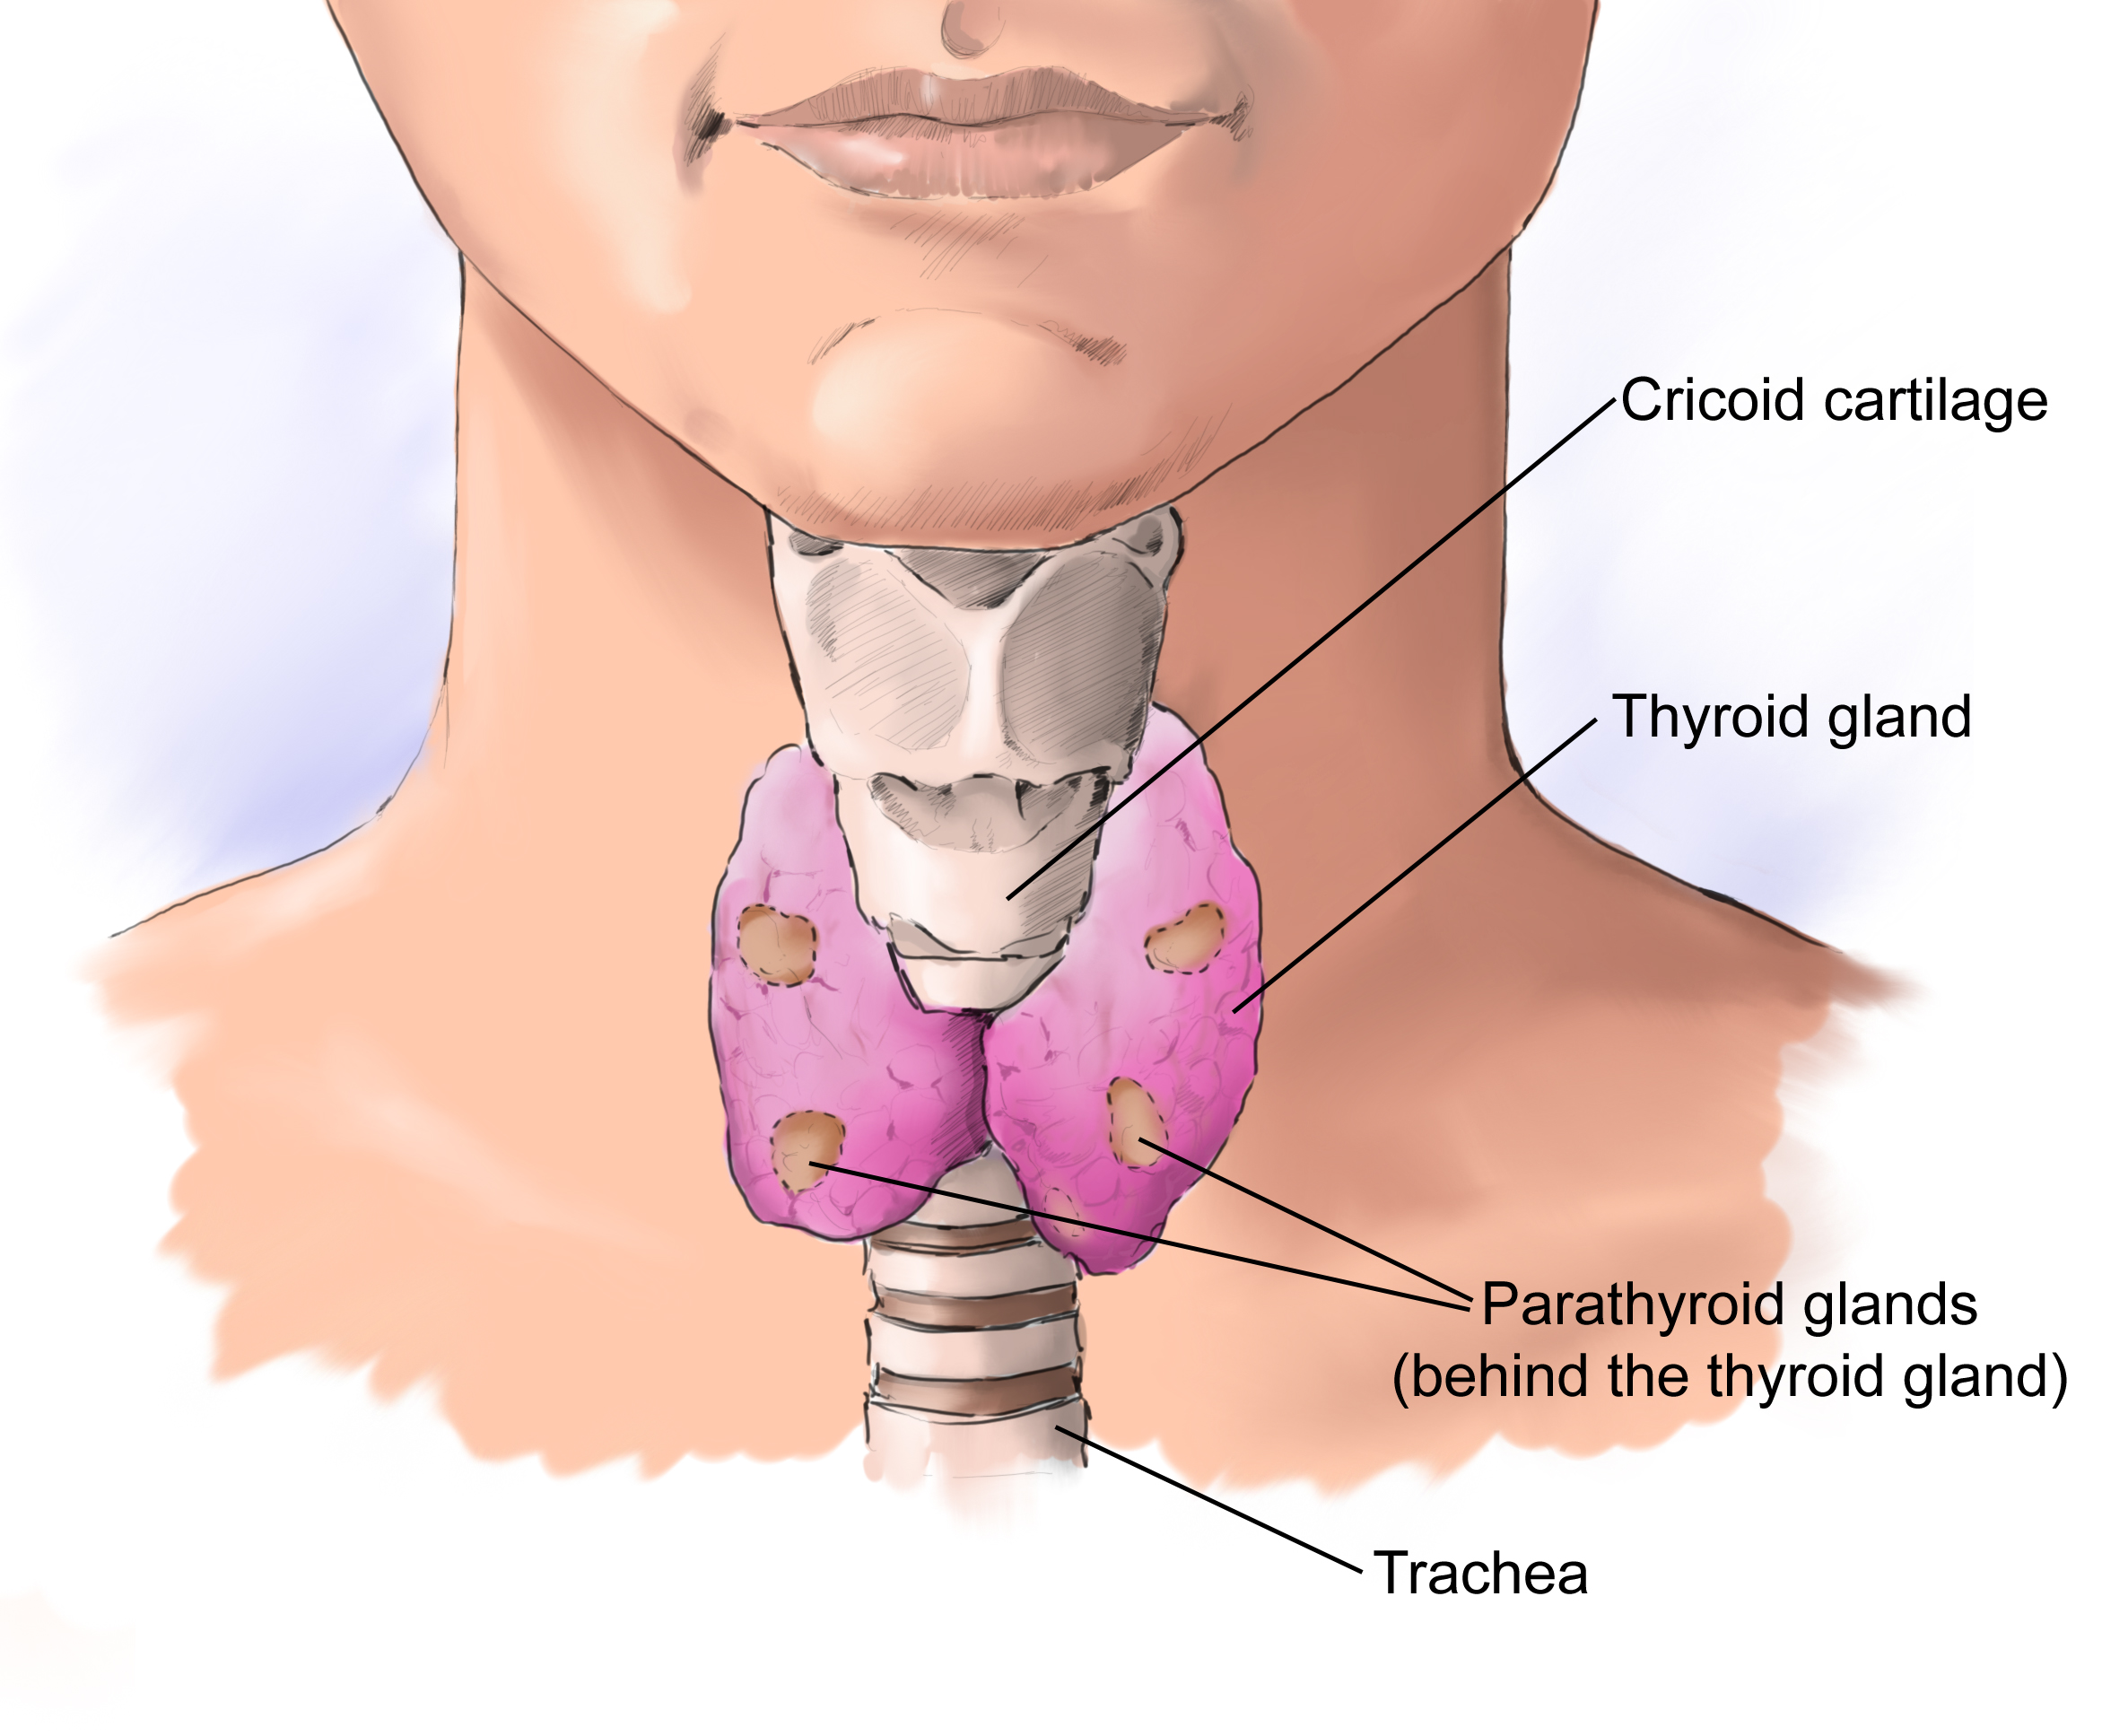
Thyroid gland
The thyroid gland is part of the endocrine system and produces hormones that regulate the body’s metabolic rate controlling heart, muscle and digestive function, brain development and bone maintenance. Its correct functioning depends on a good supply of iodine from the diet. Cells producing thyroid hormones are very specialised in extracting and absorbing iodine from the blood and incorporate it into the thyroid hormones.
There are several disorders associated with the thyroid gland with most problems concerning the production of thyroid hormones. Either the thyroid gland produces too much hormone (called hyperthyroidism) or your thyroid doesn’t produce enough hormone (called hypothyroidism), resulting in your body using energy faster or slower than it should. Like many other ailments, thyroid disorders can also be caused or aggravated by stress, anxiety, depression etc.
As we all know, yoga offers a variety of benefits at the physical, physiological, mental, emotional and deeper levels. The main purpose and the chief benefit of yoga is to eliminate all kinds of suffering and ultimately realize our true nature. However, to achieve that goal, we need to practice the various aspects of yoga as given in our ancient yoga texts. The most important text that describes the underlying concepts of yoga is the Yoga Sutras of Patanjali. In this text, Patanjali prescribes the eight limbs of yoga as the methodology to achieve the goals of yoga. Of the eight, asana (physical postures), pranayama (breathing practices) and meditation are three most important from a practice point of view. While we continue with our yoga practice, called “sadhana”, we begin to accrue many therapeutic benefits at the physical and mental levels as mentioned earlier. Of course we need a strong, healthy and flexible body to continue with our sadhana, the main component of which is the practice of meditation.
Even though an integrated and complete practice consisting of asana, pranayama and meditation is essential to achieve an overall sense of well-being, there are specific yoga sequences that can be tailored to deal with specific ailments. In this article, I am presenting a few asana and pranayama practices that can help to stabilize and improve the functioning of the thyroid and parathyroid glands.
I hope you will enjoy practicing with me using the video sequence.
An outline of the practices presented is as follows:
- Marjarasana (Cat and Cow stretch)
- Kapalabhati with bandhas
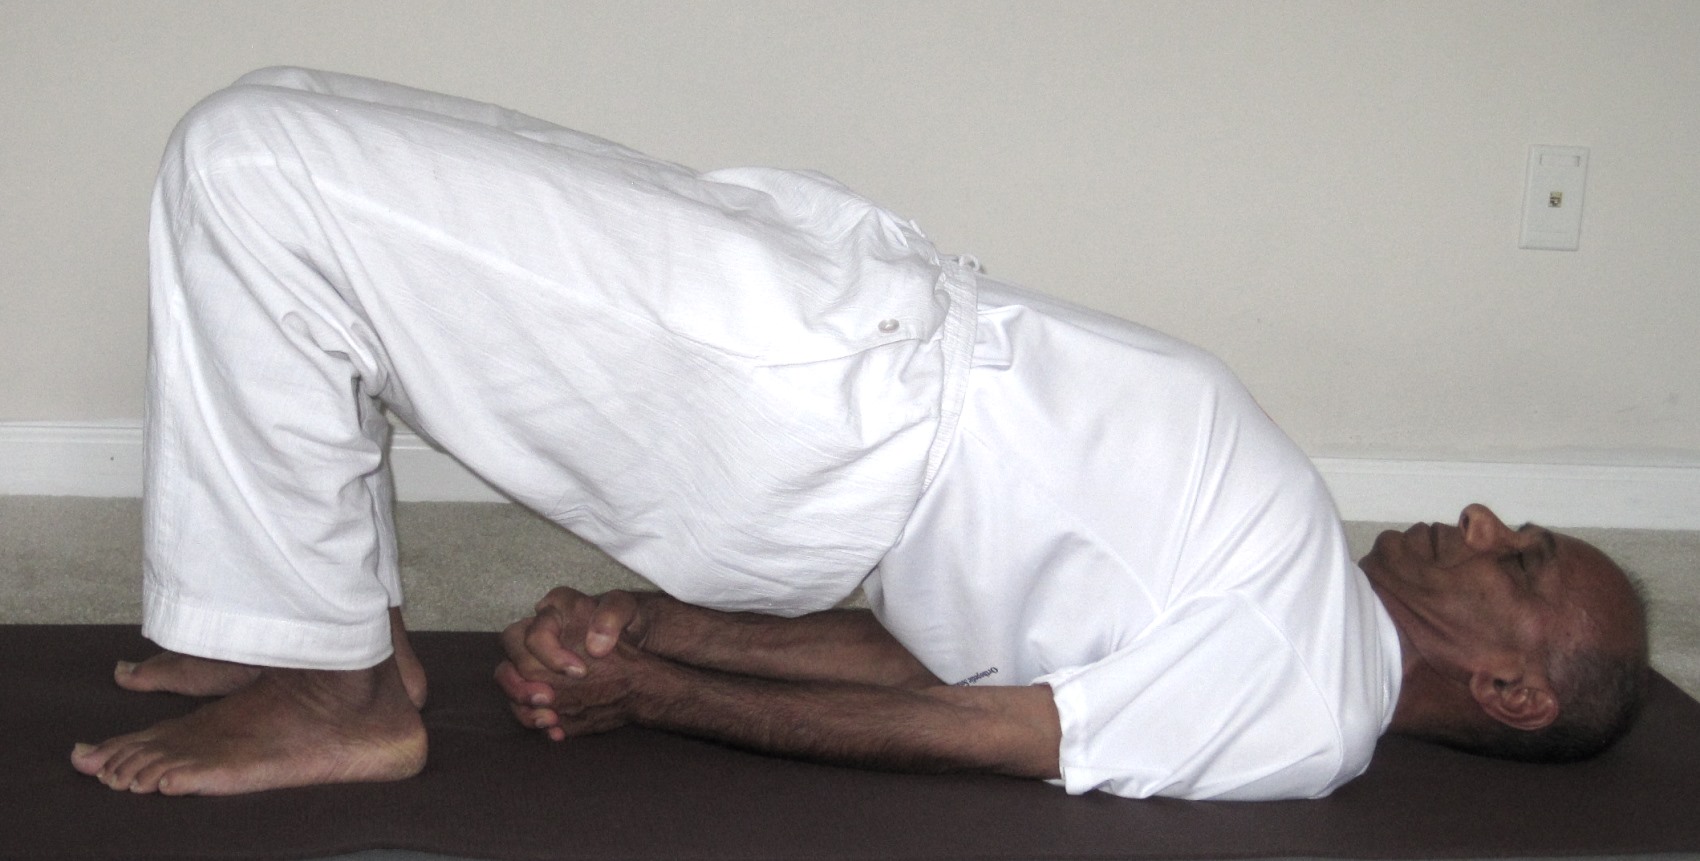
- Setu-bandhasana (Bridge pose)
- Sarvangasana (shoulder stand)
- Halasana (plough pose)
- Matsyasana (fish pose)
- Ujjayi pranayama
- Brief relaxation
Marjarasana (Cat and Cow stretch)
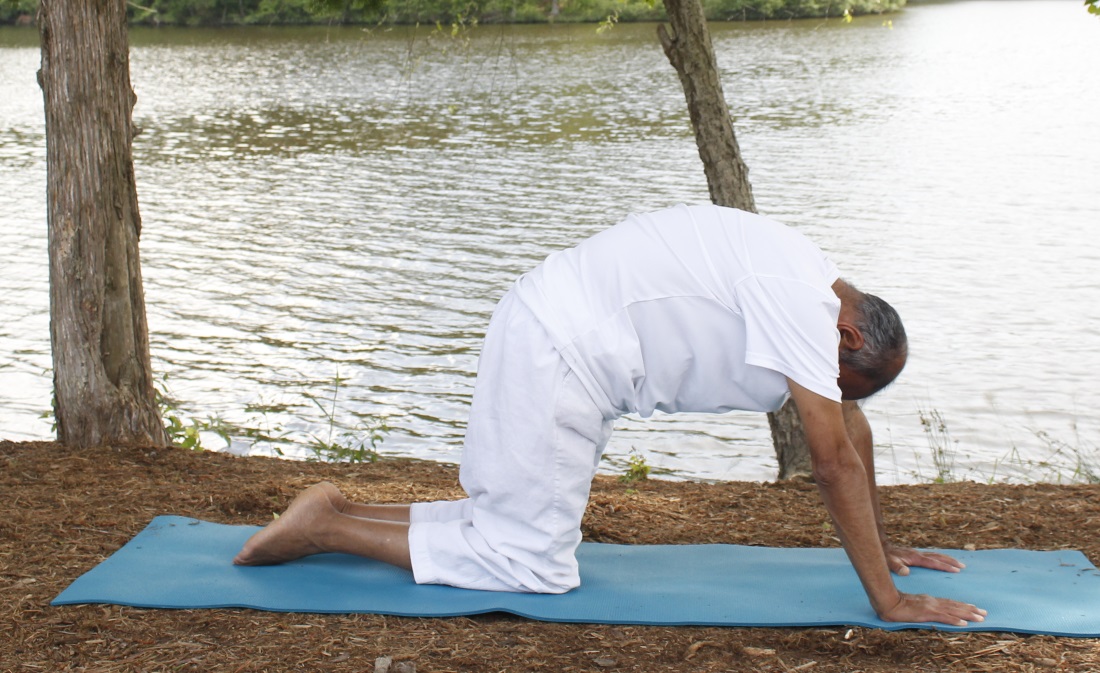
Cat Pose
-
Come on to all fours on your mat with the hands positioned vertically under the shoulders and the knees vertically under the hips. Keep the knees hip width apart and the hands shoulder width apart. Spread the fingers wide and try to keep the palms flat and firm on the ground.
- In the starting position, the spine is flat like a table top. While inhaling, lift the head and chest up, tail bone up, and lower the navel down toward the ground. This will create an arch in the spine. Think of it as a little valley in the spine.
- While exhaling, lower the chin down to the chest, tuck the tail bone in, and lift the navel up. This will create a rounding of the spine. Think of it as creating a small hill on the spine.
- Using the "ujjayi" pattern of breath, keep the breathing long and smooth and keep the movements of the spine synchronized with the breath. At the end of each inhalation and exhalation, give a small pause so you can become aware of the transition of the breath as well as of the spinal movement.
- Continue these movements for 8-10 breaths. Finally bring the spine back to the neutral, flat table top position and pause there for a couple of breaths. Then sit comfortable in a cross-legged position and relax.
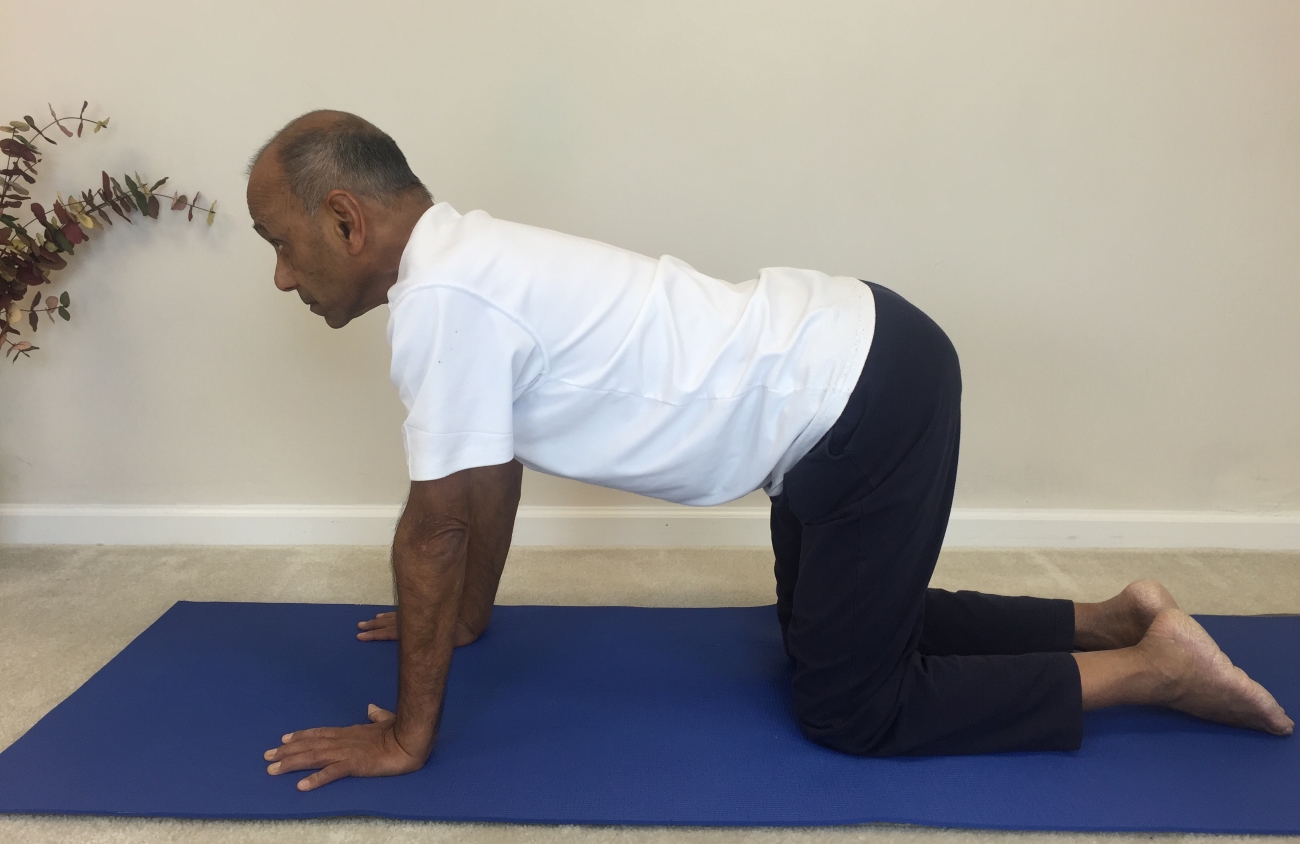
Cow Pose
Please visit my blog here for more details on the basic pose as well as some variations of the pose.
Kapalabhati with Jalandhara Bandha (chin lock)
In Kapalabhati, we exercise the diaphragm by exhaling forcefully and quickly through both nostrils while simultaneously drawing the abdominal muscles inwards. The brisk and vigorous exhalation produces a “puffing” sound. Allow the abdominal muscles to relax at the end of exhalation and let the inhalation happen automatically and passively. The rate of expulsion will vary from one individual to the next depending upon capacity. On the average, one can maintain a rate between 70 to 120 expulsions per minute (remember the normal breathing rate is 12 to 15 breaths per minute).
At the end of the Kapalabhati sequence, you need to exhale completely and then apply the Jalandhara Bandha (chin lock) which will activate the thyroid gland.
Visit my blog here for detailed description of the basic Kapalabhati practice. To learn how to integrate the practice of the three bandhas (locks) with Kapalabhati, visit here.
Setu-bandhasana (bridge pose)
- Lie down flat on your back with arms alongside the body, palms facing down.
- Bend your knees and place the feet flat on the floor. Keep your feet hip width apart, parallel to each other, and with the heels as close to the buttocks as possible.
- Pressing the upper arms and feet into the floor, while inhaling begin to lift your buttocks up towards the ceiling. Try to distribute your weight equally across the inside and outside of your feet.
- If you comfortably can, clasp the hands under your back, interlock the fingers and pull the hands away, toward the feet. Keep the arms on the ground and the elbows straight. This position of the hands naturally helps roll the shoulders back and lift the chest up higher.
- If you are unable to clasp the hands together, keep the arms parallel to each other with the palms facing down, just as before.
- Once in the final position, continue to breathe your normal breathing pattern. Rolling from side to side try to roll the shoulders back, bringing the shoulder blades close to each other. This will help lift the chest up higher and bring the chest closer to the chin.
- In the final position, maintain a gentle pressure with the heels and the upper arms to keep the buttocks and chest lifted up. Try to stay in the final position for about 8 to 10 breaths, if comfortable.
- To come out of the pose, while exhaling, slowly release the buttocks and the back down and rest in Shavasana for a few breaths.
Visit my blog here for more info and detailed instructions on some of the variations of the pose.
Sarvangasana (shoulder stand)
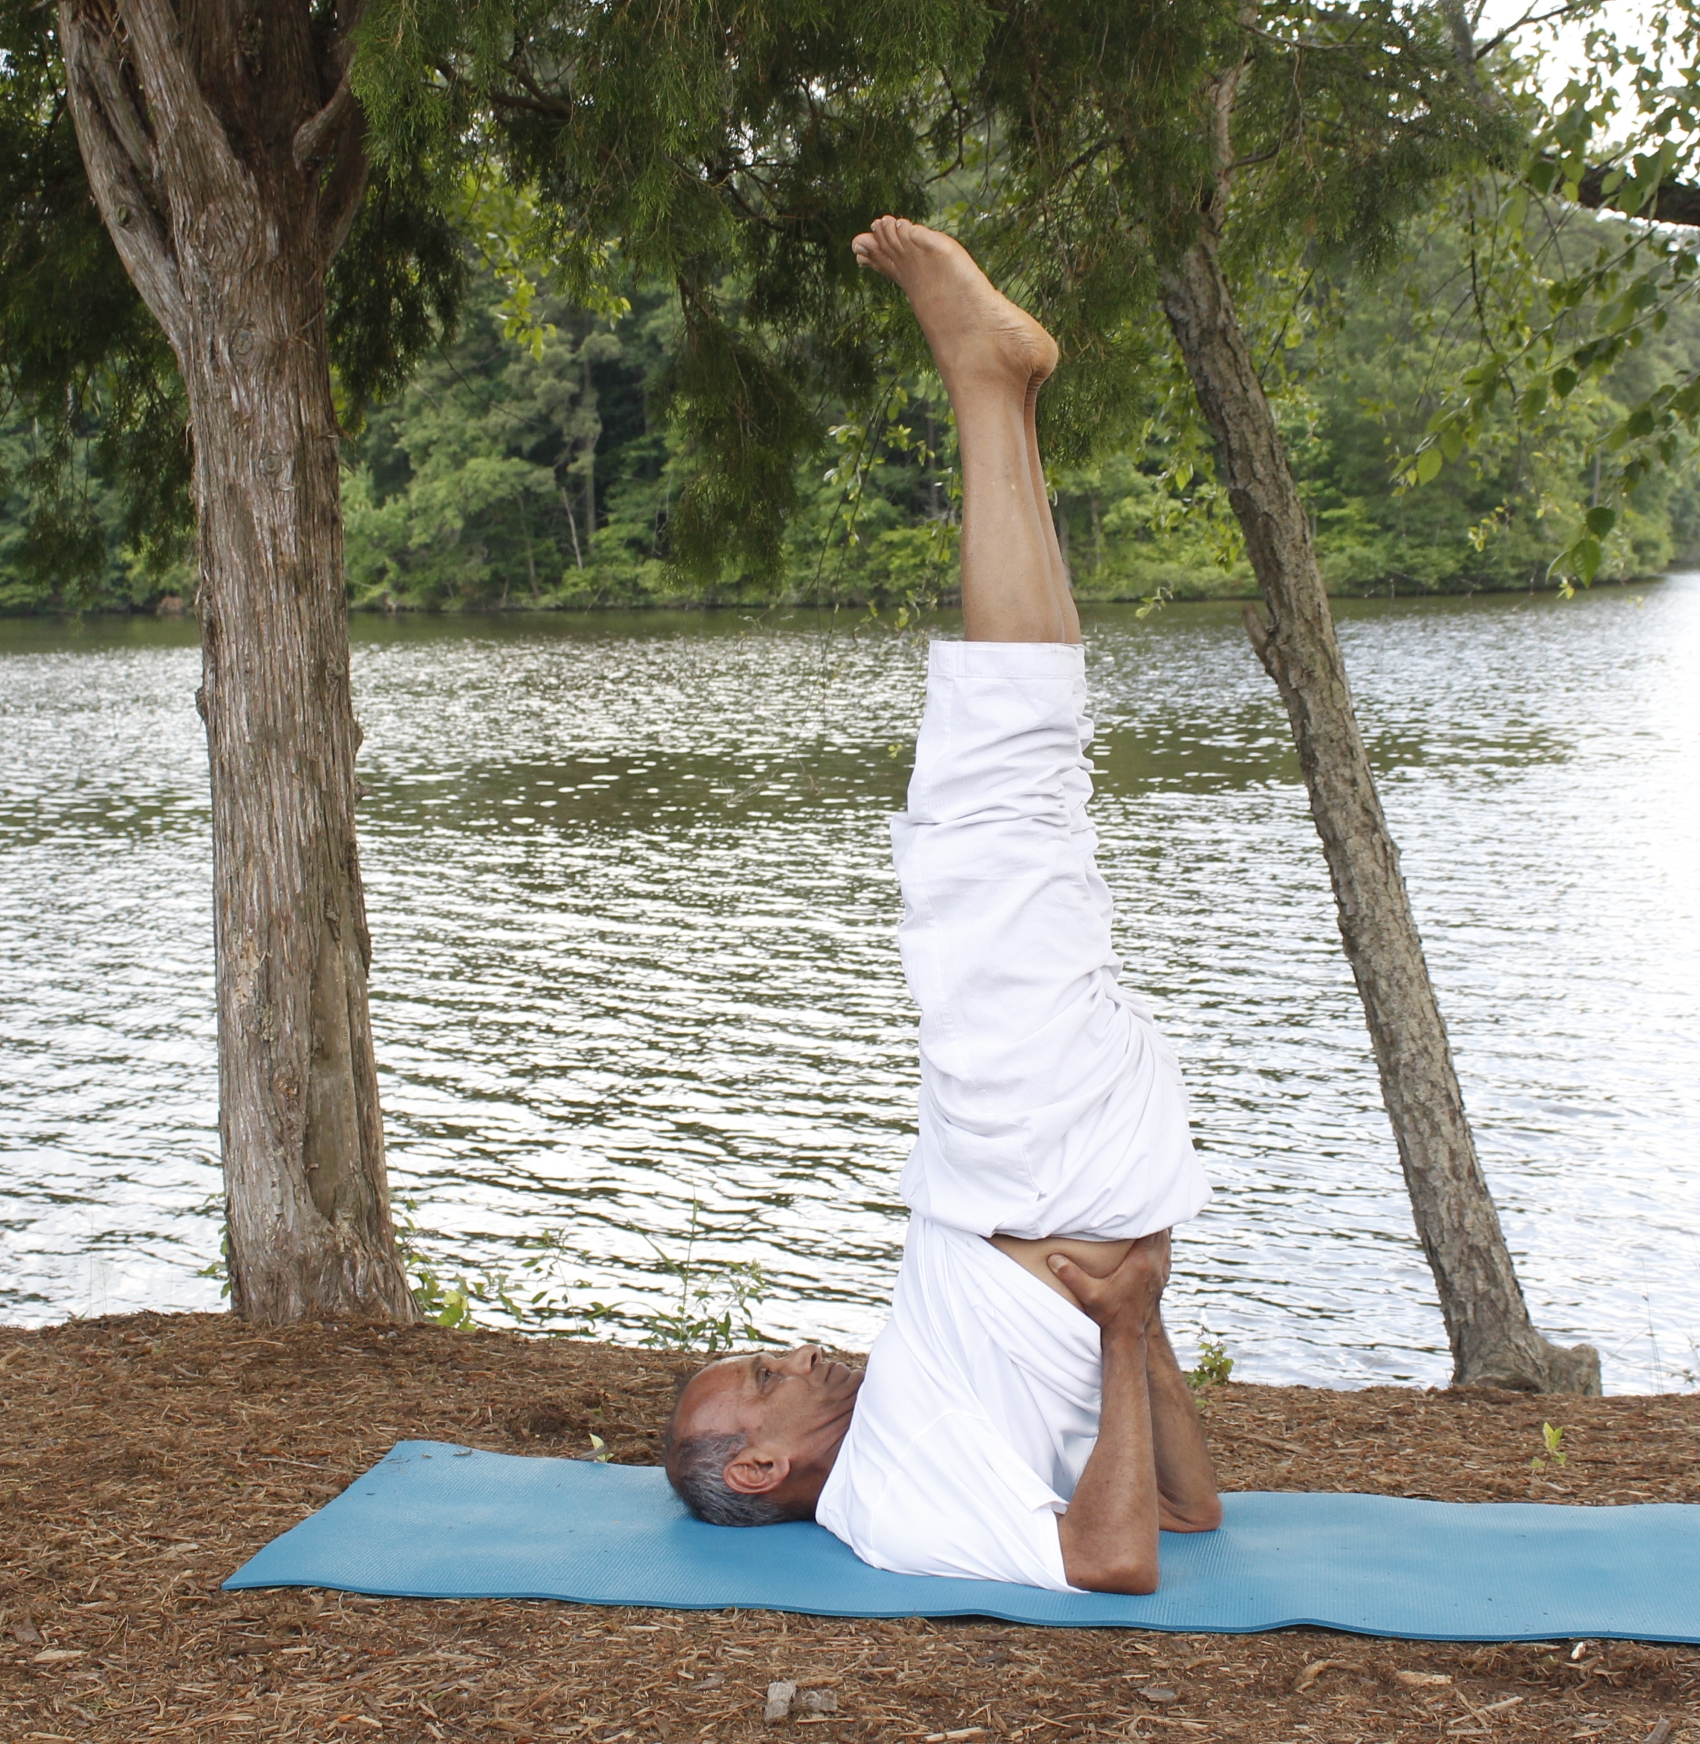
Sarvangasana (shoulder stand)
- Lie down on your back and relax for a few moments in Shavasana.
- Bring your feet together. Place the arms alongside the body, palms facing down.
- Pressing with the palms, holding the breath, slowly raise the legs up to a 90 deg angle. Pause for a few seconds.
- At this point, pressing with the palms, lift your back and lower your legs overhead behind you until they are parallel to the floor.
- Try to keep the spine vertical and place your palms on the back, close to the shoulder blades, without widening the elbows.
- Use your hands to push the back forward with the result that it gets narrower and straighter and there is an increased pressure on your shoulders. At the same time, this requires more power of the muscles of the lower back. Rest your weight on the back side of the shoulders.
- Slowly raise the legs up to a full vertical position. In the final position of the pose, the heels, buttocks and the shoulders should be in a single vertical plane. The chest may make a soft contact with the chin.
- While maintaining the pose, keep the neck and shoulder muscles relaxed.
- After some time, try placing your arms a little lower in the direction of the shoulder blades on your back. See to it that the elbows do not stand too far apart. Breathe in and out quietly and try to find your balance.
- Experienced practitioners can try to hold the pose for about three minutes or even longer. However, if you feel any tension building up anywhere in the body, you may lower one leg at a time or lower both the legs slightly to release tension. You may even come out of the pose completely if you begin to feel uncomfortable in the pose.
- To come out of the pose, lower both the legs down overhead until they are parallel to the floor. Place the palms on the floor and keeping a gentle pressure with the palms, begin to lower the back, one vertebra at a time, to the floor. When the tailbone touches the floor and the legs are vertical, start lowering the legs down slowly. While coming down, try to keep the legs straight and avoid lifting the head off the floor.
- Finally, rest in Shavasana for some time.
Visit my blog here for more info and detailed instructions on some of the variations of the pose.
Halasana (plough pose)
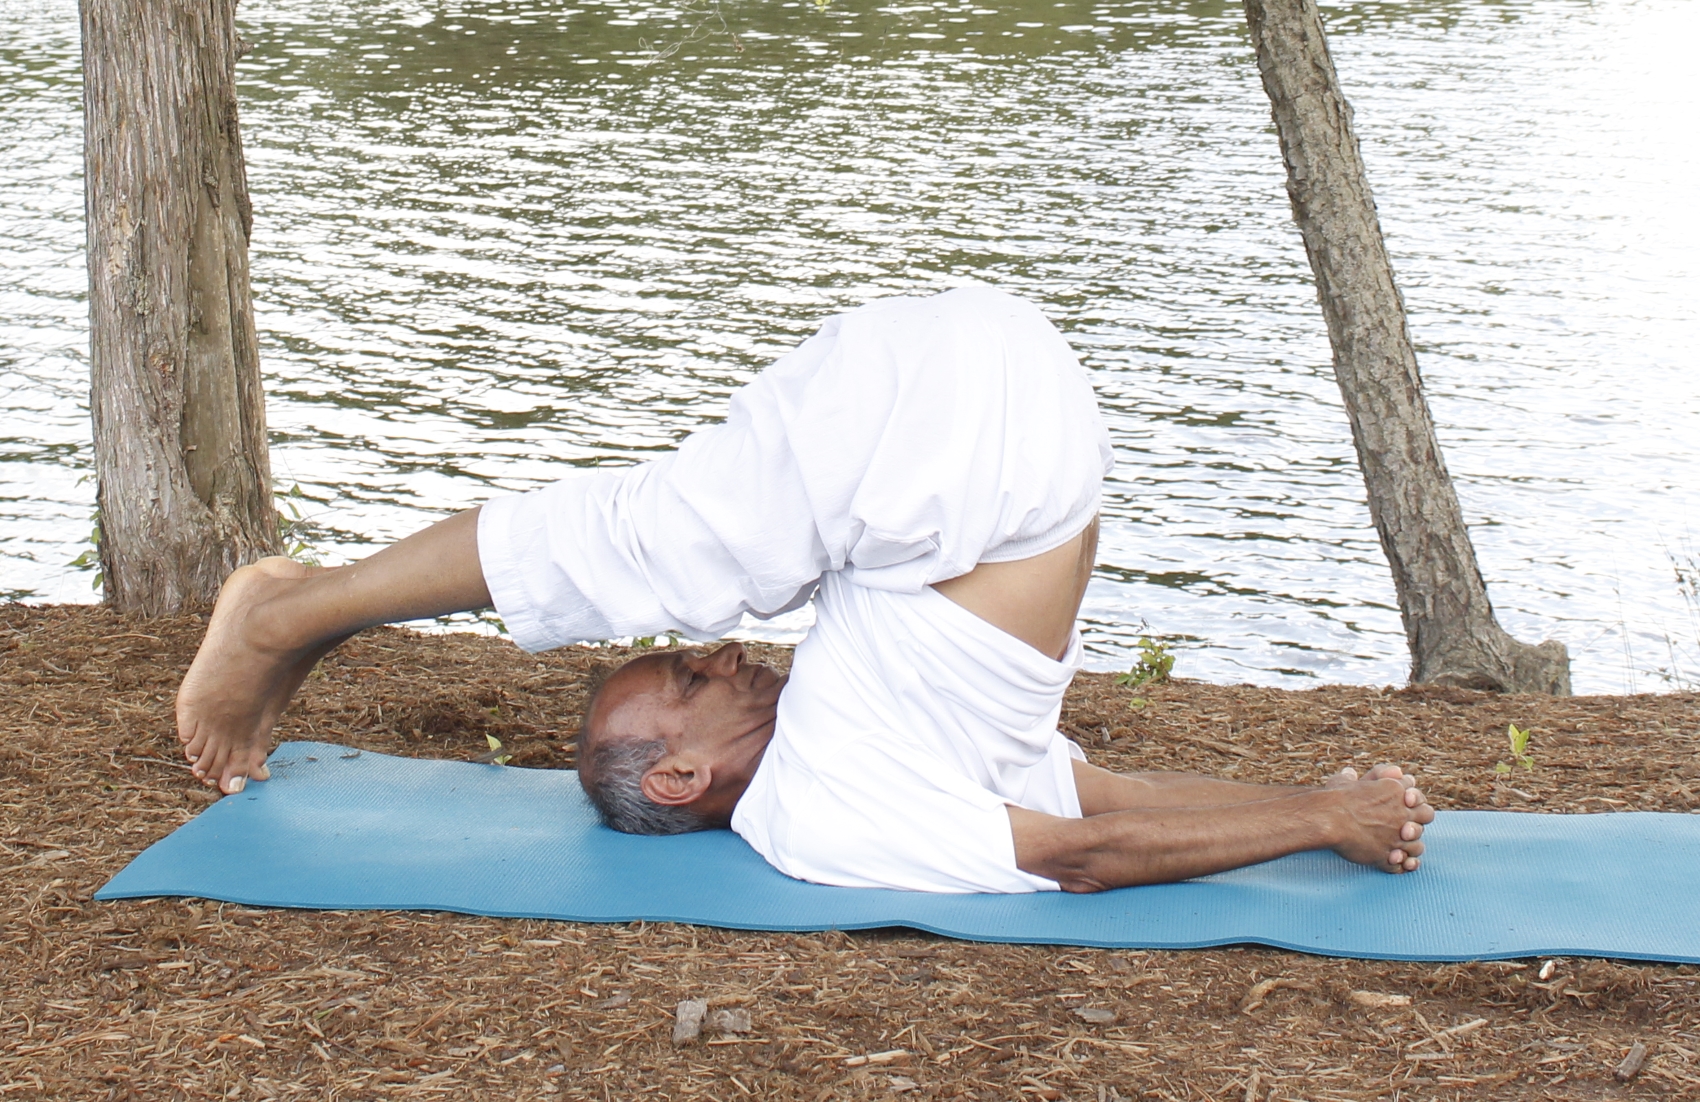
Halasana (plough pose)
- Lie down flat on your back with the arms alongside the body, palms facing down.
- Keep the legs straight and together throughout the practice of the basic pose.
- Relax the whole body and mentally prepare for the pose.
- Slowly raise the legs to a vertical position; try to use abdominal muscles more than the arms while raising the legs up.
- At this point you may use the support of the hands behind the back to raise the legs further.
- Exhale and continue to raise the legs over the head, bending at the waist, lifting the back and buttocks.
- Make an effort to bring the feet all the way down until the toes touch the floor directly behind the head.
- If you cannot touch the floor with your toes, hold them as close to the floor as possible and continue to exert a gentle effort to lower them, without causing any strain.
- Keep the feet together. If the lower back is supported by the hands try returning the arms flat to the floor with the palms facing down. If you are unable to comfortably place the arms on the floor continue to support the lower back with the hands.
- If the arms are on the floor, try to join the palms, interlock the fingers and gently pull the hands away from the body.
- Keep the knees straight. Maintain your natural breathing pattern and hold the posture for about 30 seconds. At no point you should be straining yourself to hold the pose.
- With practice, over a period of time, you may begin to increase the holding time for the pose.
- To come out of the pose, begin by first lowering the back to the floor, one vertebra at a time.
- When the tailbone touches the floor, begin to release the legs down. Try to keep the legs straight and use the abdominal muscles to support the downward movement of the legs.
- Finally rest in shavasana for a few breaths.
Visit my blog here for more info and detailed instructions on some of the variations of the pose.
Matsyasana (Fish pose)
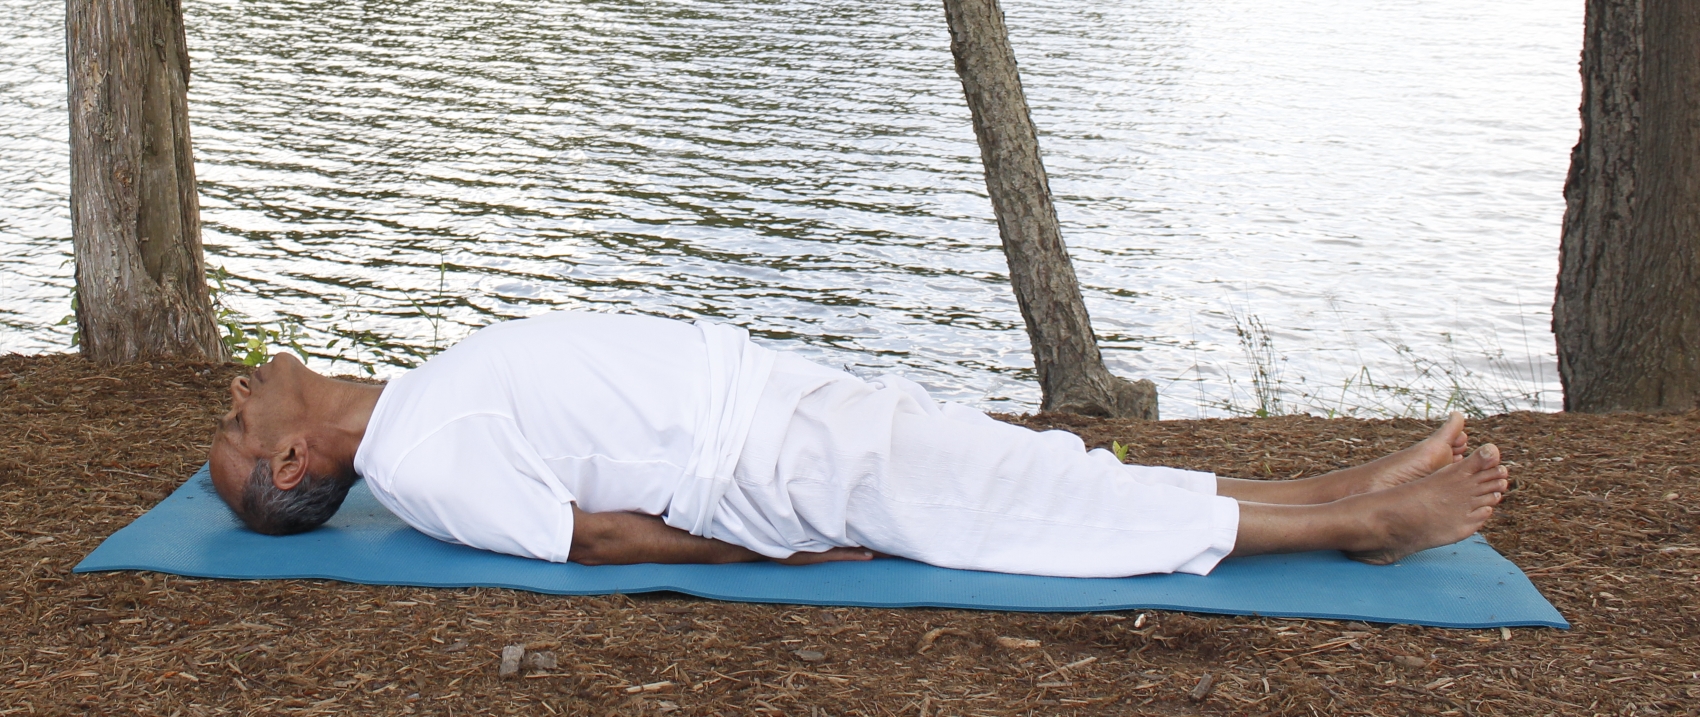
Matsyasana (fish pose)
- Start in the Shavasana relaxation pose on the back.
- Bring the feet together and come up on the elbows
- Begin to raise the chest higher while at the same time lowering the head toward the floor. You may need to adjust the elbows in order to allow the crown of the head to make soft contact with the floor. In order to provide support for the spine, you may put the palms under the buttocks, facing up or down depending upon what feels more comfortable
- Roll the shoulder blades back in order to lift the chest even higher. In the final position the chest is lifted high, the head is tilted back and you are looking at the wall behind you.
- You can maintain the final position for about 8-10 breaths, or as long as comfortable.
- To come out of the pose, come back up on the elbows and lower the chin toward your chest. Then very slowly, one vertebra at a time, lower the back to the floor. Finally rest in Shavasana.
Visit my blog here for more info and detailed instructions on some of the variations of the pose.
Ujjayi Pranayama
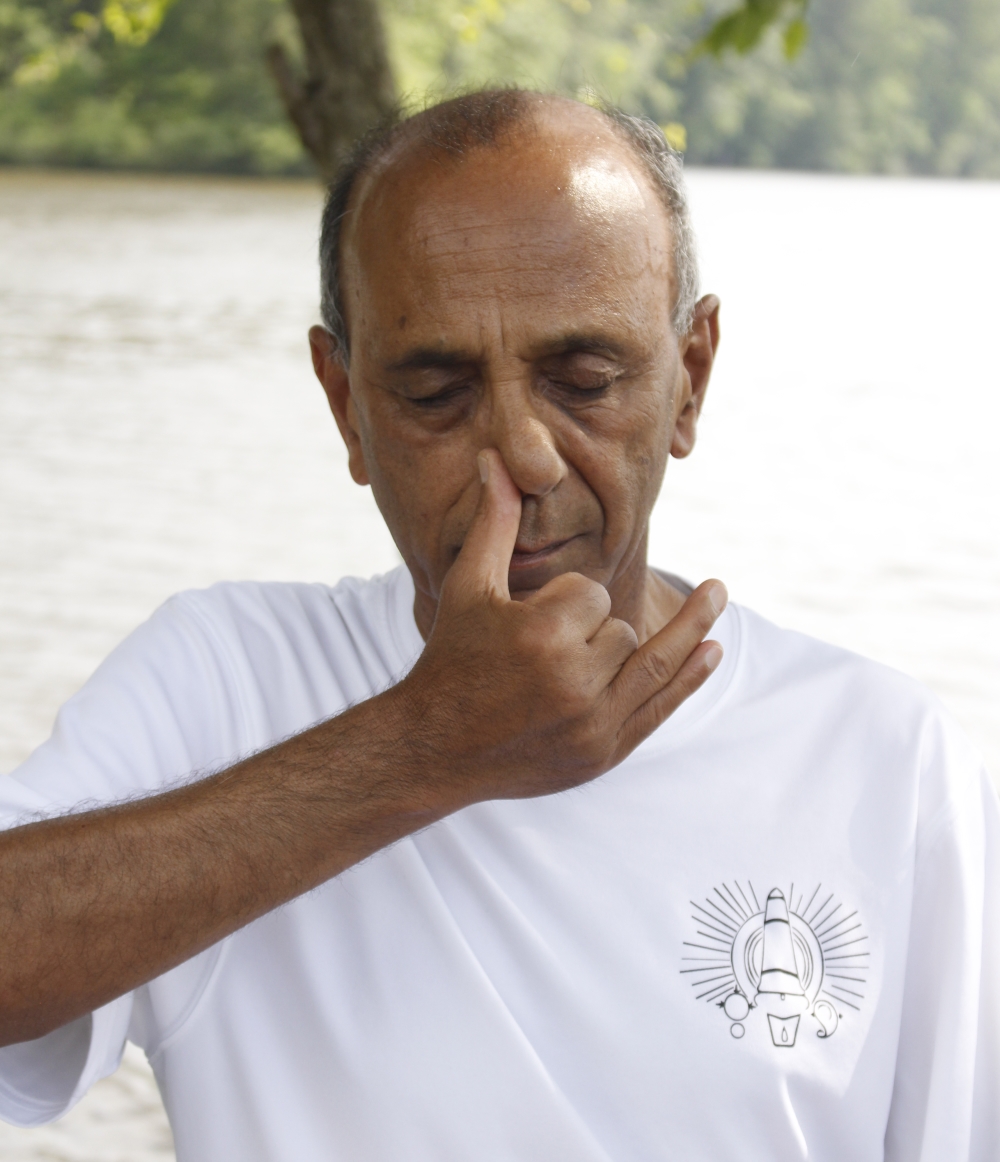
Vishnu Mudra
- Sit in any comfortable cross-legged posture, keeping the spine upright, eyes closed, and arms and shoulders relaxed.
- Watch the flow of breath at the tip of the nose for a few breaths. Then take a couple of gentle, deep breaths to develop a deeper awareness of the breath and its flow.
- Begin the practice with a deep 3-part inhalation through both the nostrils. In this breathing, begin by bringing the awareness to the lowest part of the lungs, using the diaphragm to fill the belly like a balloon.
Continue the inhalation by expanding the chest and the ribcage
Further inhaling, lift the collar bones up. Make sure that the breathing remains soft, continuous and causes no strain of any kind at all. - At the end of inhalation, hold the breath (kumbhaka) for a few seconds, following the guidelines mentioned above. While holding the breath, apply the Jalandhara Bandha (Chin Lock) by lowering the chin down to the chest, as well as the Mula Bandha (Root Lock).
- When you are ready to exhale, release the two locks.
Using the Vishnu Mudra with the right hand, close the right nostril with the right thumb and breathe out through the left nostril.
Again, for exhalation also use soft, deep, Ujjayi breathing technique, engaging the three segments of the lungs in the reverse order – first soften the upper chest, then middle chest and finally, at the end of exhalation, suck the belly in to create a cavity in the abdomen. - Continue the practice for about 5-7 minutes or a duration that you are comfortable with.
Visit my blog here for more info and detailed instructions on some of the variations of the pose.
Relaxation
After completing the above sequence, you should relax for a few minutes in Shavasana. If you have it handy, use the Yoga Nidra audio to go through a guided yoga nidra sequence.
Recent Comments