This is a continuation of the discussion of the simple stretches that can help relieve back pain.
Step-by-Step Instructions
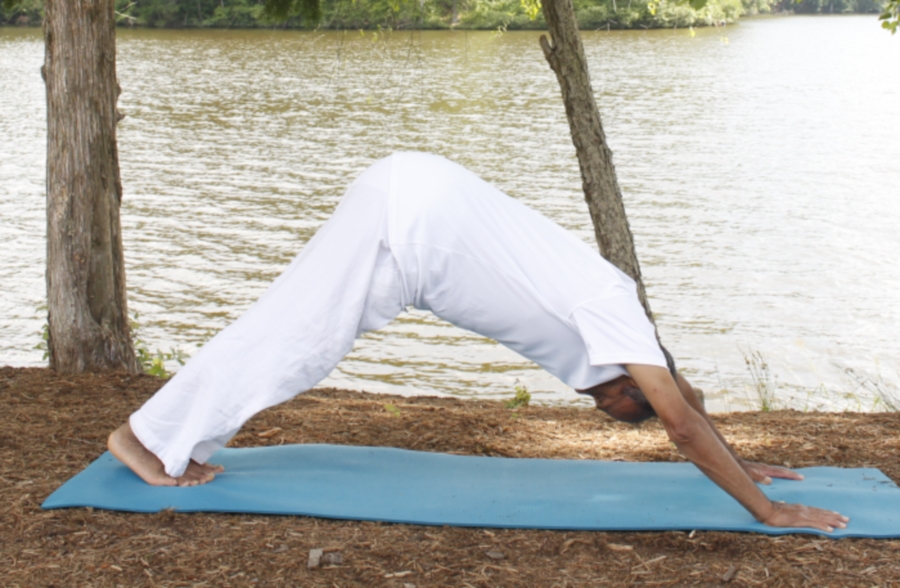
Downward Facing Dog (Adhomukha-shvanasana)
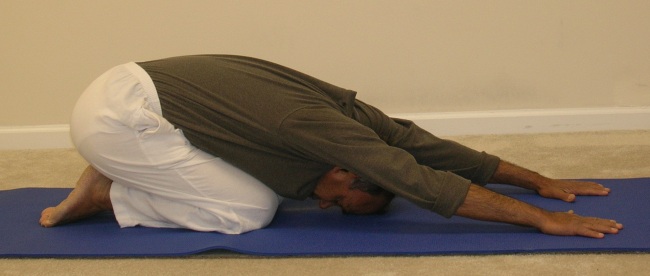
- Start in the child pose with the arms stretched out in front
- Inhale in place. With the next exhalation, curl the toes under, pressing down with the toes, lift the buttocks up coming up into the downward-facing dog position. In this position, make an effort to press the heels to the ground while keeping the tailbone lifted up.
- While inhaling go back to the extended child pose
- Repeat steps 2 and 3 for three more breaths
- Next time when you come up into the downward-facing dog, stay in the pose for five deep breaths. Every time you inhale, try to lift the tailbone up, and every time you exhale, try to press the heels down.
- Finally, lower the buttocks on the heels and rest in child pose
Half Camel Pose (Ushtrasana)
- From the child pose, come up into a kneeling position with the tops of the feet and shins on the ground, thighs vertical, and knees hip-width apart. If needed, fold a blanket under the knees for support.
- Place the hands on the waist with the thumbs joined together at the soft spot at the lower spine, just above the tailbone
- As you inhale, pressing against the back with the thumbs, tilt your head back as far as comfortable. Make sure that the thighs stay in the vertical position, only the spine is arched.
- As you exhale, come back up straight
- Repeat steps 3 and 4 for five more breaths, keeping the movement synchronized with the breath
- Finally rest in the child pose
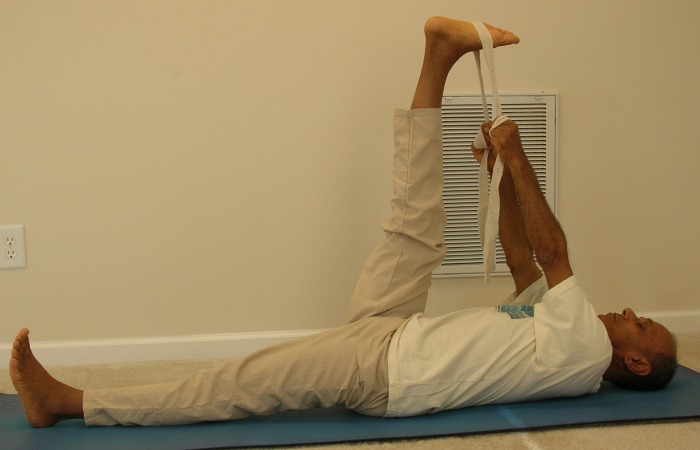
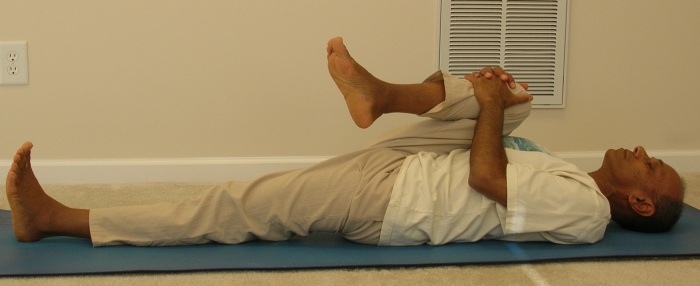
Leg Lift (Supta Padangushthasana)
- Lie down on your back in shavasana
- Bring the feet together and put a strap around the right foot. As you inhale, using the strap, lift the right leg up and try to bring it to a vertical position. Try to keep the left thigh pressed to the floor.
- As you exhale, slowly bring the leg down to the floor
- Repeat steps 2 and 3 for two more breaths keeping the movement synchronized with breathing
- Next time you raise the leg up, hold it up there for four deep breaths. Then, while exhaling, slowly release the leg down.
- Repeat the above sequence with the other leg
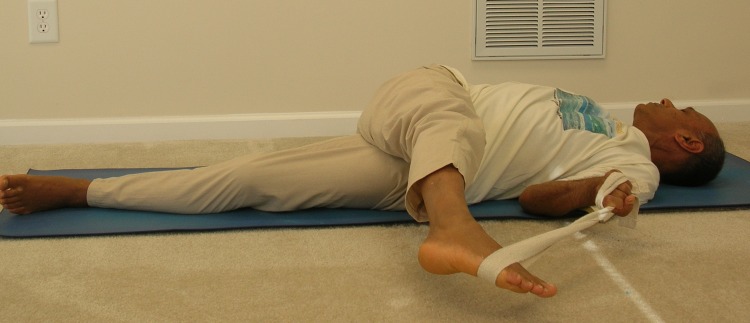
Lying Spinal Twist (Reclining Supta Padangushthasana)
- Lie down on your back. Using a strap, while inhaling raise the right leg up to a vertical position. Try to keep the leg straight, without bending the knee.
- Shift the strap to the left hand and stretch the right hand in line with the shoulders with the palm facing down. Look over the right shoulder.
- While exhaling, start lowering the right leg to your left side. Maintain a constant gentle pull on the leg with the strap while attempting to lower the right foot onto the floor. Try to keep the right shoulder firmly on the ground and try to keep the knee straight.
- Hold the final position for five deep breaths
- Very gently, while inhaling, raise the leg back up to a vertical position
- While exhaling, lower the leg down to the floor
- Repeat the above sequence with the other leg
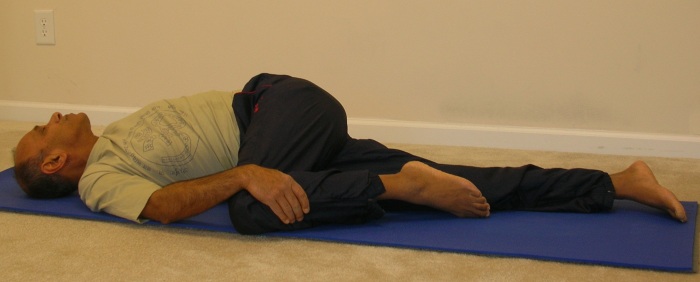
Lying Spinal Twist – Variation
- Lie down on your back. Fold the right knee and place the sole of the right foot on top of the left knee.
- Stretch the arms into a T-shape (in line with the shoulders)
- Use the left hand to hold the raised right knee and start gently pulling the right knee to the floor on the left side. Make sure that the right shoulder stays firmly on the ground and keep looking over the right side. You may roll the right hip over the left while trying the bring the foot closer to the floor on the left side.
- Stay in the final position for five deep breaths
- While inhaling, slowly begin to come up and when the knee is vertical, stretch the leg straight.
- Repeat the above sequence on the other side
Wind-relieving Pose (Pavana-muktasana Sequence)
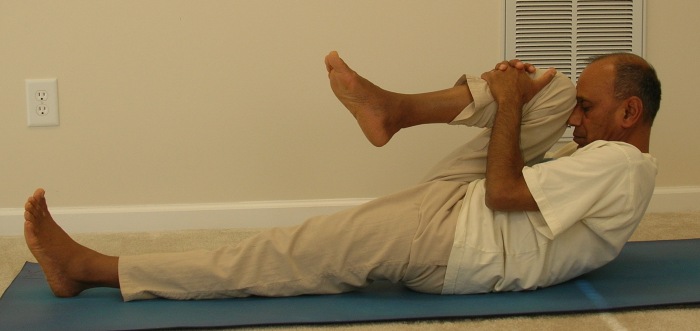
- Lie down on your back. Fold the right knee. Lifting the right foot up, hold the right shin with the two hands.
- While exhaling, gently begin to pull the knee while at the same time lifting the head up. In a conscious effort to round the spine, try to close the gap between the raised knee and the forehead
- Inhaling, lower the head down
- Repeat steps 2 and 3 for three more deep breaths
- Repeat the above sequence with the other leg
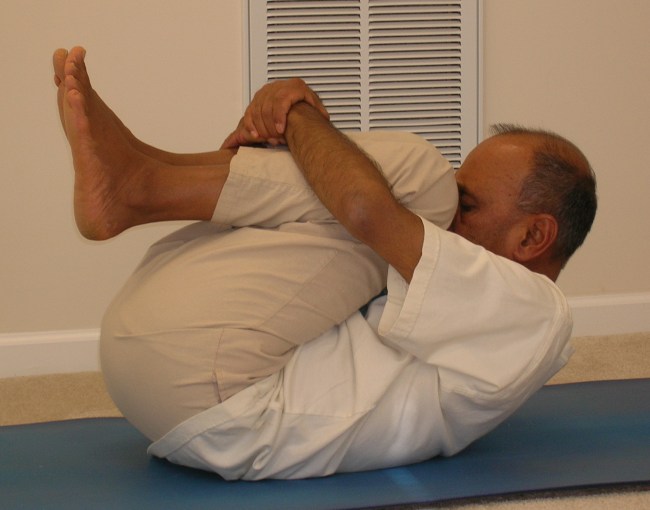
- Now fold both the knees. Lift the feet up and wrap the arms around the knees gently pulling the knees to the chest
- Exhaling, begin to lift the head up. Again, in a conscious effort to round the spine, try to close the gap between the knees and the forehead
- Inhaling, lower the head down
- Repeat steps 7 and 8 for three more deep breaths
- Finally rest in shavasana
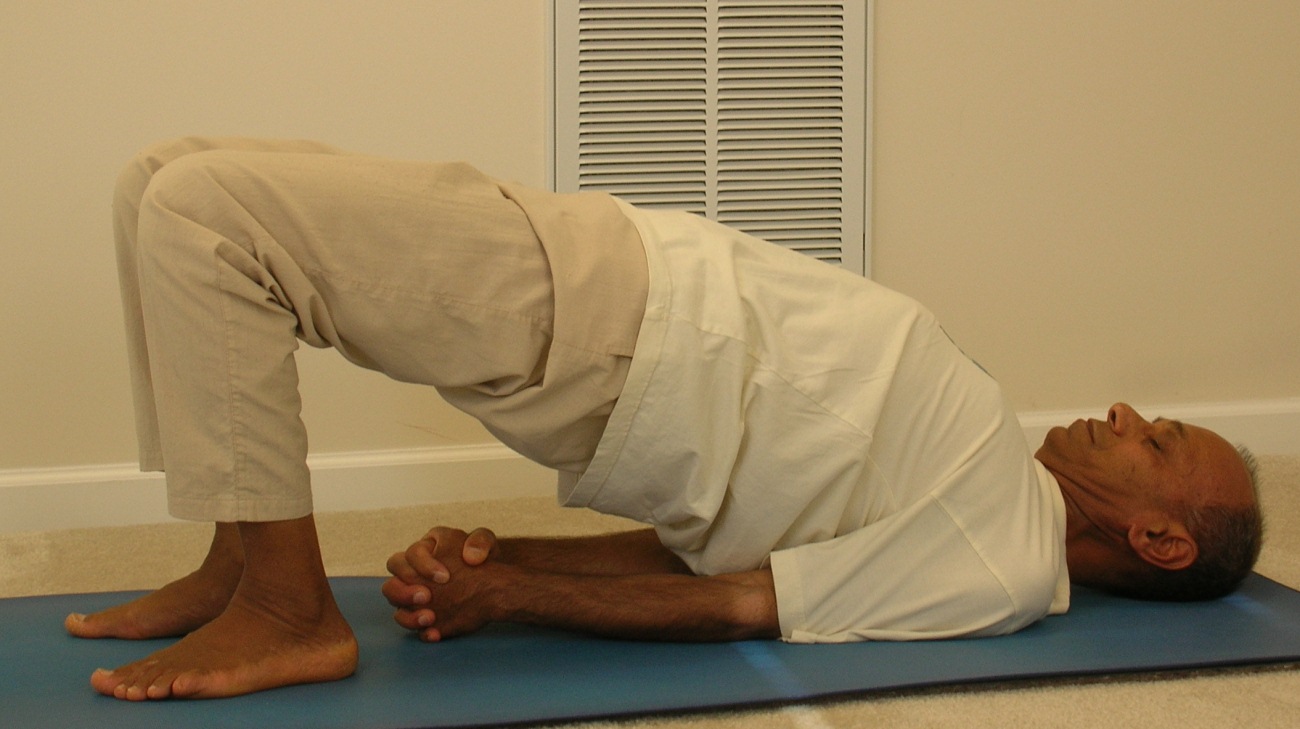
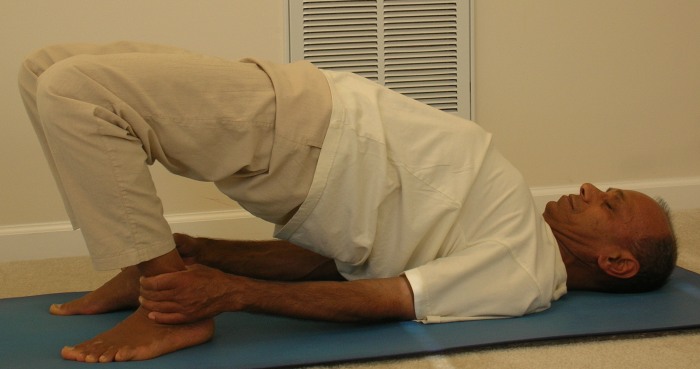
Half Bridge Pose (Setu-bandhasana )
- Lie on your back. Fold the knees and place the feet flat on the floor with the heels close to the buttocks. Keep the feet hip distance apart. Keep the arms alongside the body with the palms facing down.
- As you inhale, pressing with the heels, raise the buttocks as high as comfortable. Also, try to roll the shoulder blades back in an effort to lift the chest higher.
- As you exhale, gently lower the buttocks down to the floor
- Repeat steps 2 and 3 for three more deep breaths
- Next time you inhale, raise the buttocks up and hold the position for four deep breaths. In this position, you may try to clasp the hands together under the back, stretch the elbows straight and maintain the effort to lift the buttocks and chest higher
- When you are ready to come out of the pose, exhale and gently lower the buttocks down
- Relax for three breaths. Now spread the feet slightly wider, just enough so you can hold the ankles with the two hands
- As you inhale, press down with the heels and begin to raise the buttocks up. Also, try to roll the shoulder blades back in an effort to lift the chest higher.Hold the final position for about ten breaths or as much as is comfortable. Keep a gentle pressure with the heels on the floor.
- When you are ready to come out of the pose, lower the buttocks with an exhalation; relax in shavasana.

Hi there,
Thanks for article. Everytime like to read you.
Tania
Hi Tania,
Thanks for the feedback. I will continue to add information on more yoga-related topics in the future.
Subhash
[…] as the counter pose for halasana. The most commonly practiced are matsyasana (fish pose) or the ushtrasana (camel pose). These asanas release the compression of the neck and throat by stretching the neck in the opposite […]